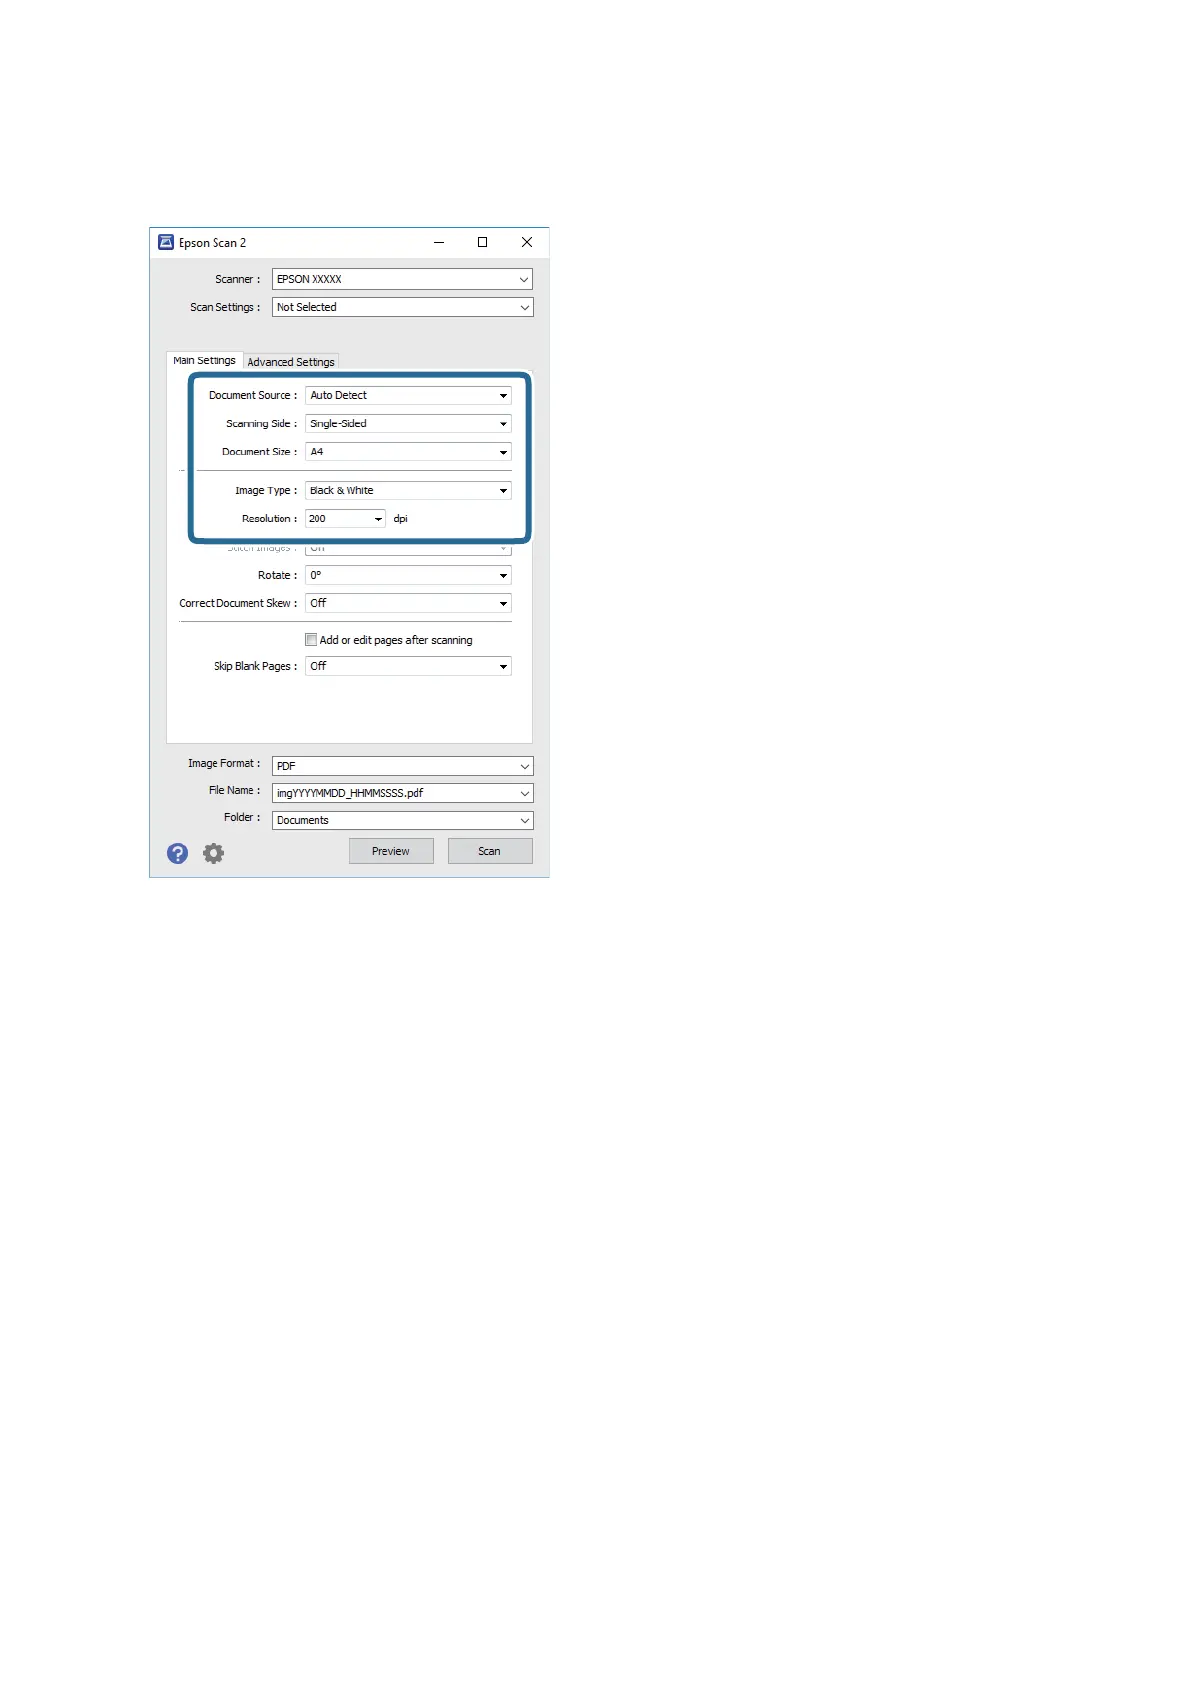
3. Make the following settings on the Main Settings tab.
❏ Document Source: Select the source where the original is placed.
❏ Scanning Side: Select the side of the original you want to scan when scanning from ADF.
❏ Document Size: Select the size of the original you placed.
❏ Image Type: Select the color for saving the scanned image.
❏ Resolution: Select the resolution.
4. Make other scan settings if necessary.
❏ You can preview the scanned image by clicking the Preview button. e preview window opens, and the
previewed image is displayed.
When you preview using the ADF, the original is ejected from the ADF. Place the ejected original again.
❏ On the Advanced Settings tab, you can make detailed image adjustment settings that are suitable for text
documents, such as the following.
❏ Unsharp Mask: You can enhance and sharpen the outlines of the image.
❏ Descreening: You can remove moiré patterns (web-like shadows) that appear when scanning printed
papers such as a magazine.
❏ Remove Background: Remove the background of the originals.
❏ Text Enhancement: You can make blurred letters in the original clear and sharp.
❏ Auto Area Segmentation: You can make letters clear and images smooth when performing black and
white scanning for a document that contains images.
User's Guide
Scanning
127
 Loading...