7. CENTERING FOR A HIGH-BASE FRAME
At the end of a tracing, if a frame is considered to be high-base, the indicator is displayed in the
information bar.
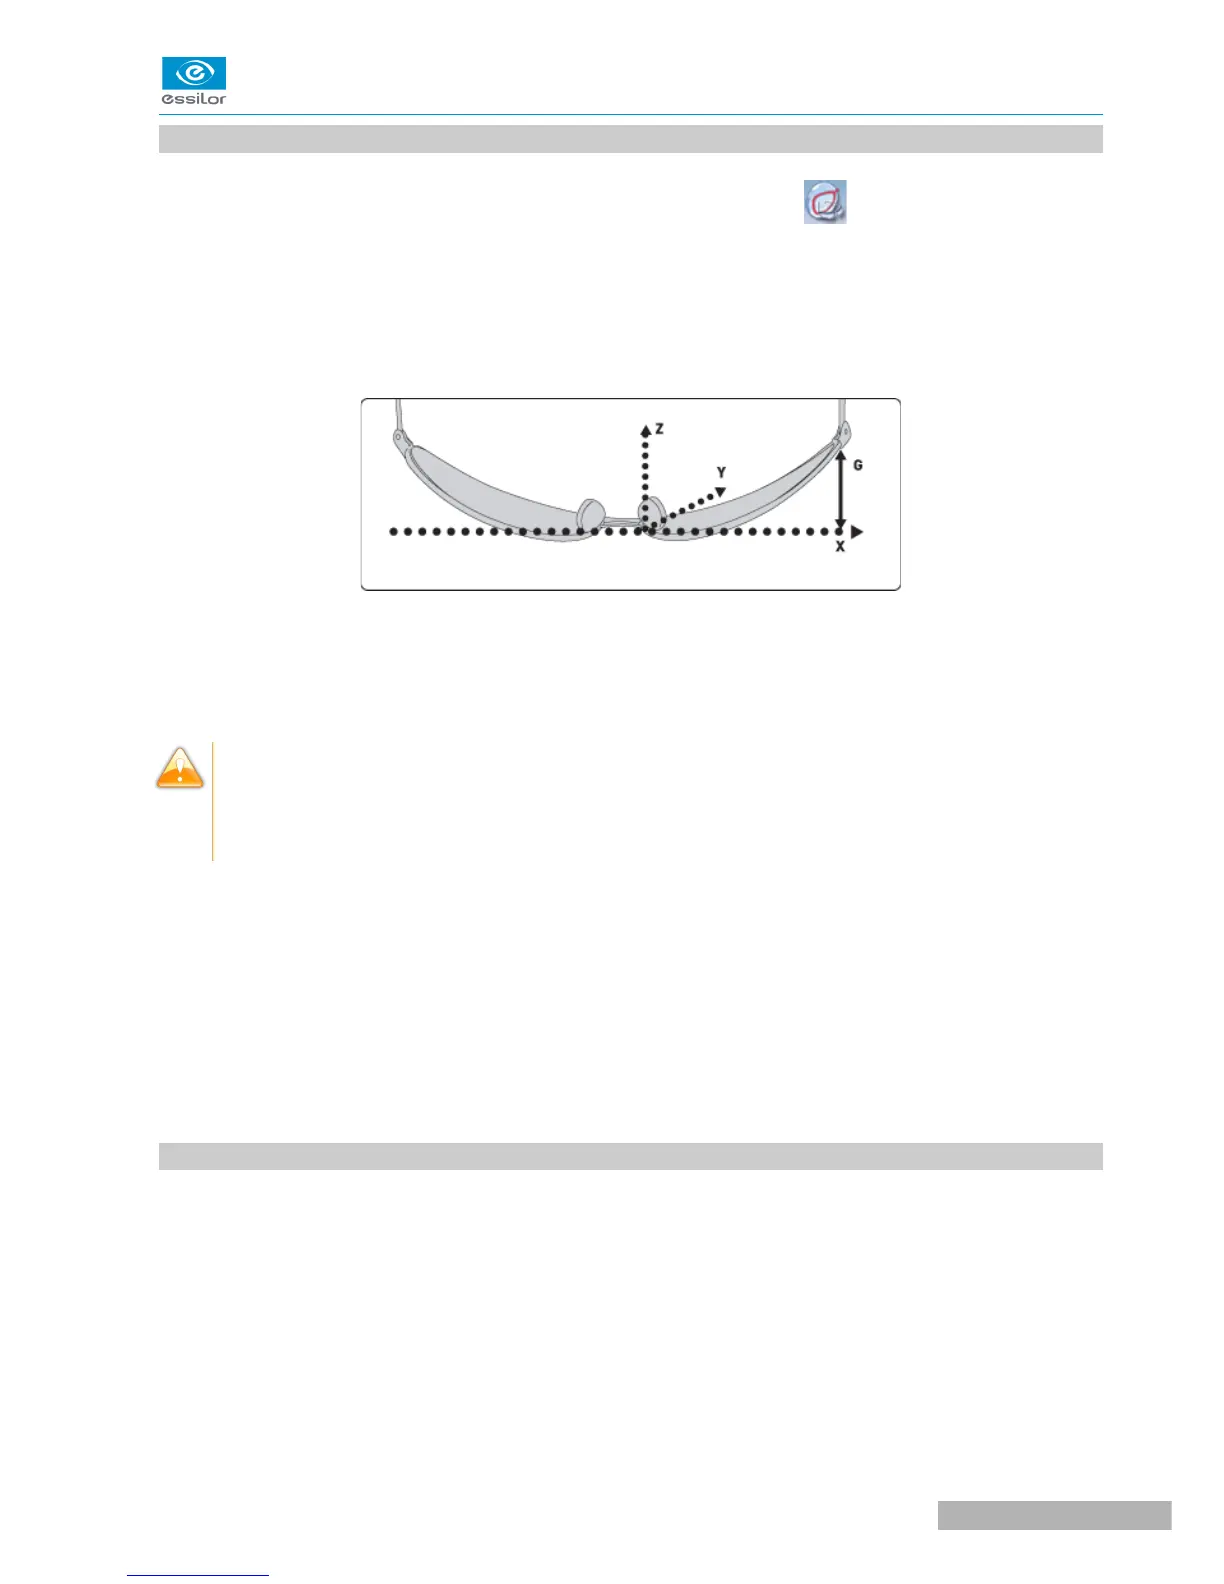
3D compensation
The PD and pupillary height measurements as well as the lens centering are done in two dimensions. Yet,
the frame is treated in three dimensions:
3D compensation takes into account all frame characteristics (x, y, z, curve, pantoscopic tilt, etc.) to ensure
that the center of the wearer's pupil is at the optical center of the lens. For an optimal job, the on-screen
positioning of the centering indicators always takes account of 3D compensation.
Match between frame base and lens base
To do a job involving a high-base frame, use lenses whose base matches that of the frame (maximum
difference of 0.7 D).
For greater ease, you can use the recut lens tripod (option) to center a high-base lens.
Refer to the centering procedure for the particular type of lens:
• Centering a single vision lens (F p.44)
• Centering a progressive lens (F p.47)
• Centering a bifocal lens (F p.52)
• Centering an executive lens (F p.54)
• Centering a mid-distance lens (F p.56)
8. BLOCKING A LENS
This section describes the procedures for lens blocking depending on the selected option:
• Blocking preparation (F p.62)
• Blocking with the automatic arm (F p.63)

 Loading...
