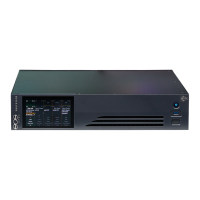
40 Sensor+ CEM+ User/Config Manual
Build New Configuration (from NoConfig State)
This overall procedure is made up of several smaller procedures.
When a CEM+ is in the state of “NoConfig”, the face panel menu is different than during normal
operation. It changes to options that are centered around getting the CEM+ configured. That menu
can be found at
CEM+ LCD Menu
on
page 77
. From the NoConfig menu at the face panel you can
Generate Defaults for that rack with a any user level including Guest.
Configure/Confirm Network Settings of CEM+
The IP address settings of each CEM+ module must point to each other in order for the configuration
information to transfer between racks/CEM+s.
The first part of this process is to confirm/set the individual network settings of each CEM+. The easiest
way to do this is at the CEM+ face panel.
• [Web] Configuration>Network
• [FP] Setup Network
From the Set Group / Rack menu, specify:
• Group - A selection of racks that share a common config and preset, panic and level information
between themselves. Groups can be numbered from 1 - 64.
• Rack - The number of a rack within the Group. Racks can be numbered from 1-16. All Groups
must start with Rack 1.
• Network Enable - Makes the specified unit active in the network table.
• IP address - The network IP address for the CEM+ you are using (the local CEM+).
• Subnet Mask - The network subnet mask for the CEM+ you are using (the local CEM+).
• Gateway IP - The network gateway IP address for the CEM+ you are using (the local CEM+).
This must be done for each CEM+ module. It works best if the IP addresses adhere to the default IP
address scheme:
• 10.101.1GG.1RR where GG is the two-digit Group number and RR is the two-digit rack number.
Once the racks have all been assigned their group and rack numbers, login to Rack #1 and confirm that
the IP addresses that Rack #1 has for each of the other racks matches what was set for each of the
previous racks.
To change the entire network table at once from the web interface, set the Group and Rack numbers
and click Restore Defaults. This will repopulate the network table with the default addresses. Then click
Save Changes.
Note:
To edit the IP addresses directly from the web interface, you need to contact ETC
Technical Services.
 Loading...