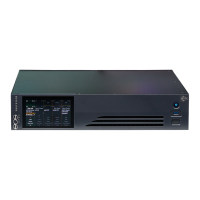
18 Sensor+ CEM+ User/Config Manual
Add Rack [Power]
The Add Rack menu is the place to add additional racks to your existing configuration. You do this by
specifying: the rack voltage, the rack type, first dimmer in the rack, the patch mode, the ambient alarm
temperature, the default module type, the phase balancing, and whether or not to enable Advanced
Features for the rack.
Group [User][Power]
The Group menu includes the full menu trees for Presets and Panic functions (as they are both group-
wide operations) as well as for recording loads, naming the group, setting the language, default login
settings and the preferred scale for temperature reporting.
Presets
The Presets menus are used to activate and deactivate Presets at the rack. If you are logged in at the
Power User level, you can also record and modify Presets from the CEM+.
There are four available Rooms and 128 available Presets in a single Group. A Room is a way of
grouping dimmers - such as “Lobby” or “Auditorium”. An individual Preset can only control dimmers
assigned to the same Room. For example, a Preset with dimmers assigned to the Room named
“Lobby” cannot also control dimmers in the Room “Auditorium”.
Presets can also be assigned a playback Priority. Priority is a function of the CEM+ that defines how
various sources of control interact with dimmers. The default priority for controllers on the network is
100. When controllers share the same priority level, a single dimmer assigned to those controllers will
output the highest level it receives. If the controllers are at different priorities, the highest-priority
controller (highest priority number - a priority of 200 wins versus a priority 100) will win and the
dimmer will output the level sent by that controller. For a clearer illustration of priorities and how the
CEM+ uses them, refer to
CEM+ Playback Priorities
on
page 6
.
Activate Preset
The Activate Preset menu allows you to activate a selected preset.
Deactivate Presets
The Deactivate Preset menu allows you to deactivate a selected preset.
Delete Presets
The Delete Presets menu allows you to delete a selected preset.
Record Presets
The Record Presets menu allows you to assign a preset number, and set the source for levels, the fade
time and playback priority and the room. If the preset number is already recorded, you can record over
it with the new settings, or if the preset is empty, you can record these settings to that selected
number.
Edit Fade Times [Power]
The Edit Fade Times menu allows you to update the fade time for a recorded preset.
Fade In Time -Any new levels of the preset will fade in according to this time. Given in minutes and
seconds.
Fade Out Time - Any previously existing levels will fade out according to this time. Given in minutes and
seconds.
Edit Priority [Power]
The Edit Priority menu allows you to update the priority for a recorded preset.
 Loading...