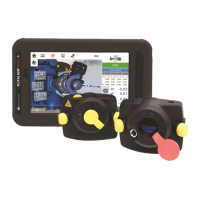
7. Once measuring has stabilized, the letter 'M' appears below 1 as shown in the above
screen.
Note
For this measurement procedure automatic measurement after stabilization must be dis-
abled in default settings.
8. Tap 'M' to take the measurement point.
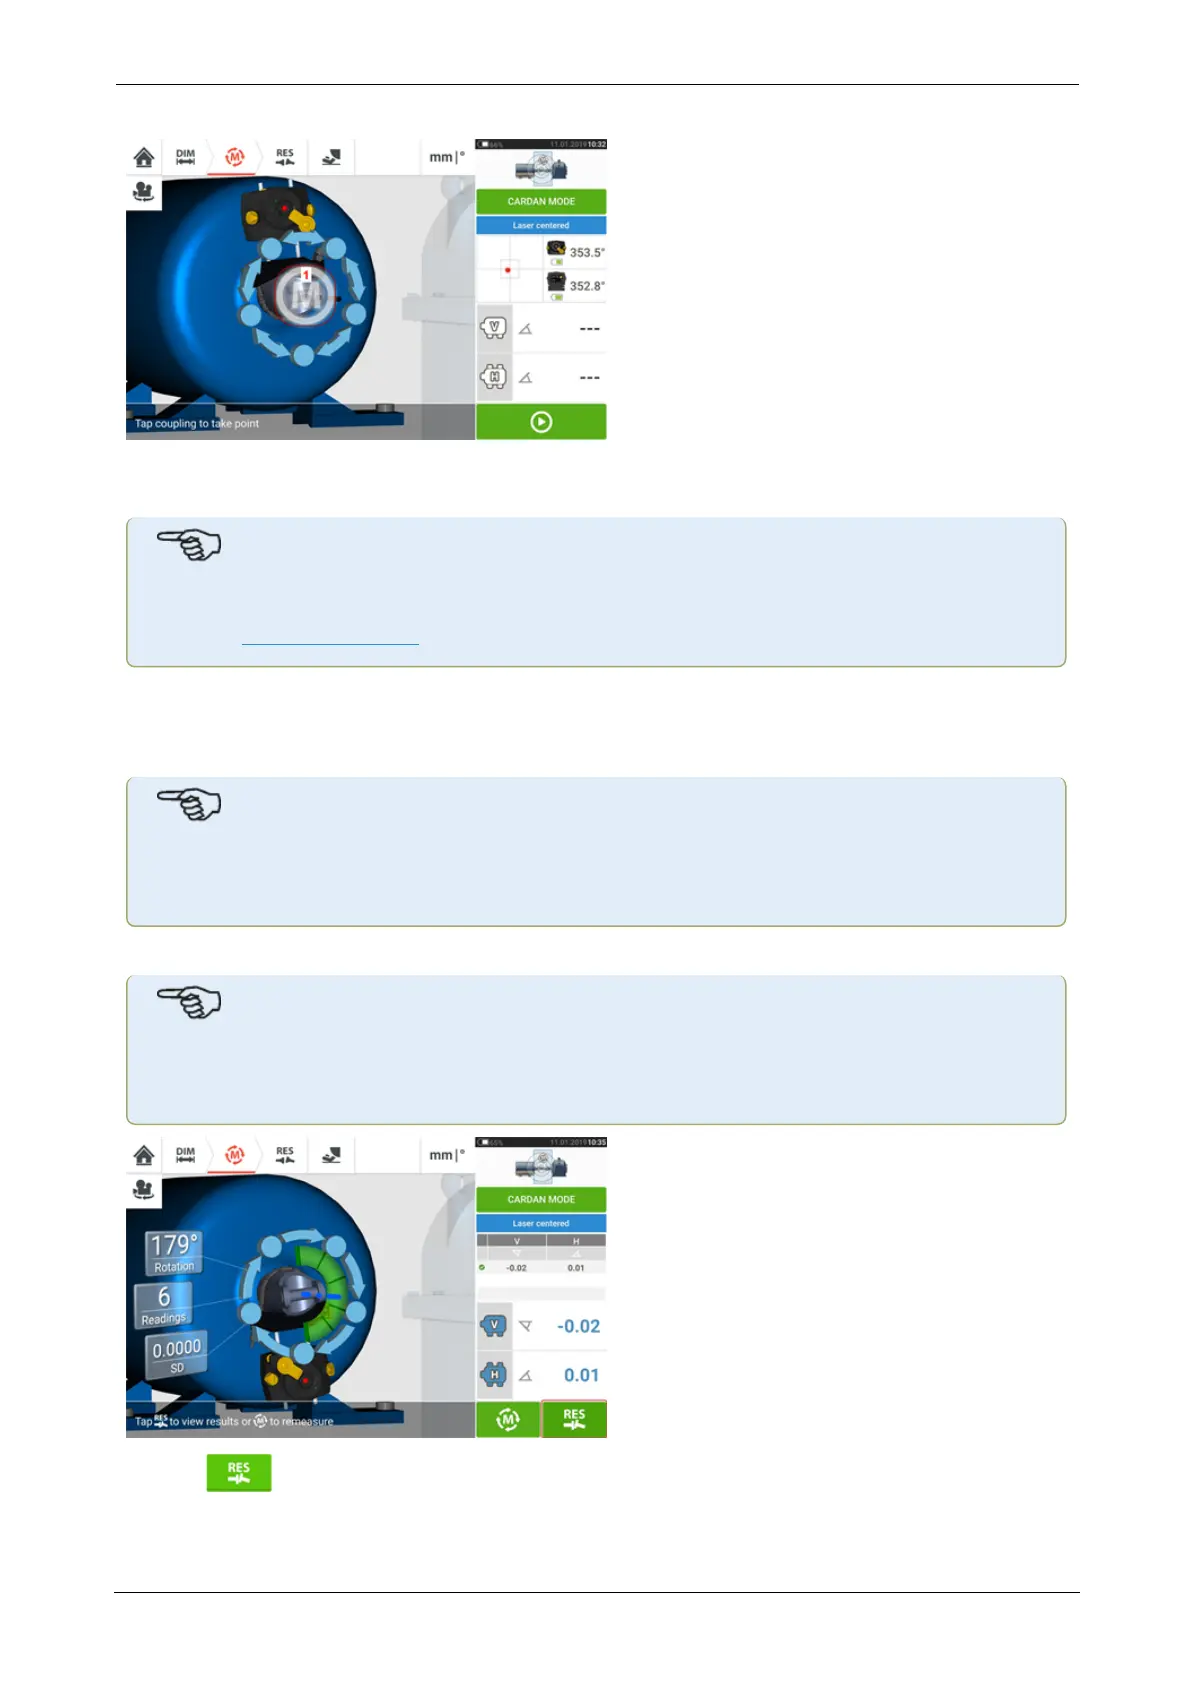
9. Cover the sensor aperture, then rotate the cardan shaft approximately 10° - 20° to the next
measurement point.
Note
Determine this position depending on the accessible angle of rotation, and the minimum
requirement of five measurement points through a rotational angle greater than 60°.
10. Repeat steps 2 to 8 for all necessary measurement points.
Note
Taking measurements at points evenly distributed along the rotational arc has a positive
influence in the quality of the measurement attained.
11. Tap to view cardan alignment results.
ROTALIGNtouch EX 135
On-board help