5 Scan/E-mail
102
4. Enter the correct password as
necessary.
5. Click [Open Mailbox].
A list of documents saved in the
selected mailbox will be
displayed.
6. Select the document to be imported, then click [Import].
NOTE: You can also select multiple documents.
For other functions available on Mailbox Viewer2, refer to the Mailbox Viewer2 On-line
Help.
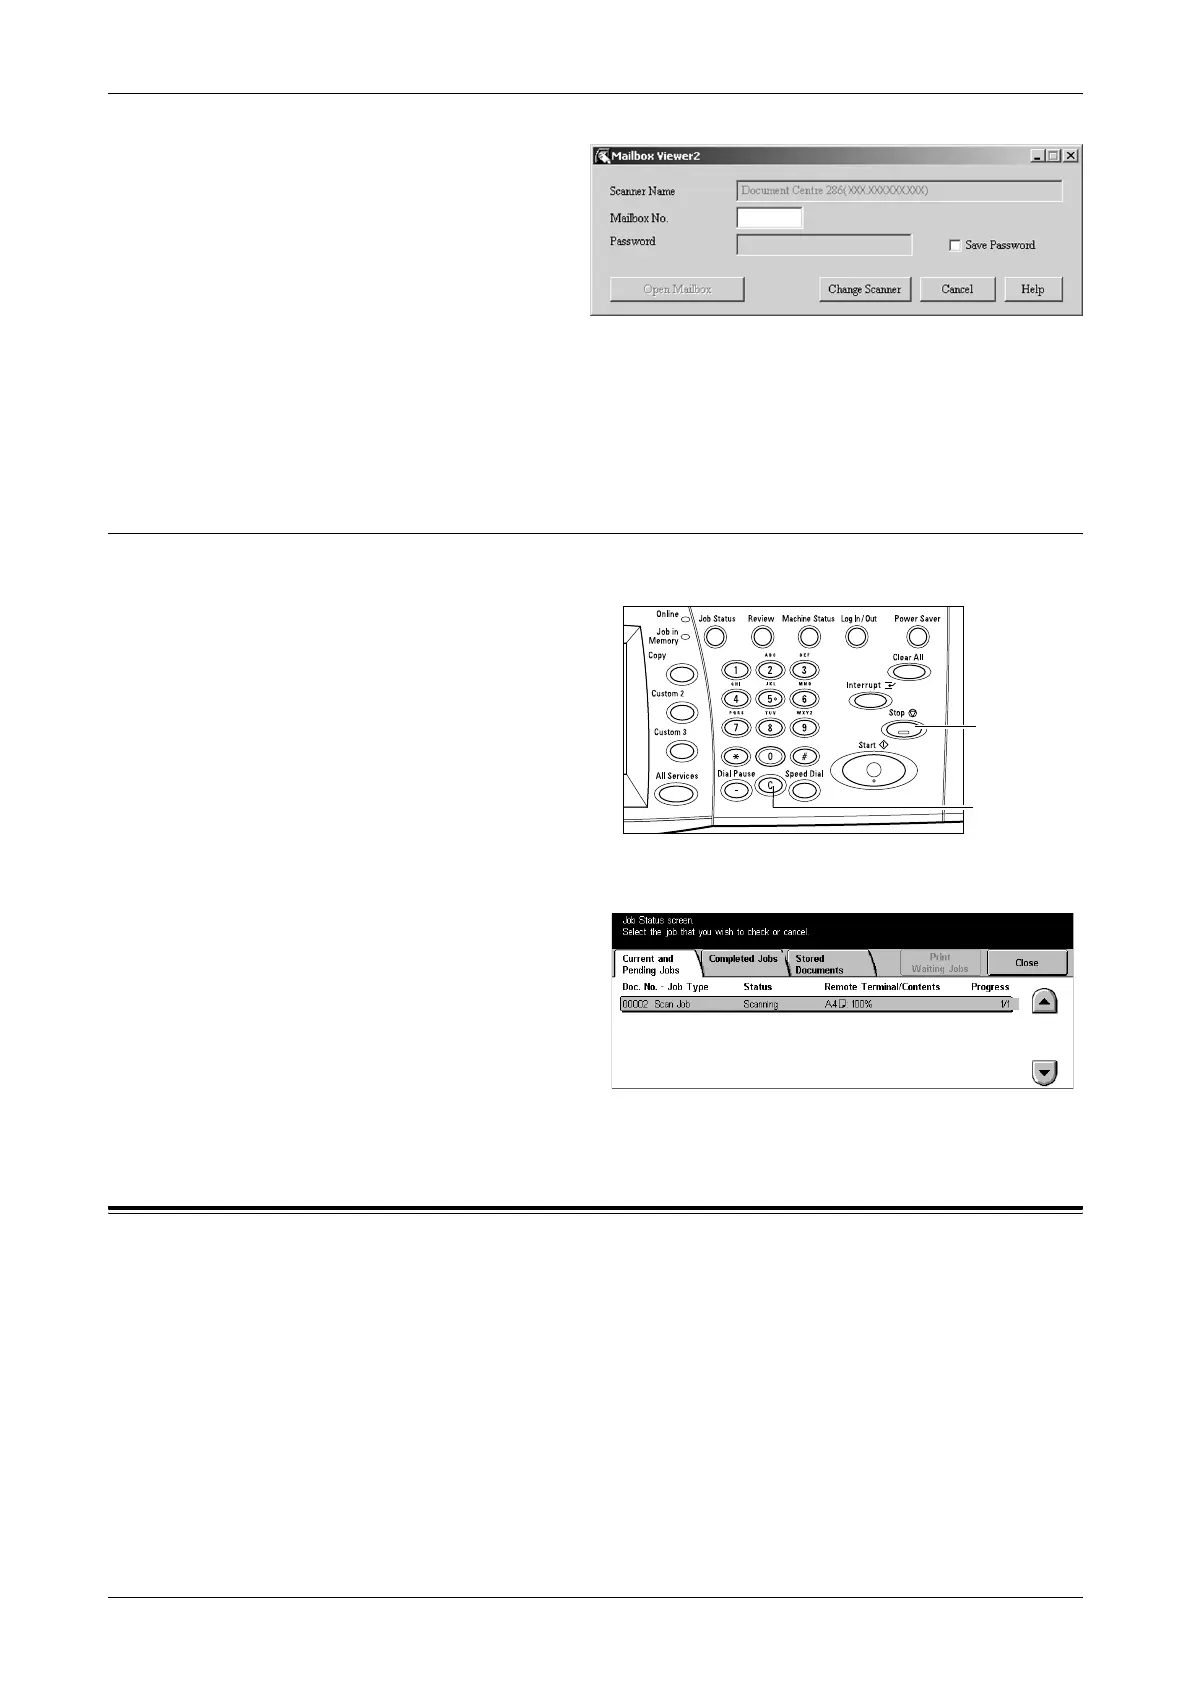
Stop the Scan Job
Follow the steps below to manually cancel an activated scan job.
1. Select [Stop] on the touch screen
or press the <Stop> button on the
control panel to suspend the
current scan job.
NOTE: Select the <Start> button on
the control panel to resume the
suspended job.
NOTE: Pressing the <Stop> button
on the control panel suspends print
jobs.
2. If required, press the <Job
Status> button to display the
[Job Management] screen. To
exit the [Job Management]
screen, press the <All Services>
button.
3. Press the <C> button on the
control panel to delete the suspended job.
E-mail
This section describes how to scan documents to send them as e-mail attachments.
You can specify destination addresses by using the screen keyboard to enter the
addresses, or by selecting from the address book. For more information on how to
make entries using this screen, refer to the following.
Address Book – page 103
Keyboard – page 105
Select Sender as recipient – page 105
Sender’s Details – page 106
Delete Recipient – Clears the currently selected address entry field.
Change Settings – page 107
<Stop>
button
<C> button
 Loading...