Save in: - Scan to Mailbox
107
Change Settings
Use this feature to change the entered destination address.
1. Select [Change Settings] on the
[E-mail] screen.
2. Perform the necessary
operations.
3. Select [Save].
For more information on keyboard entry, refer to Keyboard in the Fax/Internet Fax
chapter on page 77.
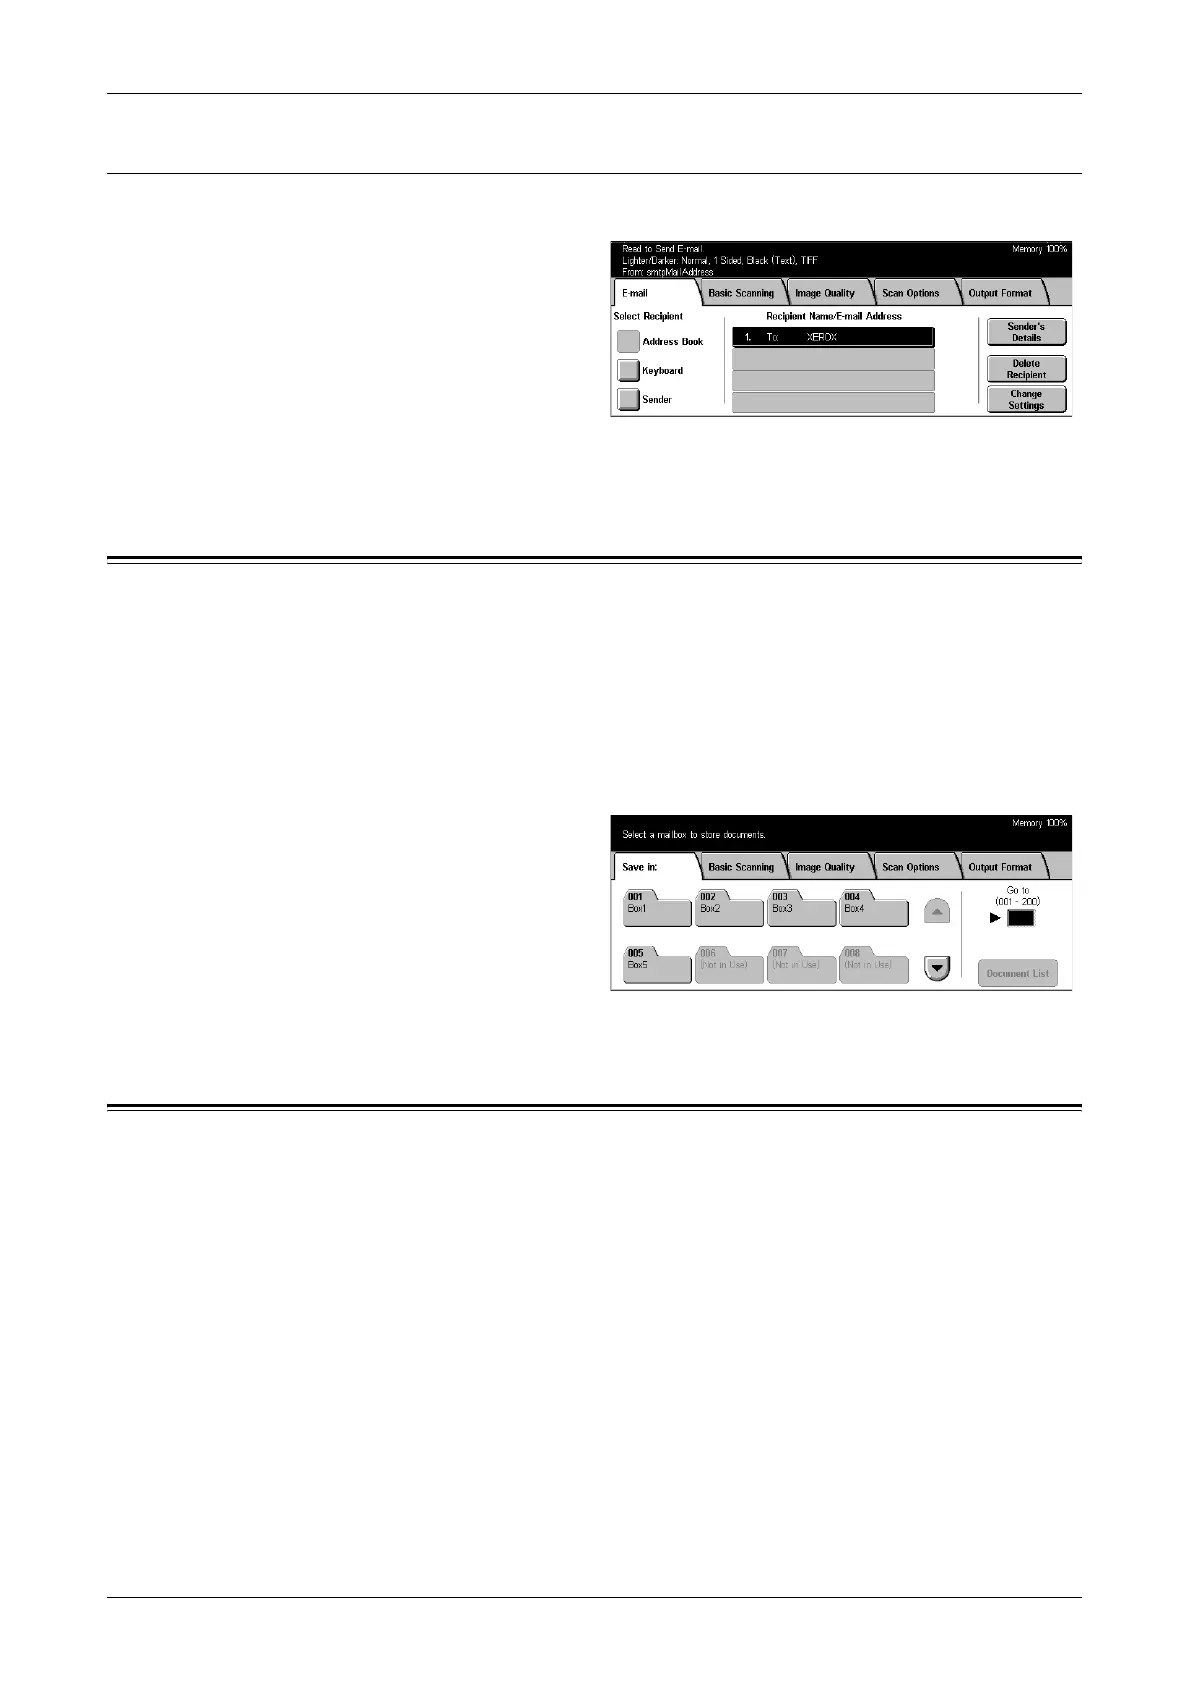
Save in: - Scan to Mailbox
This section describes how to select a mailbox on the machine to save scanned
documents. For more information on this screen, refer to the following.
Mailbox list – Select a mailbox for saving scanned data.
Go to – Specify the start number of a mailbox from which mailboxes are to be displayed,
using the numeric keypad on the control panel.
Document List – Allows you to print or delete documents in the selected mailbox.
1. Press the <All Services> button
on the control panel.
2. Select [Scan to Mailbox] on the
touch screen.
3. Select a mailbox for saving
scanned data.
For more information on mailboxes, refer to the Check Mailbox chapter.
Job Templates - Network Scanning
This section describes how to scan and send documents to a specified server using a
job template. A job template can be created on the machine or remotely using the
CentreWare Scan Services. According to the settings in the template, documents are
automatically scanned, saved in the TIFF/JPEG, or PDF format, and then sent to a
specified server. For information on how to program a job template, refer to Services in
the CentreWare Internet Services chapter on page 141. For information on how to
select a scan job template, refer to the following.
The name of a template created on the machine begins with “@”. The template created
with the CentreWare Scan Services carries the name you specified.
For information on the CentreWare Scan Services, refer to the CentreWare Scan
Services Manual.
Job template list – Select a job template to be used.
 Loading...