13 Job Status
250
1. Press the <Job Status> button
on the control panel.
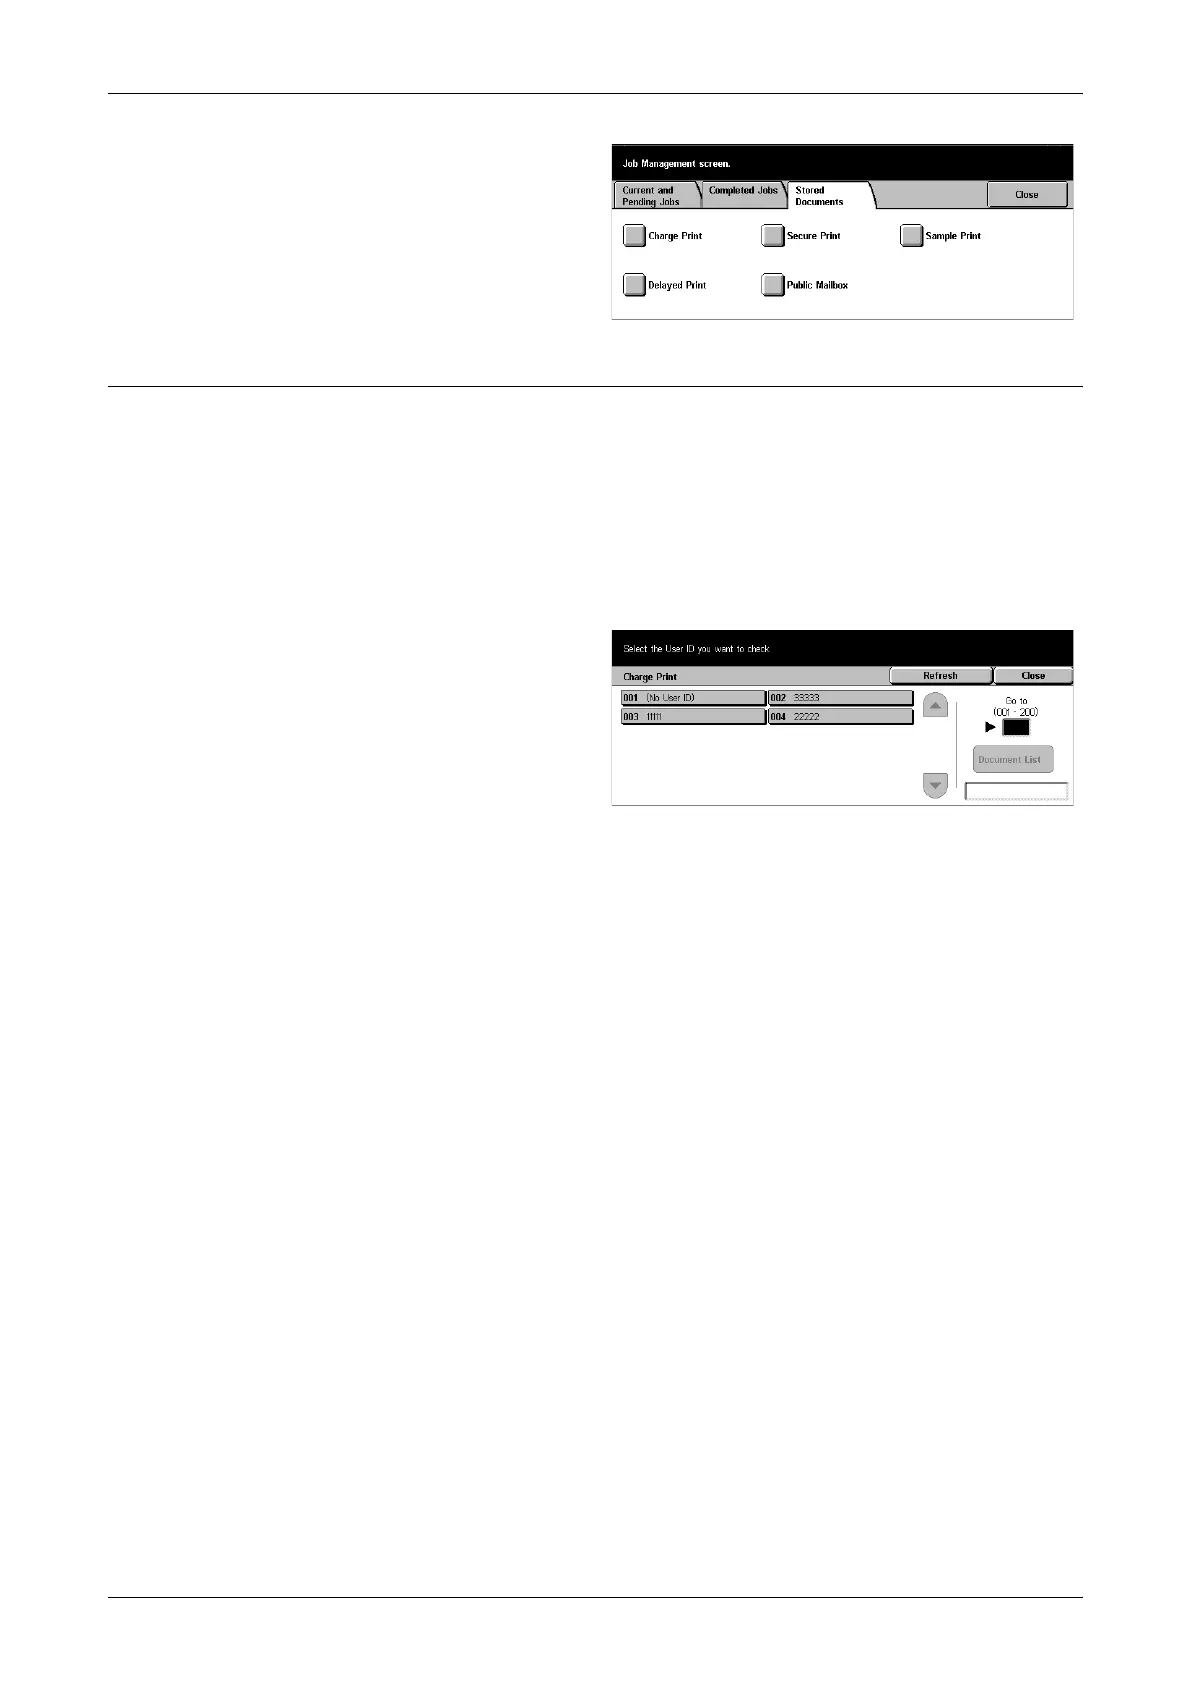
2. Select the [Stored Documents]
tab.
3. Select the required option.
Charge Print
The print jobs that failed authentication (i.e., a wrong user ID and/or password was
entered in the print driver) when the Authentication feature is enabled are stored or
cancelled as specified in [Charge Print Settings].
If the machine receives a document without a user ID or no user ID is specified in the
print driver, the saved document will be listed as [(No User ID)].
The settings for Charge Print are set up by the System Administrator. For more
information, refer to Charge Print Settings in the Setups chapter on page 243.
1. Select [Charge Print] on the
[Stored Documents] screen.
Refresh
Brings the information up to date.
Go to
Use this field to specify the Charge Print number to be displayed at the top of the
screen. You can set the number within the range of 1 to 200 using the scroll buttons.
Document List
Displays the log-in screen after selecting a user ID from the list. Enter the required user
ID to display the stored documents.
• Delete – Deletes a document.
• Print – Prints a document selected in the list. You can select whether or not to delete
the stored documents after printing.
 Loading...