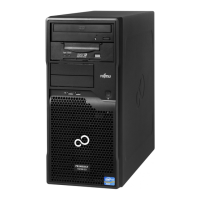
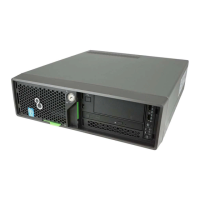
Upgrade and Maintenance Manual TX100 S3
Contents
12.2.5.2 Preparing the slide-in unit . . . . . . . . . . . . . . . . . . 246
12.2.5.3 Installing the slide-in unit . . . . . . . . . . . . . . . . . . 249
12.2.6 Installing a backup drive . . . . . . . . . . . . . . . . . . . . 252
12.2.6.1 Preparing the backup drive . . . . . . . . . . . . . . . . . 252
12.2.6.2 Installing the backup drive . . . . . . . . . . . . . . . . . . 254
12.2.7 Concluding steps . . . . . . . . . . . . . . . . . . . . . . . . 256
12.3 Removing accessible drives . . . . . . . . . . . . . . . . . 257
12.3.1 Required tools . . . . . . . . . . . . . . . . . . . . . . . . . 257
12.3.2 Preliminary steps . . . . . . . . . . . . . . . . . . . . . . . . 257
12.3.3 Removing an optical disk drive (ODD) . . . . . . . . . . . . . 258
12.3.4 Removing a slimline optical disk drive (ODD) . . . . . . . . . 260
12.3.5 Removing a backup drive . . . . . . . . . . . . . . . . . . . . 262
12.3.6 Installing accessible drive dummy cover . . . . . . . . . . . . 264
12.3.6.1 Installing the dummy cover in bay 2 . . . . . . . . . . . . . 264
12.3.6.2 Installing the cover in bay 2 . . . . . . . . . . . . . . . . . 265
12.3.7 Concluding steps . . . . . . . . . . . . . . . . . . . . . . . . 265
12.4 Replacing accessible drives . . . . . . . . . . . . . . . . . 266
12.4.1 Required tools . . . . . . . . . . . . . . . . . . . . . . . . . 266
12.4.2 Preliminary steps . . . . . . . . . . . . . . . . . . . . . . . . 266
12.4.3 Replacing an optical disk drive (ODD) . . . . . . . . . . . . . 267
12.4.4 Replacing a slimline optical disk drive (ODD) . . . . . . . . . . 268
12.4.5 Replacing a backup drive . . . . . . . . . . . . . . . . . . . . 270
12.4.6 Concluding steps . . . . . . . . . . . . . . . . . . . . . . . . 271
13 Front panel and external connectors . . . . . . . . . . . . . 273
13.1 Replacing the front panel module . . . . . . . . . . . . . . 273
13.1.1 Required tools . . . . . . . . . . . . . . . . . . . . . . . . . 273
13.1.2 Preliminary steps . . . . . . . . . . . . . . . . . . . . . . . . 274
13.1.3 Removing the On/Off button . . . . . . . . . . . . . . . . . . 275
13.1.4 Removing the HDD activity LED . . . . . . . . . . . . . . . . 275
13.1.5 Removing the front panel cable . . . . . . . . . . . . . . . . . 276
13.1.6 Installing the front panel cable . . . . . . . . . . . . . . . . . 277
13.1.7 Installing the On/Off button and the HDD activity LED . . . . . 278
13.1.8 Concluding steps . . . . . . . . . . . . . . . . . . . . . . . . 279
13.2 Replacing the front USB module . . . . . . . . . . . . . . . 280
13.2.1 Required tools . . . . . . . . . . . . . . . . . . . . . . . . . 280
13.2.2 Preliminary steps . . . . . . . . . . . . . . . . . . . . . . . . 280
13.2.3 Disconnecting the front USB cable . . . . . . . . . . . . . . . 281
13.2.4 Removing the defective front USB module . . . . . . . . . . . 282
 Loading...


