Chapter 7: Repair Procedures
Humidifier Assembly Repairs
7-54 Service Manual
12. Remove the 3 screws in the heater cartridge sheath.
13. To remove the heater cartridge, unscrew it from its threaded hole.
14. The thermostats can be replaced by removing the nuts securing them to the ramp block.
Note: If either thermostat or the heater cartridge is being replaced, check all components (especially the
plastic ones) for signs of heat damage or corrosion. We recommend replacing the sheath when
replacing the heater cartridge.
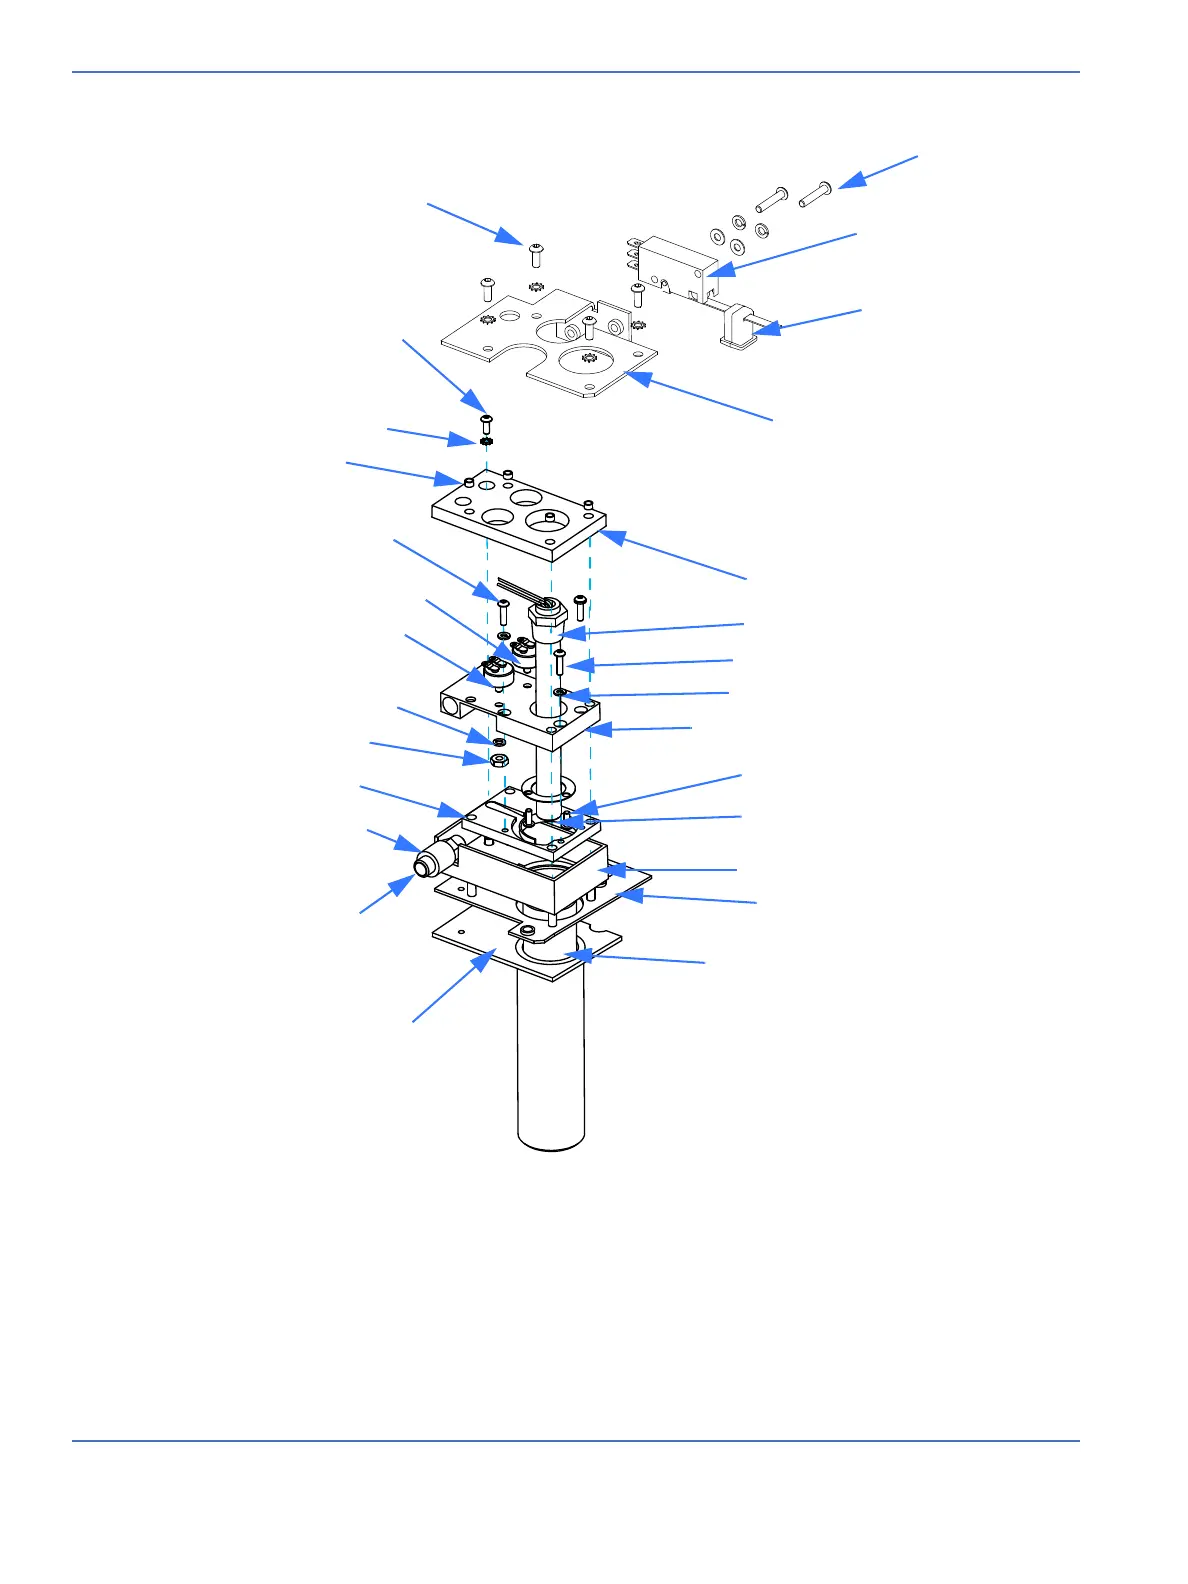
FIGURE 7-51. Humidifier Parts
M3 x 12 Phillips head screw
(Attaches ground wire with
two star washers)
M3 x 16 Phillips
head screw
Reservoir switch
Reservoir switch
button
M3 x 10 socket head
cap screw
Star washer
Add water thermostat
M3 x 10 Phillips head
coated screw
Safety thermostat
Split ring washer
6-32 Hex nut
Ramp block
Silicone tube
Steam outlet
Reservoir seal
Top bracket
Top gasket
Heater cartridge
M3 x 10 Phillips head coated screw
Split ring washer
Heater mount
M3 x 8 Phillips head coated screw
Heater cartridge sheath
Bottom gasket
Bottom bracket
Protective insert
Insulating cylinder
Spacer
 Loading...


