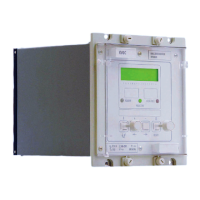
VCG202/EN M/H11
Technical
9.9.4 Method of repair
Please read the handling instructions in Section 1 before proceeding with this work. This
will ensure that no further damage is caused by incorrect handling of the electronic
components.
9.9.4.1 Replacing a pcb
a) Replacement of user interface
Withdraw the module from its case.
Remove the four screws that are placed one at each corner of the front plate.
Remove the front plate.
Lever the top edge of the user interface board forwards to unclip it from its
mounting.
Then pull the pcb upwards to unplug it from the connector at its lower edge.
Replace with a new interface board and assemble in the reverse order.
b) Replacement of main processor board
This is the pcb at the extreme left of the module, when viewed from the front.
To replace this board:
First remove the screws holding the side screen in place. There are two screws
through the top plate of the module and two more through the base plate.
Remove screen to expose the pcb.
Remove the two retaining screws, one at the top edge and the other directly below
it on the lower edge of the pcb.
Separate the pcb from the sockets at the front edge of the board. Note that they
are a tight fit and will require levering apart, taking care to ease the connectors apart
gradually so as not to crack the front pcb card. The connectors are designed for
ease of assembly in manufacture and not for continual disassembly of the unit.
Reassemble in the reverse of this sequence, making sure that the screen plate is
replaced with all four screws securing it.
c) Replacement of auxiliary expansion board
This is the second board in from the left hand side of the module.
Remove the processor board as described above in b).
Remove the two securing screws that hold the auxiliary expansion board in place.
Unplug the pcb from the front bus as described for the processor board and
withdraw.
Replace in the reverse of this sequence, making sure that the screen plate is
replaced with all four screws securing it.
9.9.4.2 Replacing output relays and opto-isolators
PCBs are removed as described in Section 9.9.4.1 b and c. They are replaced in the
reverse order. Calibration is not usually required when a pcb is replaced unless either of
the two boards that plug directly on to the left hand terminal block are replaced, as these
directly affect the calibration.
Note that this pcb is a through hole plated board and care must be taken not to damage it
when removing a relay for replacement, otherwise solder may not flow through the hole
and make a good connection to the tracks on the component side of the pcb.

 Loading...