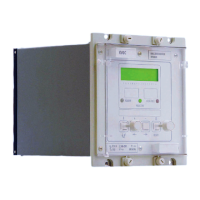
Manual
KVCG202/EN M/H
The following options are available via links SD0 to SD7:
SD0 Not used
SD1 Rem Cntrl 1 = enable remote control
SD2 Rem LSB 1 = enable load shedding/boost
SD3 Rem Grp2 1 = enable remote change to group2 settings
SD4 En Grp2 1 = enable group 2 settings
0 = hide group 2 settings
SD5 1 = Grp2 1 = select group 2 settings
SD6 Irev = Grp2 1 = reverse current selects group 2
SD7 Log Evts 1 = enable storing of logic changes in event recorder
SD8 Not used
SD9 Extrn V 1 = TPI uses external voltage VT
When the selection has been completed continue to press the [F] key until the
confirmation display appears and confirm the selection.
Now step down the menu to cell [0004 Description] and enter a suitable name for the
configuration; a maximum of sixteen characters are available.
Step down one cell [0005 Plant Ref.], where a suitable reference can be entered for the
plant that the relay is to protect. If the configuration is for a relay that is to be applied to
one particular circuit, then the reference by which the circuit is known can be entered at
this time; a maximum of sixteen characters are available.
Now move down the SYSTEM DATA column to cell [0009 Freq] and set the frequency to
50Hz or 60Hz as appropriate. This is an important setting because it will be the default
frequency used by the analogue/digital converter when appropriate signals are not
available for frequency tracking.
If the address of the relay on the serial communication bus is known then it can be
entered at this time. This cell is password protected on the series 2 relays.
This concludes the settings that can be entered in this menu column at this time.
4.2.2 Logic links (LOG)
The Logic Links under the LOGIC menu column heading customise the auxiliary
functions of the relay. To modify these settings put the relay into setting mode by
pressing the [+] key. Step through the function links with the [F] key and set the links for
the options required.
LOG0 Not used
LOG1 TpFail 1 = Block if outside dead time for max time
LOG2
I
C
> Blk
1 = Block for excessive circulating current
LOG3
I
L
> Blk
1 = Block for excessive load current
LOG4 total opsBlk 1 = Block for excessive number of operations
LOG5 Freq opsBlk 1 = Block for frequent operations
LOG6
I
rev
Blk
1 = Block for reverse current
LOG7 Runaway Blk 1 = Block for tap change runaway
LOG8
I
rev – Grp 2
1 = Reverse current to select group 2
LOG9 Il<blk 1 = Block for insufficient current
When the selection has been completed continue to press the [F] key until the
confirmation display appears and confirm the selection.

 Loading...