22 Sabre Owner’s Guide
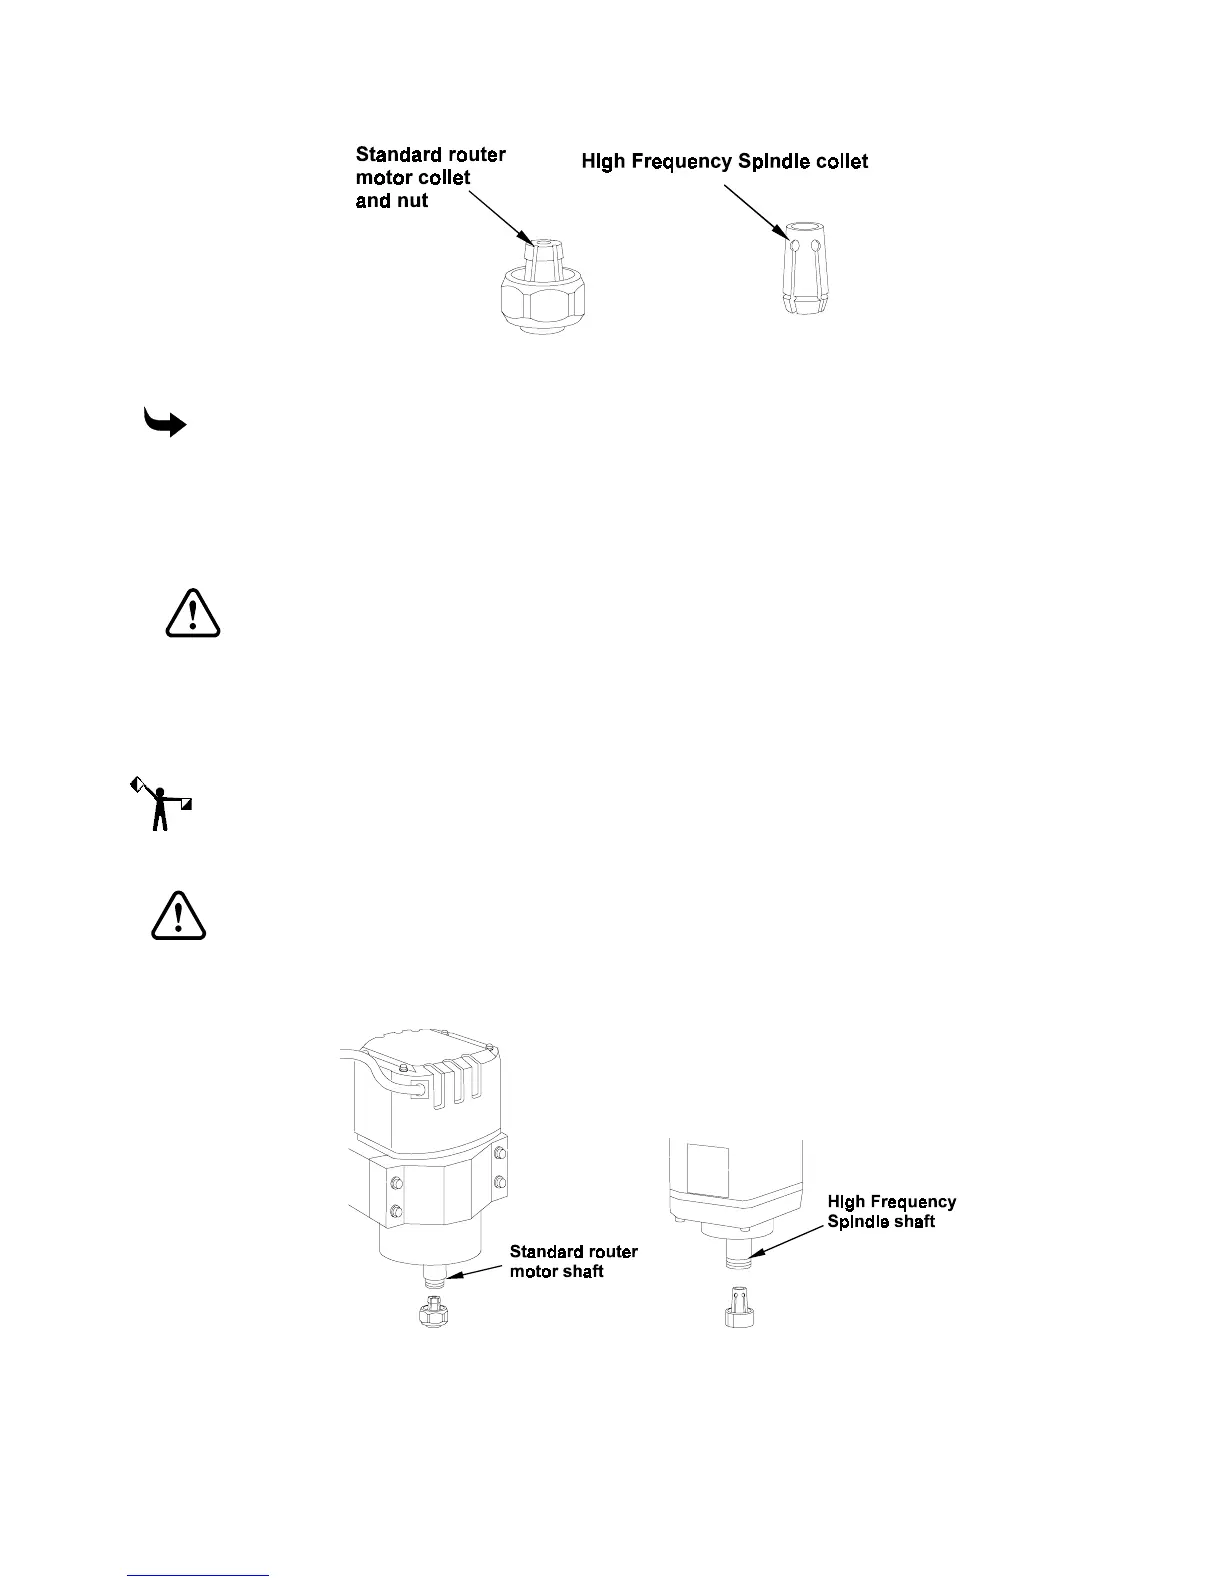
Installing a cutting tool
To install a cutting tool
1
Move the router motor near the front of the table.
2
Unplug the router motor.
3
Select the desired tool and corresponding collet from the tool kit.
CAUTION: Do not strike the cutting edge of the tool with the collet or any other
hard material during tool installation.
4
Hold the collet so that the narrow end points upward.
5
Make sure that the collet and spindle are clean and undamaged.
6
If the High Frequency Spindle is installed, snap the collet into the collet nut. This step
is not necessary if the standard router motor is installed.
Note: If using a .125" or 3 mm tool, insert the tool into the sleeve.
7
Insert the sleeve or shank of the tool into the collet.
CAUTION: Do not allow a cutting tool to drop out of the collet. Allowing a tool to
strike another object can damage the tool or the object.
8
Hold the tool to prevent it from falling out and insert the collet, nut, and tool into the
router motor shaft. Hand tighten the collet nut.
9
Hold a wrench in one hand and place it on the flats of the router motor shaft.
10
Hold the other wrench in the opposite hand and place it on the collet nut.