47
!
"
#
$
%
S
10
D
!
"
Saw-Spindle Moulder
B3 / B3 e-classic
Making adjustments and preparations
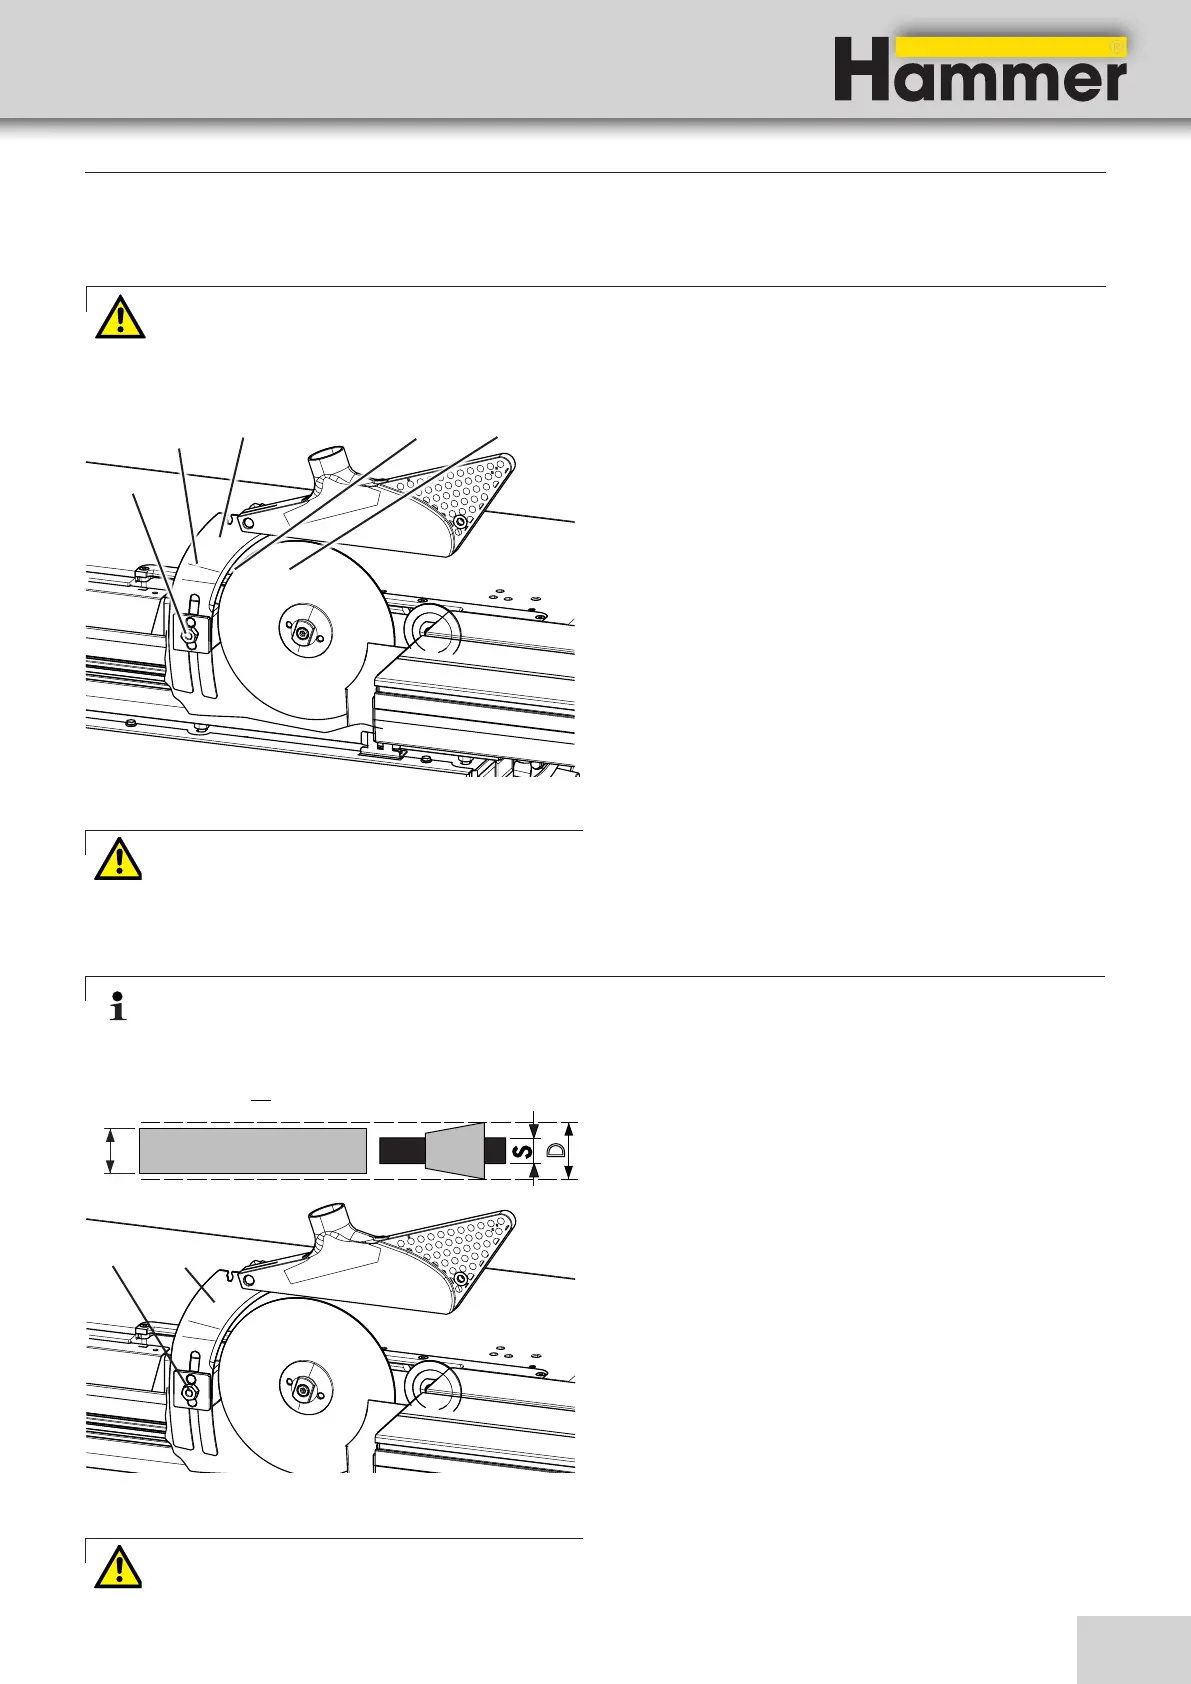
The splitter has to be adapted to the thickness of the saw
blade.
Required tools:
• Spanner SW 19 mm
1. Loosen the locking nut.
2. Remove the splitter if required.
3. Insert the splitter.
Take care that the splitter holder studs fit in the
splitter groove.
4. Tighten the locking nut.
!Locking nut #Shim
"Splitter $Bolts
%Saw blade
Fig. 8-21: Fitting in/changing the splitter
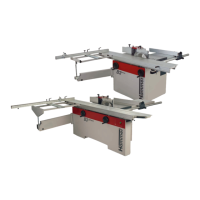
8.10.1 Loosening/adjusting the splitter
Fig. 8-20: Adjusting the splitter
1. Prepare to change tooling.
2. Loosen the nut.
3. Move the splitter so that there is, at any given point,
a distance of 3 to 8 mm betweeen the saw blade
and the splitter.
4. The marking on the splitter must match the top edge
of the sliding table at the max. cutting height (inde-
pendently of the saw blade used).
5. Tighten the nut.
!Nut $Distance
"Marking %Saw blade
#Splitter
Attention! Minimum tightening torque: 25 Nm!
Warning! Risk of injury!
The splitter has to be adapted to the thickness of the saw blade.
The thickness of the splitter has to have a value between that of the saw blade body and the width of the
sawtooth.
Required tools:
• Spanner SW19 mm
8.10.2 Fitting in/changing the splitter
Note:
The thickness of the splitter must be between that of the saw blade body and the width of the sawtooth.
Splitter thickness (d), saw blade body (S), sawtooth width (D)
Attention! Minimum tightening torque: 25 Nm!