74
X
Gefaket!!
15 mm in Richtung dimetrie 1 verschoben
Schiebetisch, Grundbahn, Handrad Logo
"
!
#
Saw-Spindle Moulder
B3 / B3 e-classic
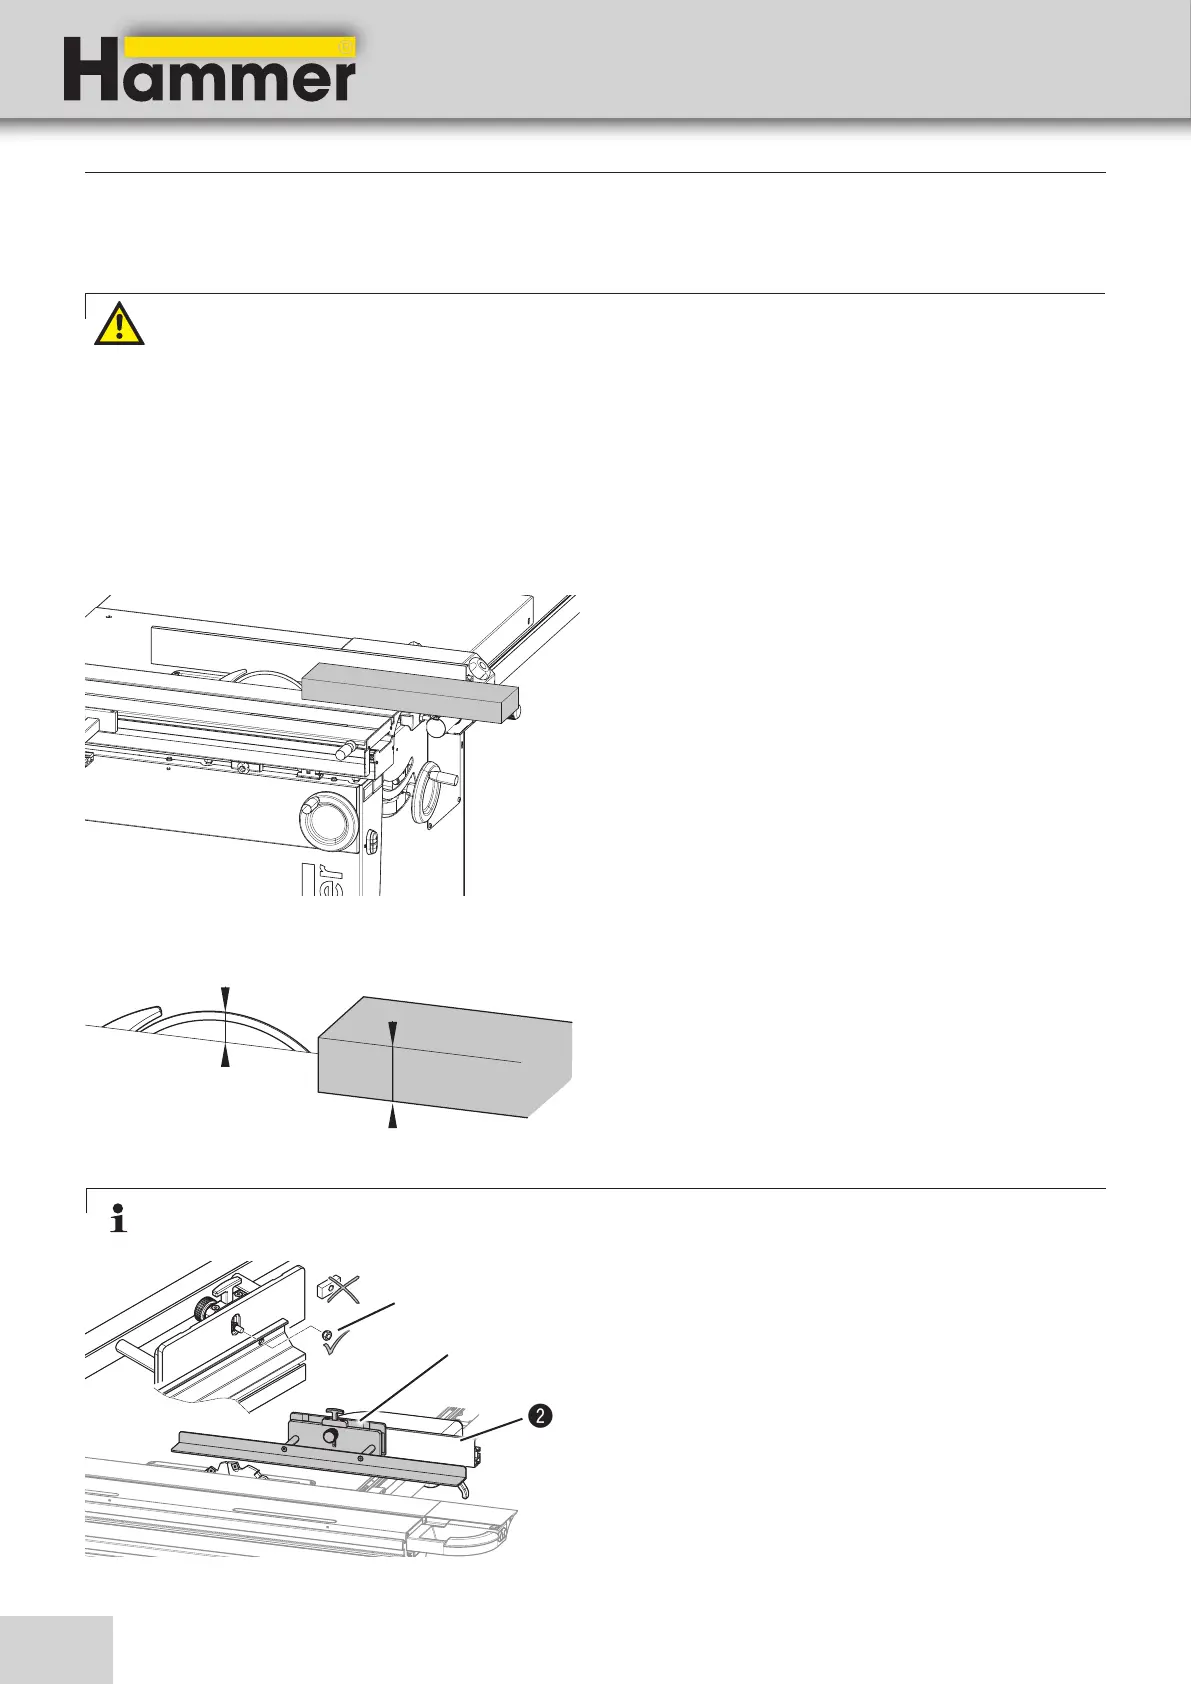
10.5.9 Groove cuts
Fig. 10-12: Groove cuts
Fig. 10-13: Groove cuts
1. Take note of general procedures for authorised work-
ing techniques.
2. Set the combination fence to the desired dimensions.
3. Lock the sliding table into a centre position.
4. Set the cutting height to a maximum of half the work-
piece thickness.
5. Select the cut sequence so that the cut batten falls
onto the sliding table side.
Should the cut batten fall to the right side of the circu-
lar saw, a wooden push stick has to be used due to
the high kickback risk!
X Workpiece thickness
X/2 Cutting height
Warning: Risk of injury!
• Groove cuts may only be carried out with an overhead saw guard! Do not, under any circumstances, use
a saw blade guard (guard mounted onto splitter)!
• Do not pull the combination fence‘s guide back!
• Do not remove the splitter!
• If the saw blade is protruding over the top edge of the combination fence‘s guide, there is no guarantee
that the workpiece can be guided safely. A higher auxiliary fence must be used to ensure that the work-
piece is guided safely.
• When working on small workpieces, use a wooden push stick, a push stick or a load feeding accessory.
Fasten Sawboy by means of the screw onto the parallel
fence, in the case of a thin-walled fence by means of
said screw and the nut.
Operating and adjusting:
Read individual operation instructions
!Sawboy
"Fence guide
#Special-nut
Fig. 10-14: Auxiliary fence
Note: Tenoning hood and moulding guard „Sawboy“
see: Tools and Accessories catalogue
Operation