Switching the device ON and OFF Installation and start-up
EN 3925-0060 V207-00 MANUAL R03.doc
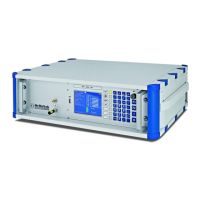
HeMaTech
Prüftechnik
Connecting serial interface(s)
After completing the test, the up-to-dated measuring values can be output to a data
terminal unit via the serial interfaces. The
Appendix
to these instructions contains a few
sample printouts
. The header appears on each new page. When switching the device
off and on again, the successive number is automatically reset to 1.
The test parameters for the existing programs can be output in the menu
SET PARAMETER (see 1.1 Data output Parameter).
The two serial interfaces of the device are:
− 9-pin Sub-D socket, serial, V24 RS232C Ser#1, X22
(see item 23 back view)
− 9-pin Sub-D socket, serial, V24 RS232C or Profibus Ser#2, X23
(see item 24 back view)
Wire the plug connections by following the enclosed
plug assignment diagram
.
Transfer format: (factory setting)
115.200 baud, baud rate adjustable from 300 … 460 800,
8 bit data, 1 stop bit, no parity, no protocol
Connecting the electric power supply
Connect the leak tester only to a main voltage of 100 … 240 V, 50/60 Hz (without
changeover) provided for this purpose.
The power consumption of the device is approx. 100 VA.
It is protected by a T2A / 250V IEC127-2 input fuse.
Plug the power supply cable into the mains connection on the back of the unit.
Connect the power supply cable to the mains supply network.
The tester is ready for operation and can be switched ON.
Switching the device ON and OFF
DANGER caused by electric current!
After connecting the device check that all cables are routed in such a
way, that they cannot be buckled or squashed or damaged in any
other way.
Only switch on the device after all connections have been made and checked for correct fit.
Press key I on the front of the device to switch on.
The display light is switched on.
Press key 0 on the front of the device to switch off.
The display light is switched off.