Affirm Breast Biopsy Guidance System User Guide
Chapter 3: Installation, Verification, and Removal
MAN-06411-002 Revision 003 Page 17
3.3.2 Attach the Biopsy Control Module
The Biopsy Control Module attaches to either the left or right handle of the Biopsy
Guidance Module.
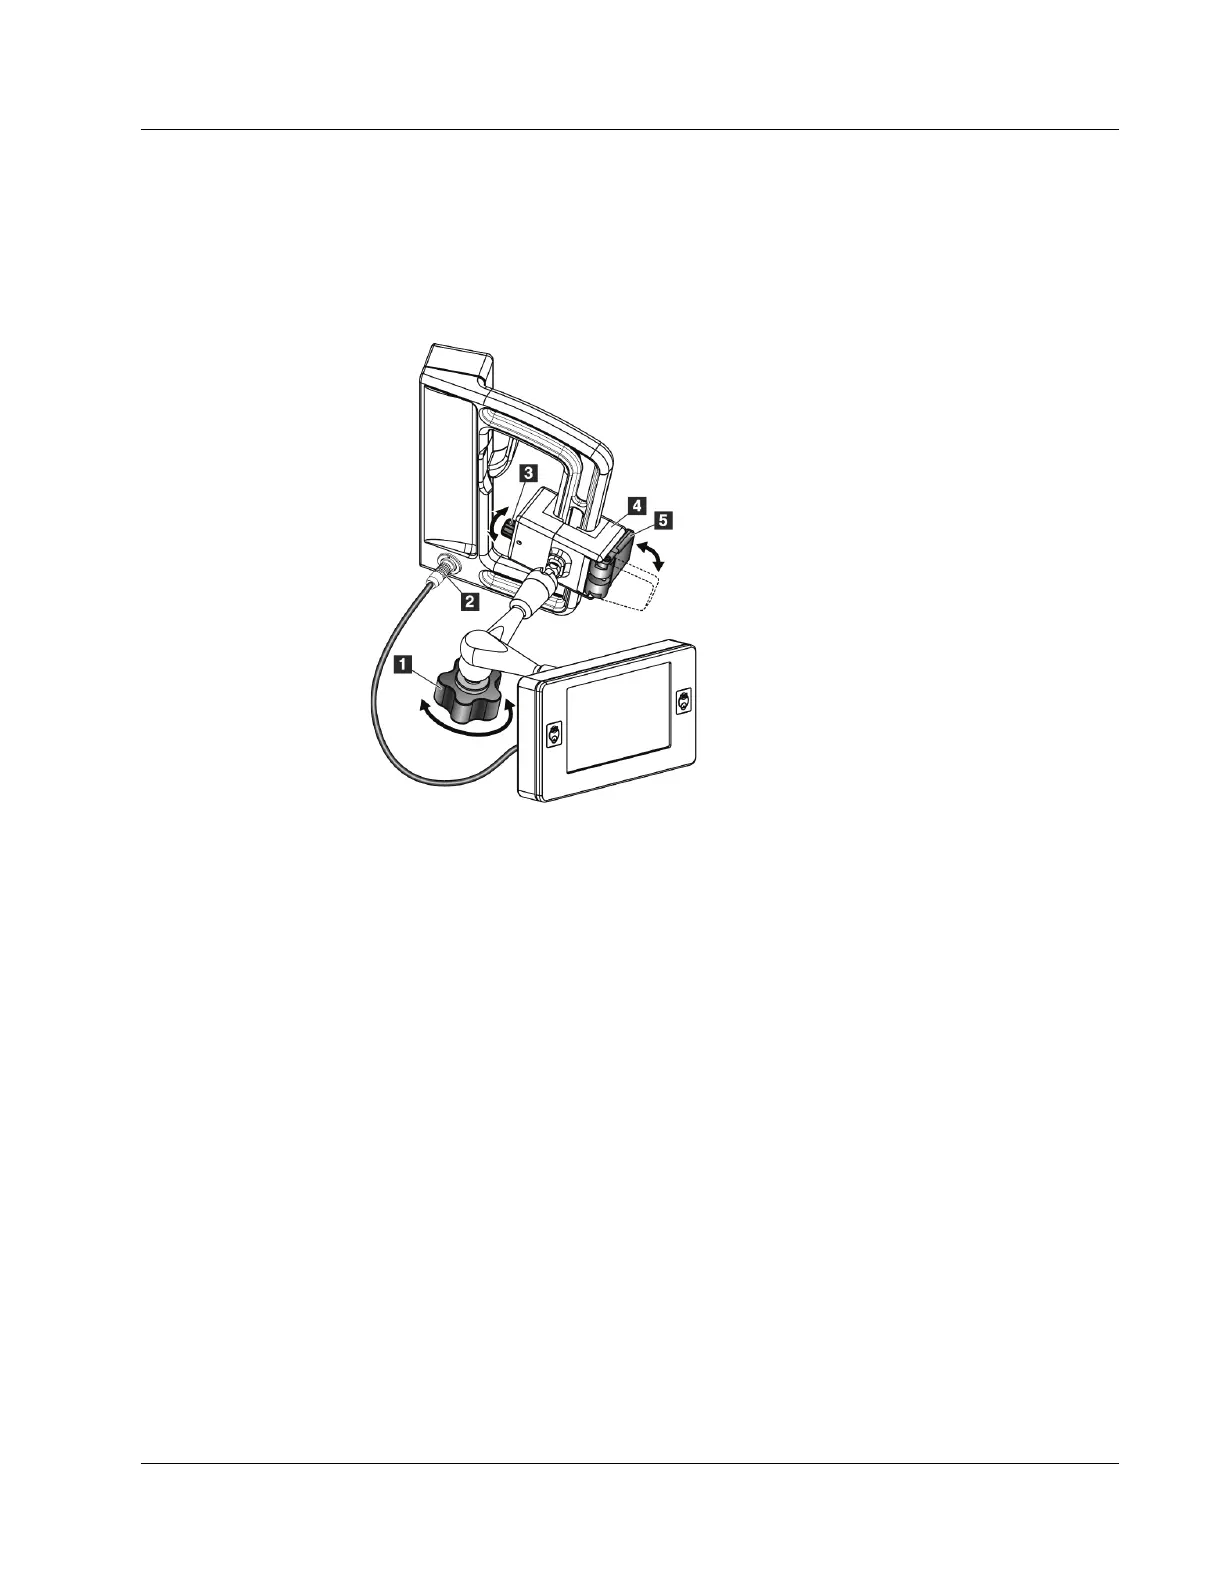
Figure 9: Attachment of the Biopsy Control Module
Figure Legend
1. Lock Knob for the Articulating Arm
2. Biopsy Control Module Cable
3. Clamp Adjust Knob
4. Attachment Bracket
5. Attachment Bracket Lock
1. Release the Articulating Arm Lock Knob (see the previous figure, item 1).
2. Position the Attachment Bracket (item 4) until the side with the Lock (item 5) is on
the front side of the handle.
3. Attach the Lock side of the Attachment Bracket around the lower part of the handle.
4. Slide the opposite side of the Attachment Bracket around the handle. The Bracket
attaches on to the patient handle.
5. If necessary, adjust the Clamp Adjust Knob (item 3).
6. Push the Attachment Bracket Lock to the locked position (item 5).
7. Make sure that this adjustment holds the bracket in position. If the bracket moves, or
you cannot get the bracket lock fully into the locked position, adjust with the Clamp
Adjust Knob (item 3).
8. Connect the Biopsy Control Module Cable (item 2) to the receptacle on the Biopsy
Guidance Module.