EIP
8114A Service Guide
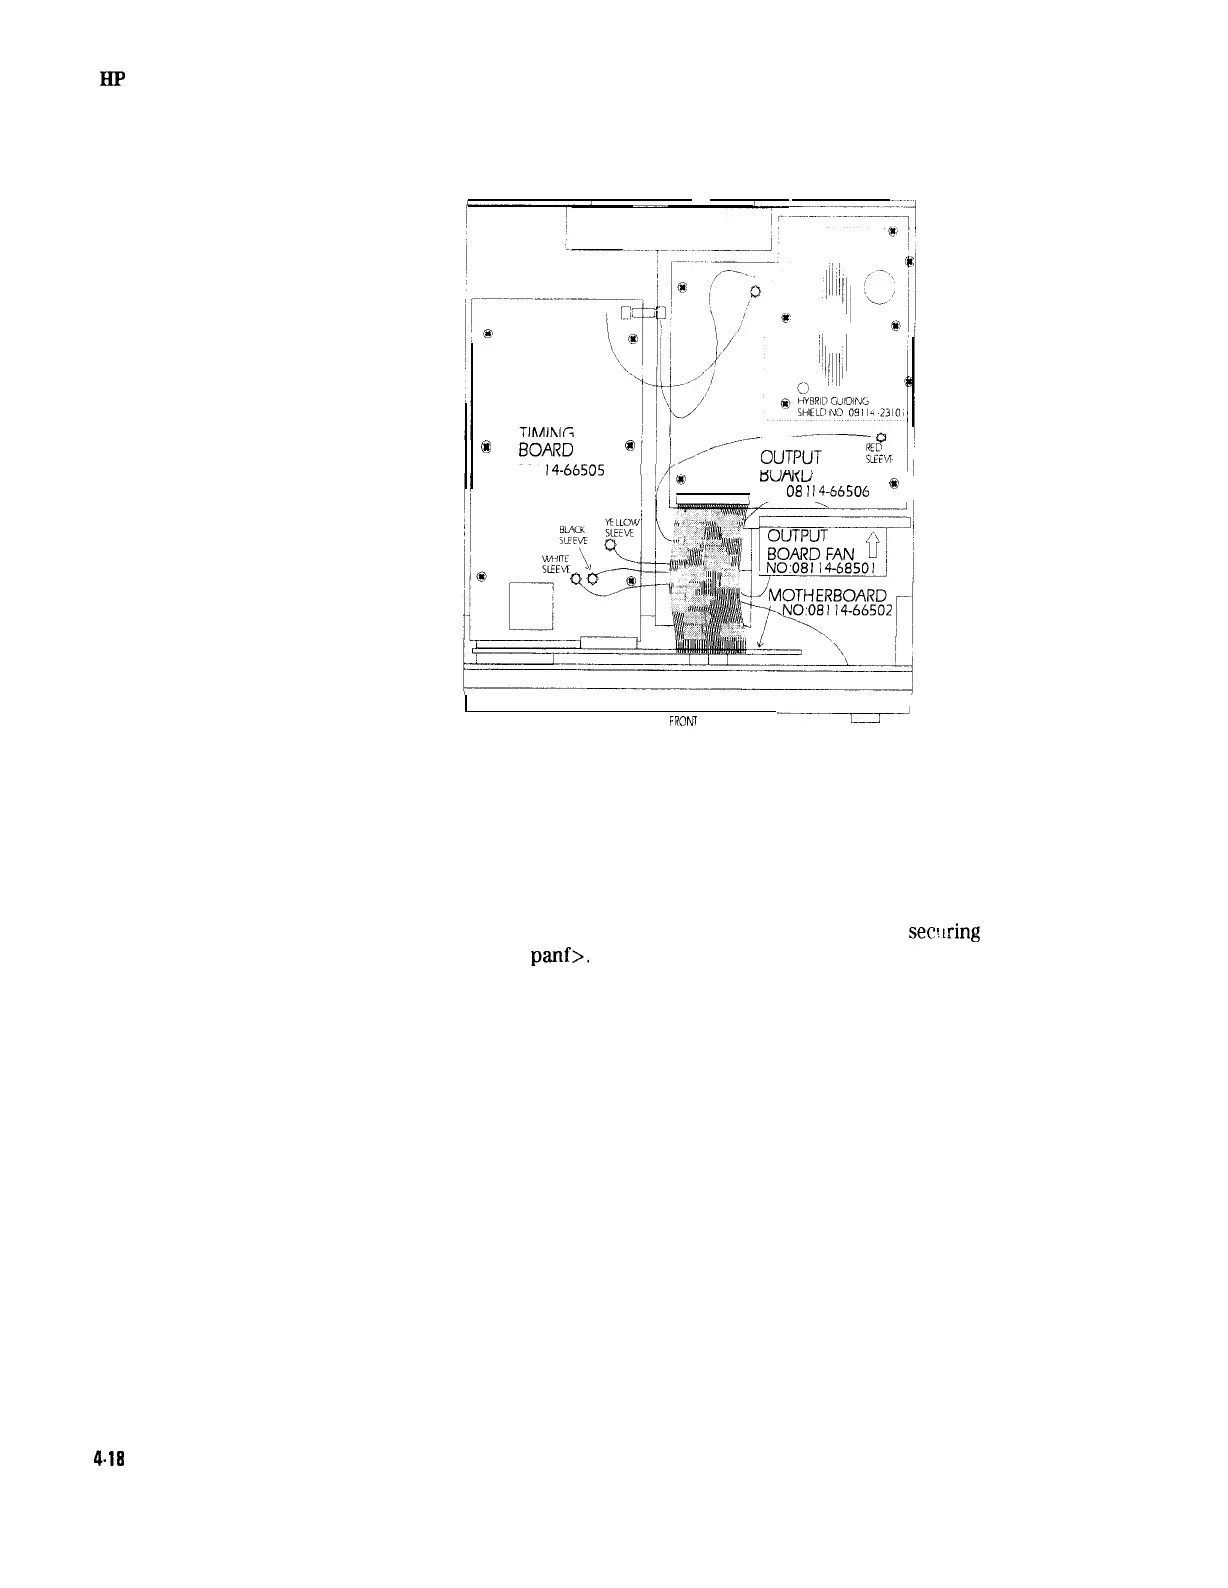
Removing the Motherboard
@
,_I~‘--
NO.08 I
14-66505
tjU/WU
NO
08
I
14-66506
0
1
,
FRON? PANEL
-___T=r_J
Figure 4-14. Location of the Motherboard
1. Before removing the motherboard, the cover, power supply,
microprocessor board, and the timing board have to be removed.
So, follow the instructions for Removing the Instrument Cover,
Removing the Power Supply, Removing the Microprocessor Board,
and Removing the Timing Board, first.
2. Remove the side strips from the front panel to reveal the
sec!u-ing
screws. See =
panf>.
3. Remove the 4 screws securing the front panel to the chassis.
4. Release the front panel from the chassis for about 10 cm.
5. Disconnect the ribbon cable connecting the front panel to the
motherboard.
6. Disconnect the 2 cables from the memory-card connector board.
7. Remove the 7 screws securing the mother board to the chassis.
8. Carefully remove the motherboard from its location,
4.18 Disassembly and Reassembly