A
Anthony WilsonSep 23, 2025
What to do if hpmont DC Drives show fault of current detection circuit?
- PPamela StephensonSep 23, 2025
To address a fault in the current detection circuit of your hpmont DC Drive, contact the supplier for repair.
What to do if hpmont DC Drives show fault of current detection circuit?
To address a fault in the current detection circuit of your hpmont DC Drive, contact the supplier for repair.
What to do if hpmont DC Drives show access fault of display panel EEPROM?
If the hpmont DC Drive shows an access fault of the display panel EEPROM, replace the display panel or contact the supplier for repairing.
What causes parameters auto-tuning fault on hpmont HD30 Inverter?
A parameters auto-tuning fault on your hpmont Inverter can occur if the parameter auto-tuning times out, so check the motor’s connection. Ensure that you input the correct motor parameters (F08.00, F08.04, F13.01, F13.05). If problems persist, seek technical support.
Why is my hpmont Inverter showing DC bus over voltage during acceleration?
DC bus over voltage during acceleration in your hpmont Inverter can occur due to several reasons. The input voltage might be too high, so check the power input. Also, the deceleration time could be too short; adjust it using parameters F03.02, F03.04, F03.06, and F03.08. Improper wiring can also lead to overvoltage, so inspect the wiring and ensure the inverter is wired correctly. If an instant stop occurred and the motor restarted, set the start mode to speed tracking (F02.00=2). Finally, ensure that the braking devices are properly selected according to the user manual's recommendations.
How to fix hpmont Inverter output overcurrent during acceleration?
To resolve an hpmont Inverter output overcurrent during acceleration, consider these potential causes. Ensure proper connection between the inverter and the motor. Verify and correct motor parameters using F08.00, F08.04, F13.01, and F13.05. If the inverter's rating is too small, select one with a higher rating. Also, adjust the acceleration and deceleration times using parameters F03.01 and F03.08. If an instant stop occurs and the motor restarts, set the start mode to speed tracking (F02.00=2).
What causes a motor overload on my hpmont Inverter?
A motor overload on your hpmont Inverter can stem from several causes. An improper setting of the V/f curve can be a factor, so adjust it using parameters F09.00-F09.06. Also, a low mains supply voltage can contribute, so check the power input. If the motor runs for a long time with a heavy load at low speed, consider using a special motor designed for such conditions. Ensure the motor’s overload protection factor is properly set. Finally, check for a blocked torque or an excessively heavy load, and inspect the load and mechanical transmission devices.
What to do if my hpmont HD30 Inverter shows DC bus undervoltage?
DC bus undervoltage on your hpmont Inverter can be caused by a few things. First, check the input power voltage to ensure it is not too low. If it is, correct it. Also, improper wiring can lead to undervoltage, so verify the wiring and ensure the inverter is wired correctly. Note that this can be a normal status during powering on and powering off.
Why is my hpmont Inverter's motor overheating?
If your hpmont Inverter's motor is overheating, it could be due to the motor itself overheating, in which case you should reduce the load, repair or replace the motor, or increase the acceleration/deceleration time (F03.01—F03.08). Alternatively, the setting of motor parameters may be incorrect; check and set the motor parameters correctly (F08.00, F08.04, F13.01, F13.05).
How to resolve heatsink overheat on hpmont HD30 Inverter?
To resolve a heatsink overheat issue on your hpmont Inverter, consider the following: The ambient temperature might be too high, so consider using an inverter with higher power capacity. Poor external ventilation around the inverter can also cause overheating, so improve the ventilation. If the fan is faulty, replace it. In the event that a fault occurs to the temperature detection circuit, seek technical support.
What causes a fault of power module in hpmont Inverter?
A fault in the power module of your hpmont Inverter can arise from several issues. Check for a short circuit between phases output and ensure proper wire connection. Also, verify there is no short circuit to the ground, and correct the wiring if necessary. If the output current is too high, inspect the connection and the mechanism. If the power module itself is damaged, contact the supplier for repair.
Defines terms like Danger, Warning, and Note used throughout the manual for hazard communication.
Discusses inverter operation compared to standard, constant torque at low speeds, and motor overload protection.
Outlines restrictions on output side connections, circuit breaker use, rated voltage, and phase input.
Details the meaning of each part of the inverter model number for identification.
Explains the information provided on the inverter's nameplate for model and specifications.
Lists the electrical and performance characteristics, control modes, and interfaces of the inverter.
Provides a table of rated capacities, input/output currents, and motor power for various inverter models.
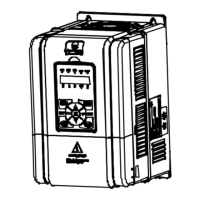
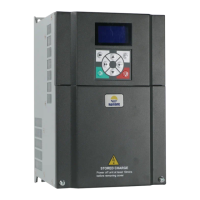
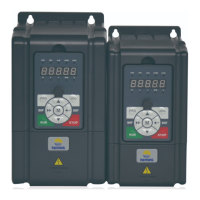
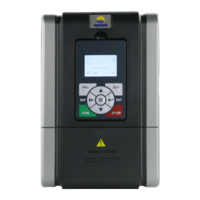
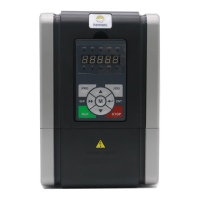
Identifies and illustrates the main physical components and connection points of the inverter.
Lists essential safety measures and checks before and during inverter installation.
Specifies environmental conditions, location requirements, and ambient temperature limits for proper operation.
Details inverter mounting orientation and necessary clearance for effective cooling and heat dissipation.
Provides diagrams and tables showing physical dimensions and mounting hole specifications for different models.
Explains the procedure for attaching and detaching the display panel from the inverter.
Illustrates the steps for removing the inverter's upper and lower plastic covers.
Outlines critical safety rules and guidelines for performing electrical wiring tasks on the inverter.
Recommends specifications for MCCBs, contactors, and cables based on inverter model.
Describes the layout and function of main circuit power terminals and provides wiring diagrams.
Details control terminal functions, wire jumper settings, and communication port connections.
Provides guidance on proper installation practices to ensure good electromagnetic compatibility (EMC).
Explains fundamental inverter functions like run command and frequency setting sources.
Covers display panel layout, key functions, indicator descriptions, and menu navigation.
Guides through the critical steps and checks required before powering on the inverter for the first time.
Lists parameters for displaying various inverter operational statuses like series, software versions, and current status.
Details fundamental general parameters such as control mode, inverter type, motor selection, and frequency limits.
Explains parameters related to user password protection, menu mode selection, and function code initialization.
Covers parameters for start modes, delay times, DC braking, and stop modes for controlling motor operation.
Defines settings for linear or S-curve acceleration/deceleration times, including jog and emergency stop parameters.
Details parameters for configuring PID control loops for process regulation, including reference, feedback, and gains.
Describes parameters for defining custom V/f curves and skip frequencies to adapt to different load characteristics.
Explains multi-step speed commands and parameters for enabling and configuring the Simple PLC function.
Covers parameters for setting up and controlling the wobble operation mode, including frequency and amplitude.
Details essential parameters for configuring motor 1, including rated power, voltage, current, frequency, and auto-tuning settings.
Covers parameters for selecting and customizing V/f curves, torque boost, and slip compensation for motor control.
Explains parameters for tuning the speed control loop in vector control mode for motor 1, including PI gains and switching frequencies.
Provides parameters for configuring a second asynchronous motor, mirroring settings for motor 1.
Details the function selection for digital input terminals (DI) and digital output terminals (DO) and relays.
Explains the configuration of analogue input (AI) and output (AO) terminals, including function selection, bias, and gain.
Covers settings for serial communication (SCI), including data format, baud rate, local address, and action on errors.
Defines parameters for customizing the display panel, including language, contrast, and displayed information.
Explains advanced features like auxiliary frequency sources, cooling fan control, and droop control.
Details parameters for various protection functions, including overload, phase loss, PID feedback loss, and auto reset.
Covers parameters related to Pulse Width Modulation (PWM) control, such as carrier frequency and modulation mode.
Outlines daily checks for operating environment, inverter, and motor status to ensure proper function.
Describes general inspections to be performed every 3-6 months to prevent issues and ensure long-term operation.
Provides lifespan information and replacement criteria for common damaged components like cooling fans and capacitors.
Gives important considerations and methods for safely disposing of the inverter.
Details the features and terminal functions of the HD30-EIO extension card for expanded I/O capabilities.
Describes the HD30-PIO card, designed for injection molding machines, and its terminal functions.
Explains the components and procedures for assembling the panel mounting base and extension cables.
Refers to a separate manual for details on the Power Regenerative Unit.
Provides recommendations for selecting appropriate braking units and resistors based on motor and inverter models.
Lists recommended AC and DC reactors based on inverter models for input and output filtering and power factor correction.
Describes the protective cover accessory for specific inverter frames and its application.
Lists parameters for displaying various inverter operational statuses like series, software versions, and current status.
Details fundamental general parameters such as control mode, inverter type, motor selection, and frequency limits.
Explains parameters related to user password protection, menu mode selection, and function code initialization.
Covers parameters for start modes, delay times, DC braking, and stop modes for controlling motor operation.
Details parameters for configuring PID control loops for process regulation, including reference, feedback, and gains.
Describes parameters for defining custom V/f curves and skip frequencies to adapt to different load characteristics.
Explains multi-step speed commands and parameters for enabling and configuring the Simple PLC function.
Covers parameters for setting up and controlling the wobble operation mode, including frequency and amplitude.
Details essential parameters for configuring motor 1, including rated power, voltage, current, frequency, and auto-tuning settings.
Covers parameters for selecting and customizing V/f curves, torque boost, and slip compensation for motor control.
Explains parameters for tuning the speed control loop in vector control mode for motor 1, including PI gains and switching frequencies.
Provides parameters for configuring a second asynchronous motor, mirroring settings for motor 1.
Details the function selection for digital input terminals (DI) and digital output terminals (DO) and relays.
Explains the configuration of analogue input (AI) and output (AO) terminals, including function selection, bias, and gain.
Covers settings for serial communication (SCI), including data format, baud rate, local address, and action on errors.
Defines parameters for customizing the display panel, including language, contrast, and displayed information.
Explains advanced features like auxiliary frequency sources, cooling fan control, and droop control.
Describes the RS485 communication interfaces and their support for MODBUS protocol.
Details the interface mode and pin definition for the RJ45 communication terminal.
Illustrates network configurations for single-master/multi-slave and single-master/single-slave setups.
Explains the frame formats for MODBUS RTU and ASCII modes, including data structure and checking.
Provides C language code for CRC-16 checksum calculation used in communication.
Presents practical examples of reading and writing inverter parameters via communication.