04/SHOCK ABSORBER, SWINGARM 47
Alternative 2
Warning
Danger of accidents Modifications to the chassis can seriously alter the
vehicle's handling characteristics.
– Extreme modifications to the adjustment of the spring elements can
cause a serious deterioration in the handling characteristics and
overload some components.
– Make settings within the recommended range only.
– Following modifications, ride slowly at first to get the feel of the new
handling characteristics.
– Set adjusting screws , and in the positions determined when disassem-
bling.
7.25Bleeding and filling the shock absorber
Info
Before the vacuum pump can be used, it is imperative to carefully read the enclosed vacuum pump operating instructions.
Completely open the adjustment elements of the rebound damping and compression damping.
200781-10
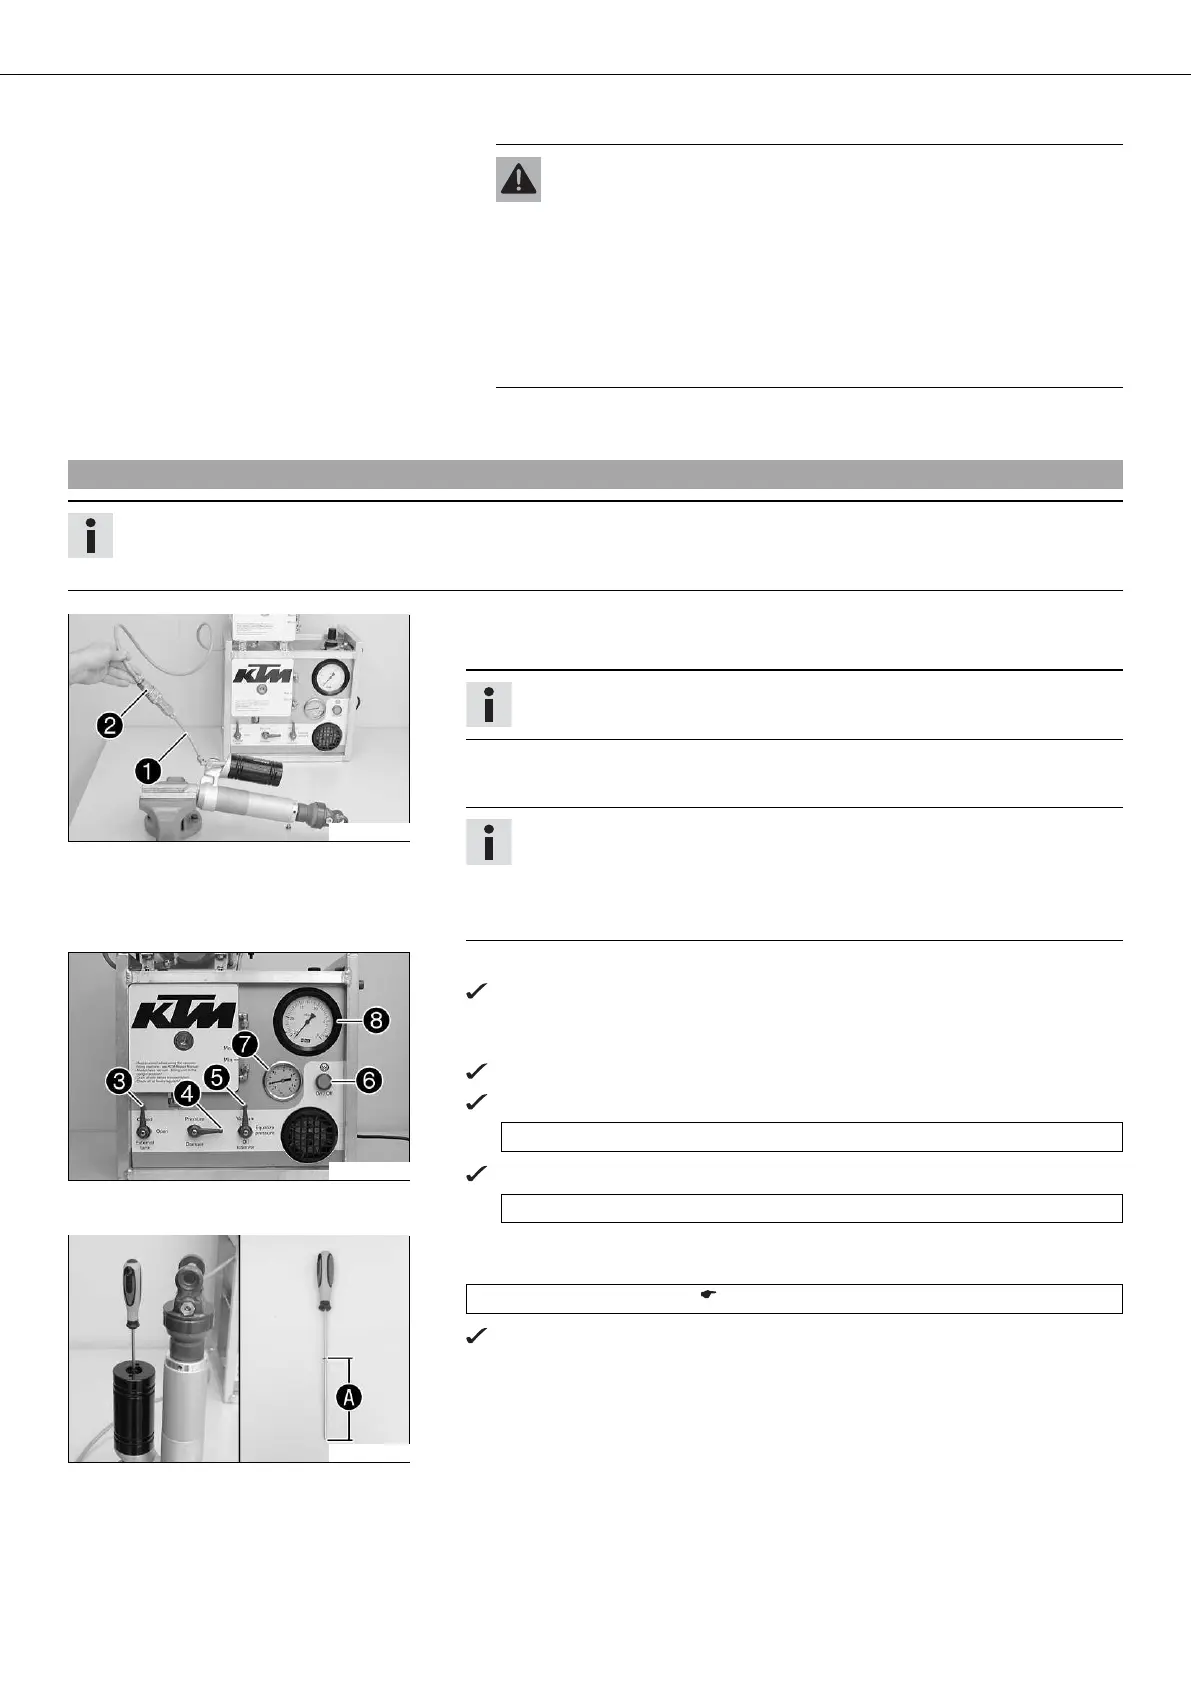
– Remove the screw from the filling port.
– Mount adapter on the shock absorber.
Info
Only tighten hand-tight; do not use any tools.
– Connect adapter to connection of the vacuum pump.
– Clamp in the shock absorber with soft jaws or hold as shown in the photo.
Info
Only slightly tighten the shock absorber.
The filling port must be positioned at the highest point.
The piston rod moves in and out during the filling operation – do not try to
grab or hold it!
200271-10
– Set the control lever as shown in the photo.
The External tank control lever is positioned to Closed, Damper to Vacuum
and Oil reservoir to Vacuum.
– Turn on the On/Off switch .
The vacuum process begins.
The pressure gauge drops to the specified value.
< 0 bar
Vacuum gauge drops to the specified value.
4 mbar
200782-10
– Distance between the floating piston and reservoir hole is ascertained using the
special tool.
Depth micrometer (T107S) ( p. 274)
The floating piston is completely at bottom.