2. Installation
[4] When using Front Flange (Option)
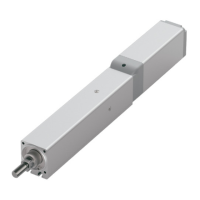
There are tapped holes equipped on the front housing (Option).
Utilize these tapped holes for installation.
[Refer to 9. “External Dimensions” for the dimensions after attaching the front flange.]
Although this option is ordered along with an actuator, they will be shipped as accessories (not
assembled parts). Attach the flange to the actuator using the enclosed bolts with prescribed
torque.
(Note) The front flange cannot be installed in the vertical direction (height direction) because the
Motor Top Side-Mounted Types (Model: MT) of side-mounted motor types RA4R, RA6R,
RA7R, and RA8R with the following strokes will interfere with the motor unit.
(Note) The front flange cannot be installed in the horizontal direction (width direction) because
Motor Left Side-Mounted (ML) and Motor Right Side-Mounted (MR) of side-mounted motor
types RA4R, RA6R, RA7R, and RA8R with the following strokes will interfere with the motor
unit.
、
、
、
、
、
、
、
、
、
、
、
、
、
、
、
、
(Note) Be cautious that the end cover may be projected from the entire actuator frame in the case
of reserving types.

 Loading...