Working with Master/Slave 8-29
ICE Vulcan Service Manual
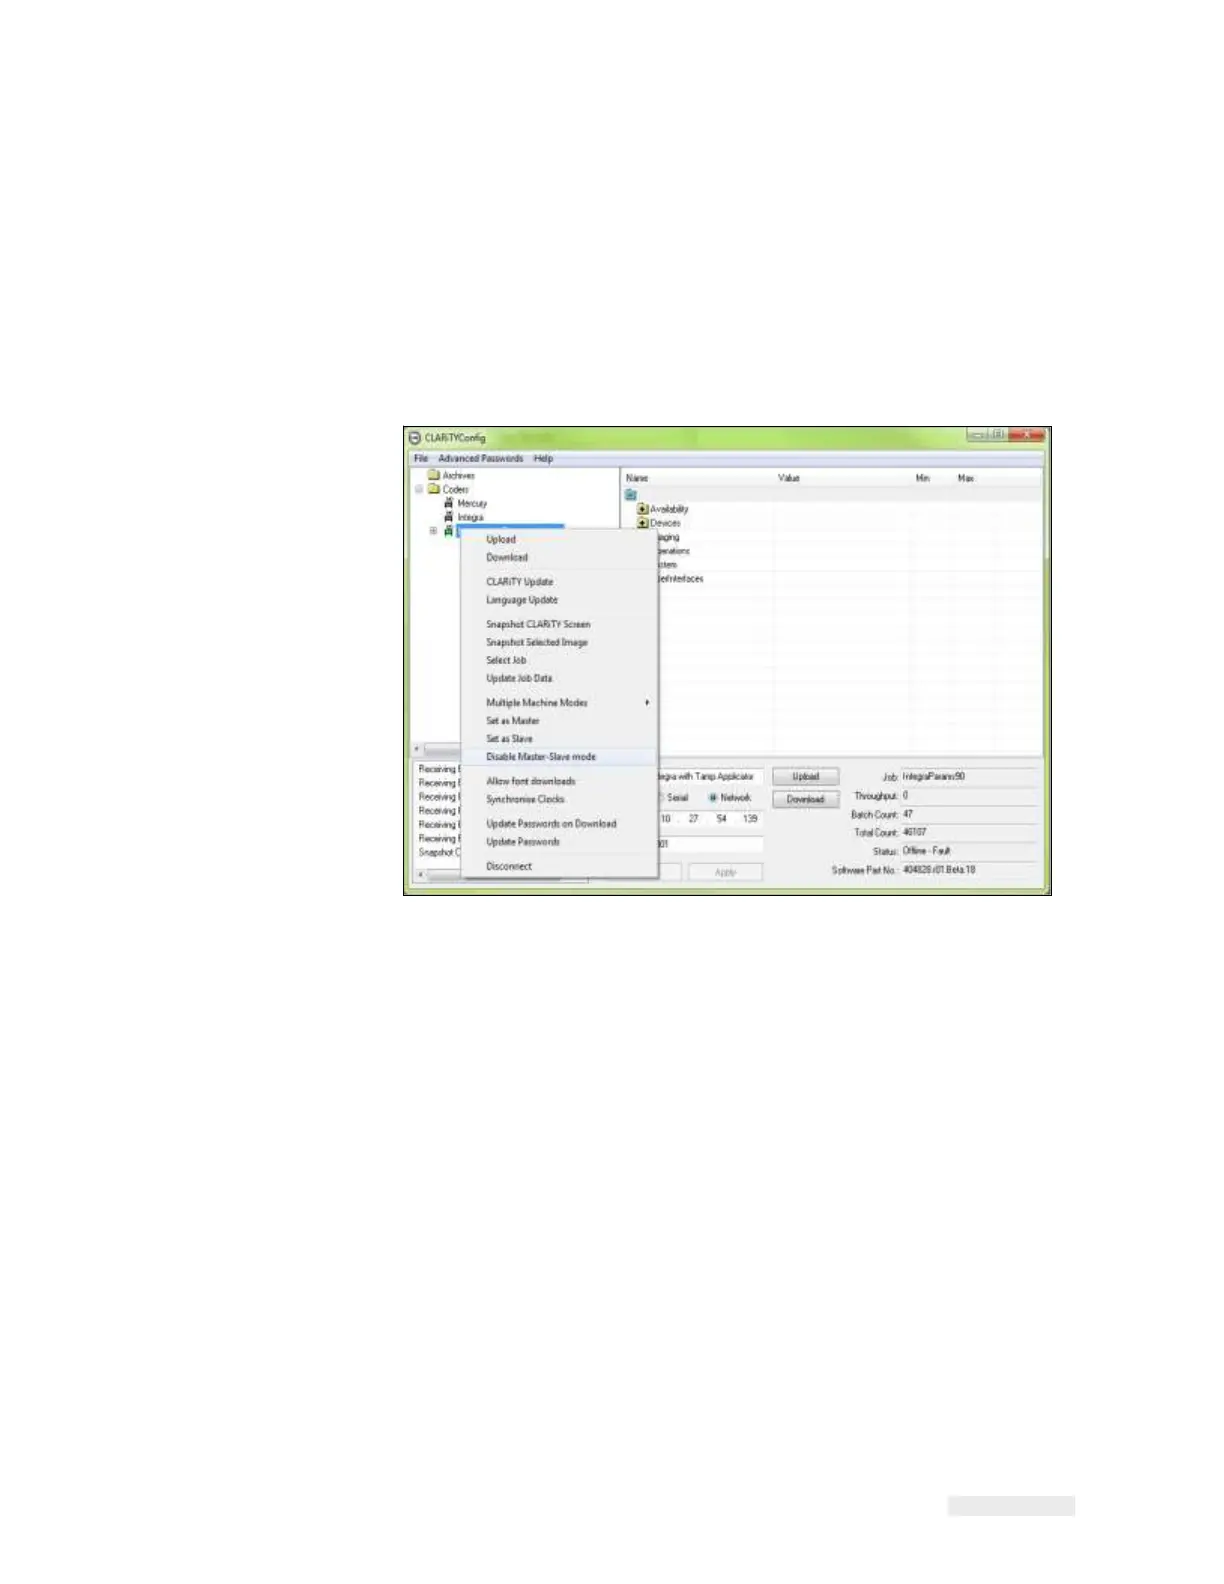
Disabling a Slave LPA
1
Establish communications between CLARiTY Configuration Manager
and the first Slave LPA
(“How to Connect the CLARiTY
Configuration Manager to the LPA using an RS232 connection”
on
page 5-8).
2
Right click on the 'New Printer' icon when the icon turns 'green' and
Select 'Disable
Master/Slave mode', from the list as shown in
Figure 8-27.
Figure 8-27: CLARiTY Config - Slave Disabling
A confirmation box appears asking you to confirm this action.
3
Click Yes and the Slave LPA is deleted from the Master/Slave group
and begins to function
as a standalone LPA.
Note: If the Slave LPAs are Standard LPAs, the 'JOB' button is enabled and
the Slave's 'Job'
database is empty or contains only the last Job selected.
The Master/Slave group database is held by the Master LPA.
Therefore, if a LPA is disabled
from the Master/Slave network and
becomes a stand alone unit, any additional Jobs
required have to be
downloaded from CLARiSOFT
®
.
Note: If you are intending to replace the Slave, it is advisable to configure the new
Slave LPA,
before disabling the currently activated Slave.
If using basic configuration, ensure the old Slave has been disconnected
from the network and
configure the new Slave with the previous Slave
network number.