44
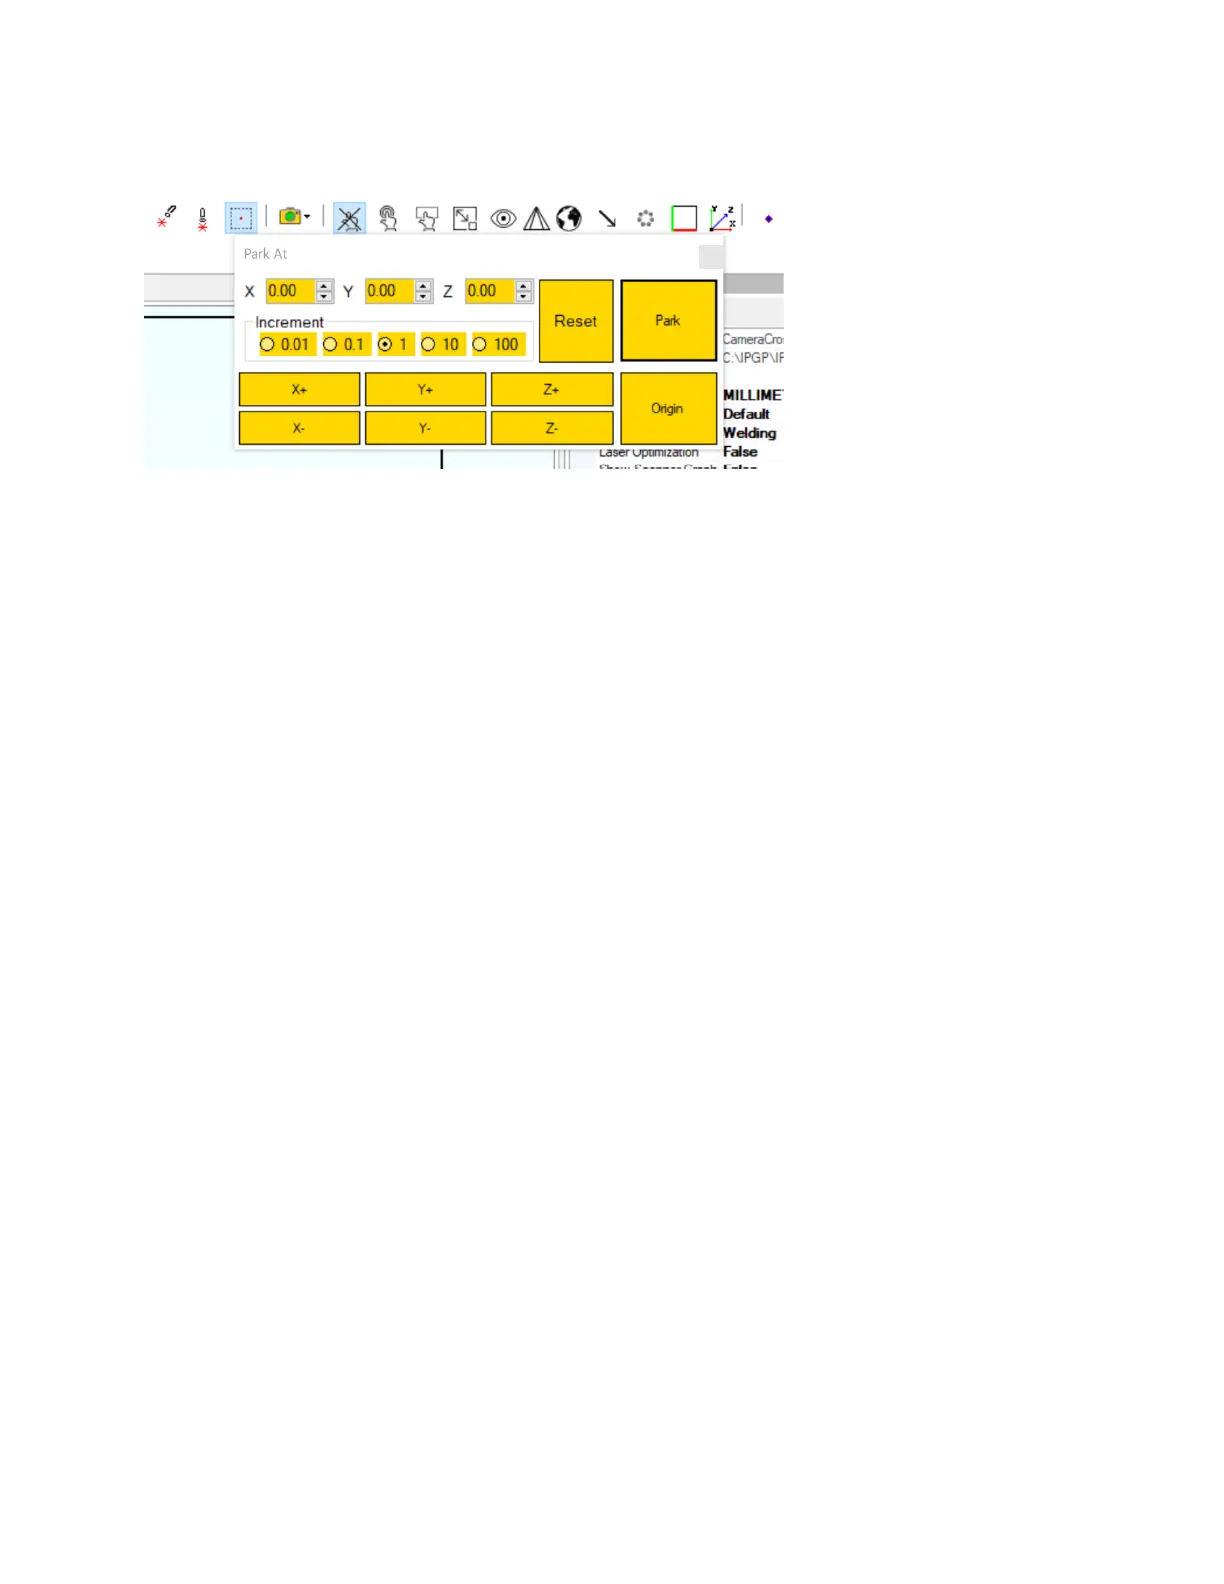
Figure 5-10 Park At Window in IPGScan
13. Focus the camera image and set brightness
a. As detailed in Figure 5-7, loosen the Clamp Screw and slide the Focus Tube up and down
until the image is in focus. Once the desired focus position is found, tighten the Clamp
Screw. The Iris can be adjusted in order to change brightness.
b. If the camera image is dark even after adjusting the Iris, ensure that there is adequate
light on the work surface.
c. Additional settings are available to change exposure and other common camera
settings.
i. For the HD camera, plug the provided controller into the camera and follow the
onscreen menu items.
ii. For the USB camera, adjustments are made on the computer.
iii. Ethernet camera adjustments are made in IPGScan (Please refer to the IPGScan
Manual [DOCOXUGGUIXX0001] for additional detials).
14. Center the camera image (This may not be required) using the adjustment screws on the camera
arm.
a. Remove the cover as shown in Figure 5-11.
b. Carefully adjust the four setscrews until the image is centered in the camera view as
desired. Always back out the adjustment screw slightly that is opposite of the one that is
to be tightened. These adjustment screws should not be overtightened.
c. Once the image is centered as desired, screw the cover plate back into place.