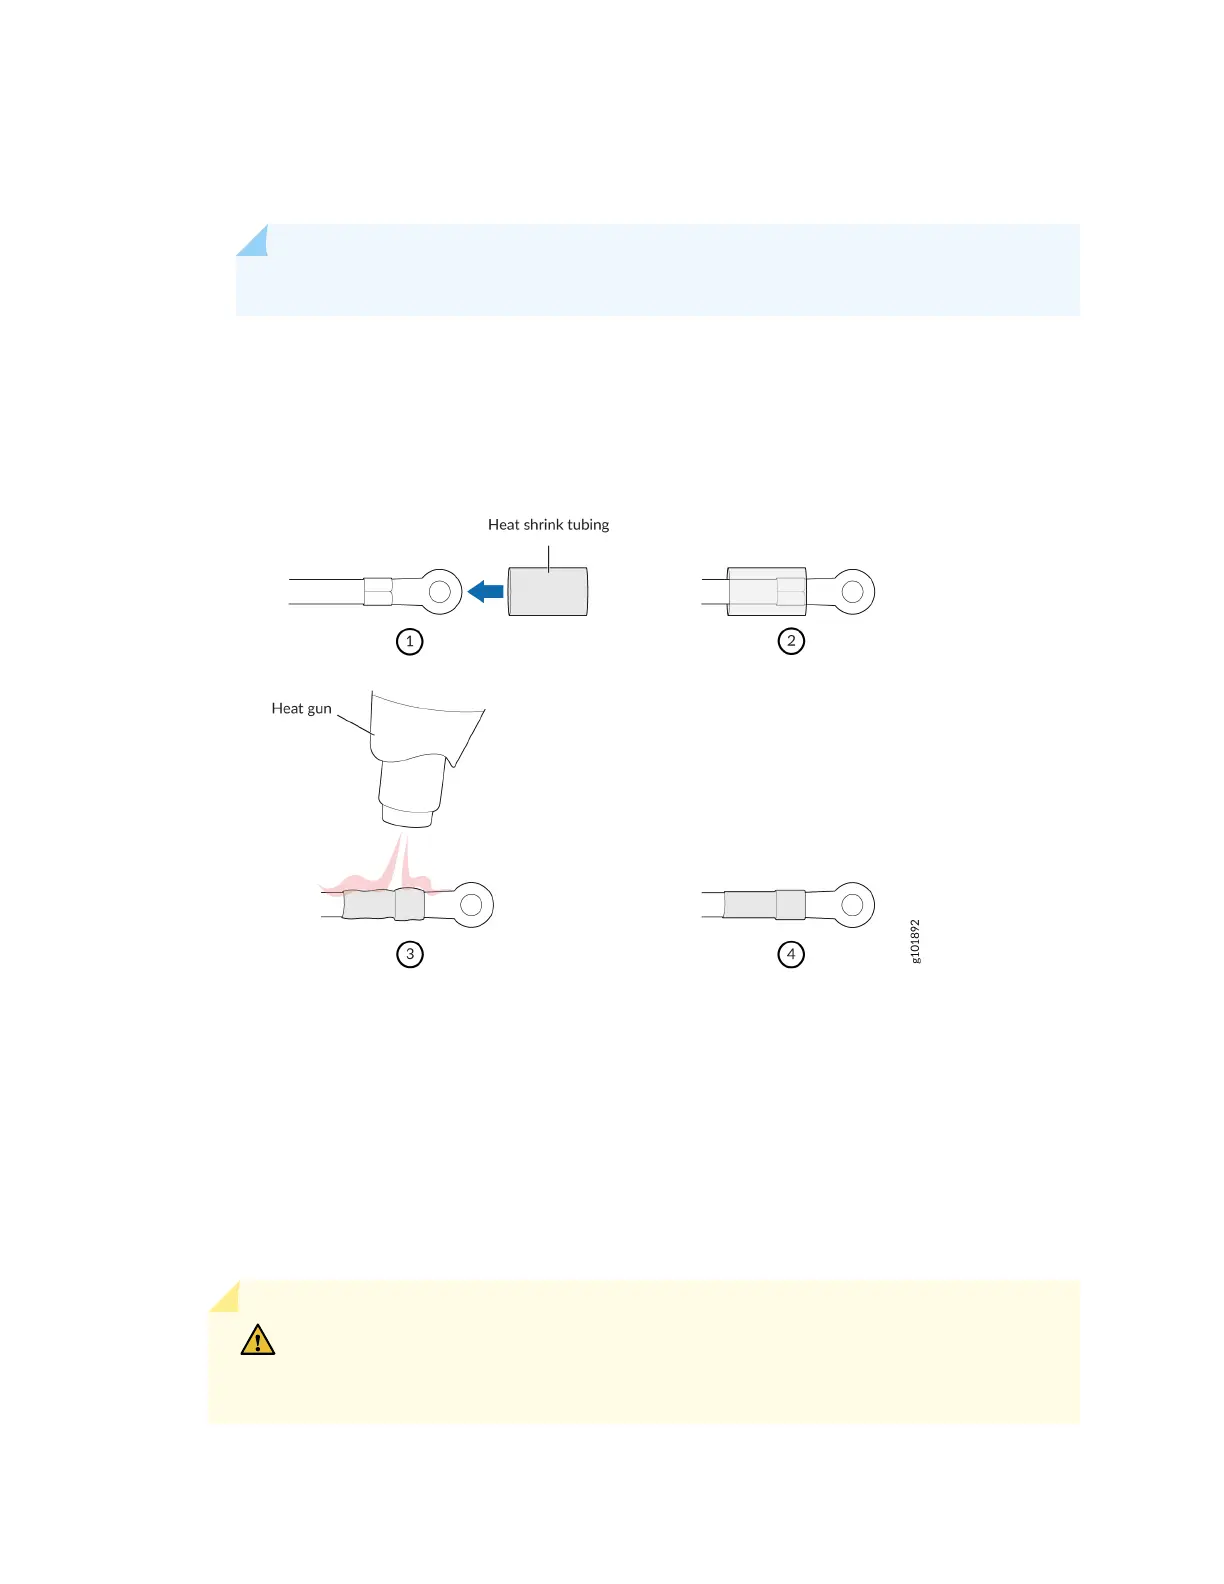
b. Shrink the tubing with a heat gun. Ensure that you heat all sides of the tubing evenly so that it
shrinks around the cable ghtly.
NOTE: Make sure that you do not overheat the tubing.
Figure 35 on page 60 shows how to install heat-shrink tubing.
Figure 35: How to Install Heat-Shrink Tubing
3. Remove the clear plasc cover that protects the terminal studs on the faceplate.
4. Verify that you have correctly labeled the DC power cables before making connecons to the
power supply.
In a typical power distribuon scheme where the return is connected to chassis ground at the
baery plant, you can use a mulmeter to verify the ohm output of the -48V and return (RTN) DC
cables to chassis ground. The cable with very large resistance (indicang an open circuit) to chassis
ground will be -48V. The cable with very low resistance (indicang a closed circuit) to chassis
ground will be RTN.
CAUTION: You must ensure that power connecons maintain the proper polarity.
The power source cables might be labeled (+) and (–) to indicate their polarity.
There is no standard color coding for DC power cables. The color coding used by
60