Assemble units as described herein only. To do otherwise
may result in instability. All screws, nuts and bolts must be
tightened securely and must be checked periodically after
assembly. Failure to assemble properly, or to secure parts
may result in assembly failure and personal injury.
71
Unite
®
Panel System - Stacking Sections Assembly
Assembly Instructions
Rare Earth Magnets used with this product. The magnets can
be harmful to pacemaker wearers and others with medical
devices. Pacemaker wearers should stay at least one
foot away from the steel tiles.
Note: Top frames must be
installed to vertical stacking
posts after all panel components
and exterior tiles are installed to
lower panel frames. Re-install all
lower panel frame tiles that were
removed from previous steps
before proceeding.
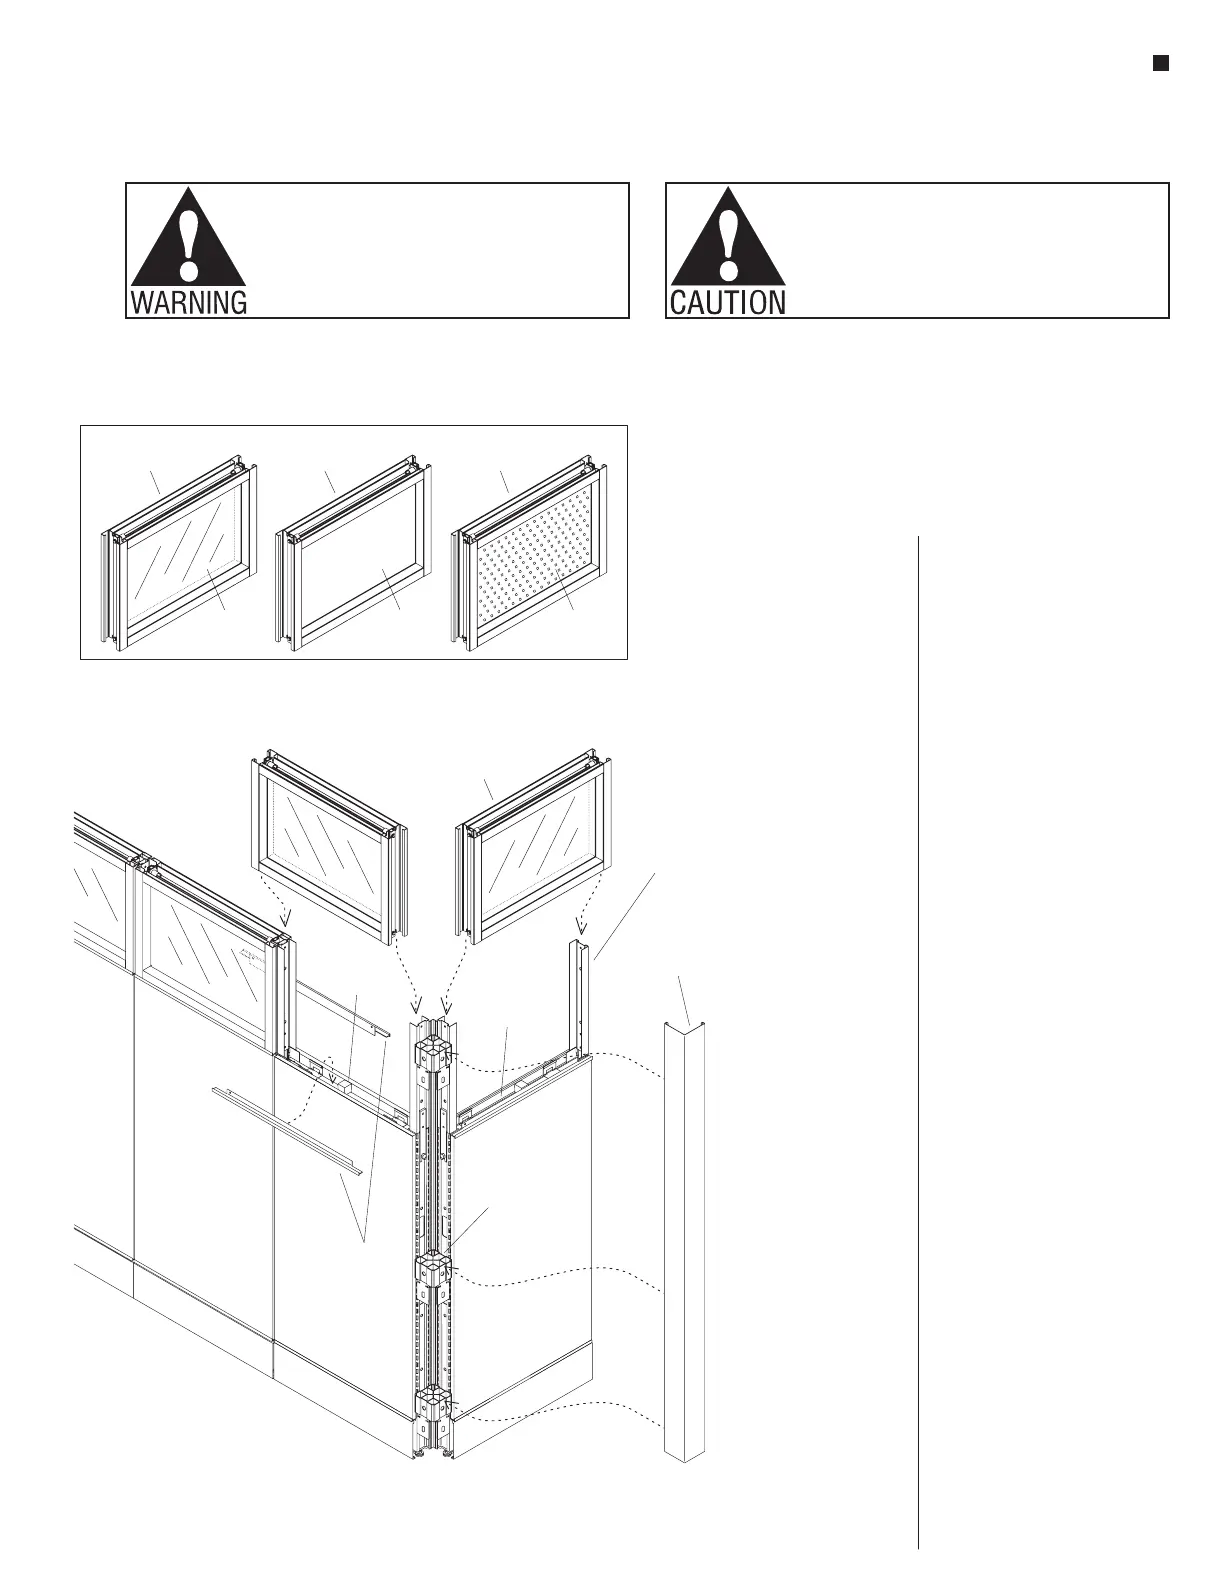
Figure 6-Stacking Sections (aluminum frame) -Full-Height Intersection
vertical
stacking
post
vertical
intersection
trim
(full-height)
top frame
stacking
trim rails
connector
block
panel
frame
square block
of foam
Detail D-Stacking Sections (aluminum frame) -Top Frames
top
frame
top
frame
top
frame
insert
(glass)
insert
(steel)
insert
(perforated steel)
Note: Stacking sections with
"top frame" (aluminum frame)
are constructed of a four-sided
aluminum frame and contain
either glass, steel or perforated
steel inserts pre-installed at the
factory. they use separate vertical
stacking posts to hold the "top
frame" in place (Detail D,
page 71).
Caution: Placement of a 1”
square block of foam (customer
supplied) on top of the lower
panel frame is recommended to
avoid pinching fingers. Position
foam blocks prior to sliding top
frames down into place. Remove
the foam block after the top frame
has been lowered into position.
1. Carefully slide the top frame down
between the vertical stacking
posts (Figure 6).
2. Stacking trim rails must fit
between the top of the lower panel
tile and the bottom of the top
frame. Lift the top frame up a few
inches then install two trim rails;
one on each side of the panel.
Ensure the large flange is oriented
toward the center of the panel.
Carefully lower the top frame
onto the foam blocks. Remove the
foam blocks to capture the trim
rails in place (Figure 6).
3. Ensure each top frame is installed
securely and even onto the lower
panels. Alignment along the top of
adjacent top frames must be even
for trim to fit properly (Figure 6).
Stacking Sections (aluminum
frame) - Full-Height Vertical
Intersection Trim Assembly
1. Hang the full-height vertical
intersection trim onto the
three connector blocks at the
intersection (Figure 6).