9
ASSEMBLY INFORMATION
EN 114
Check that crankshaft W rotates
smoothly.
NOTE: In the next illustrations of Par. 9.3 the
coupled crankcase half will be indicated with the
9.
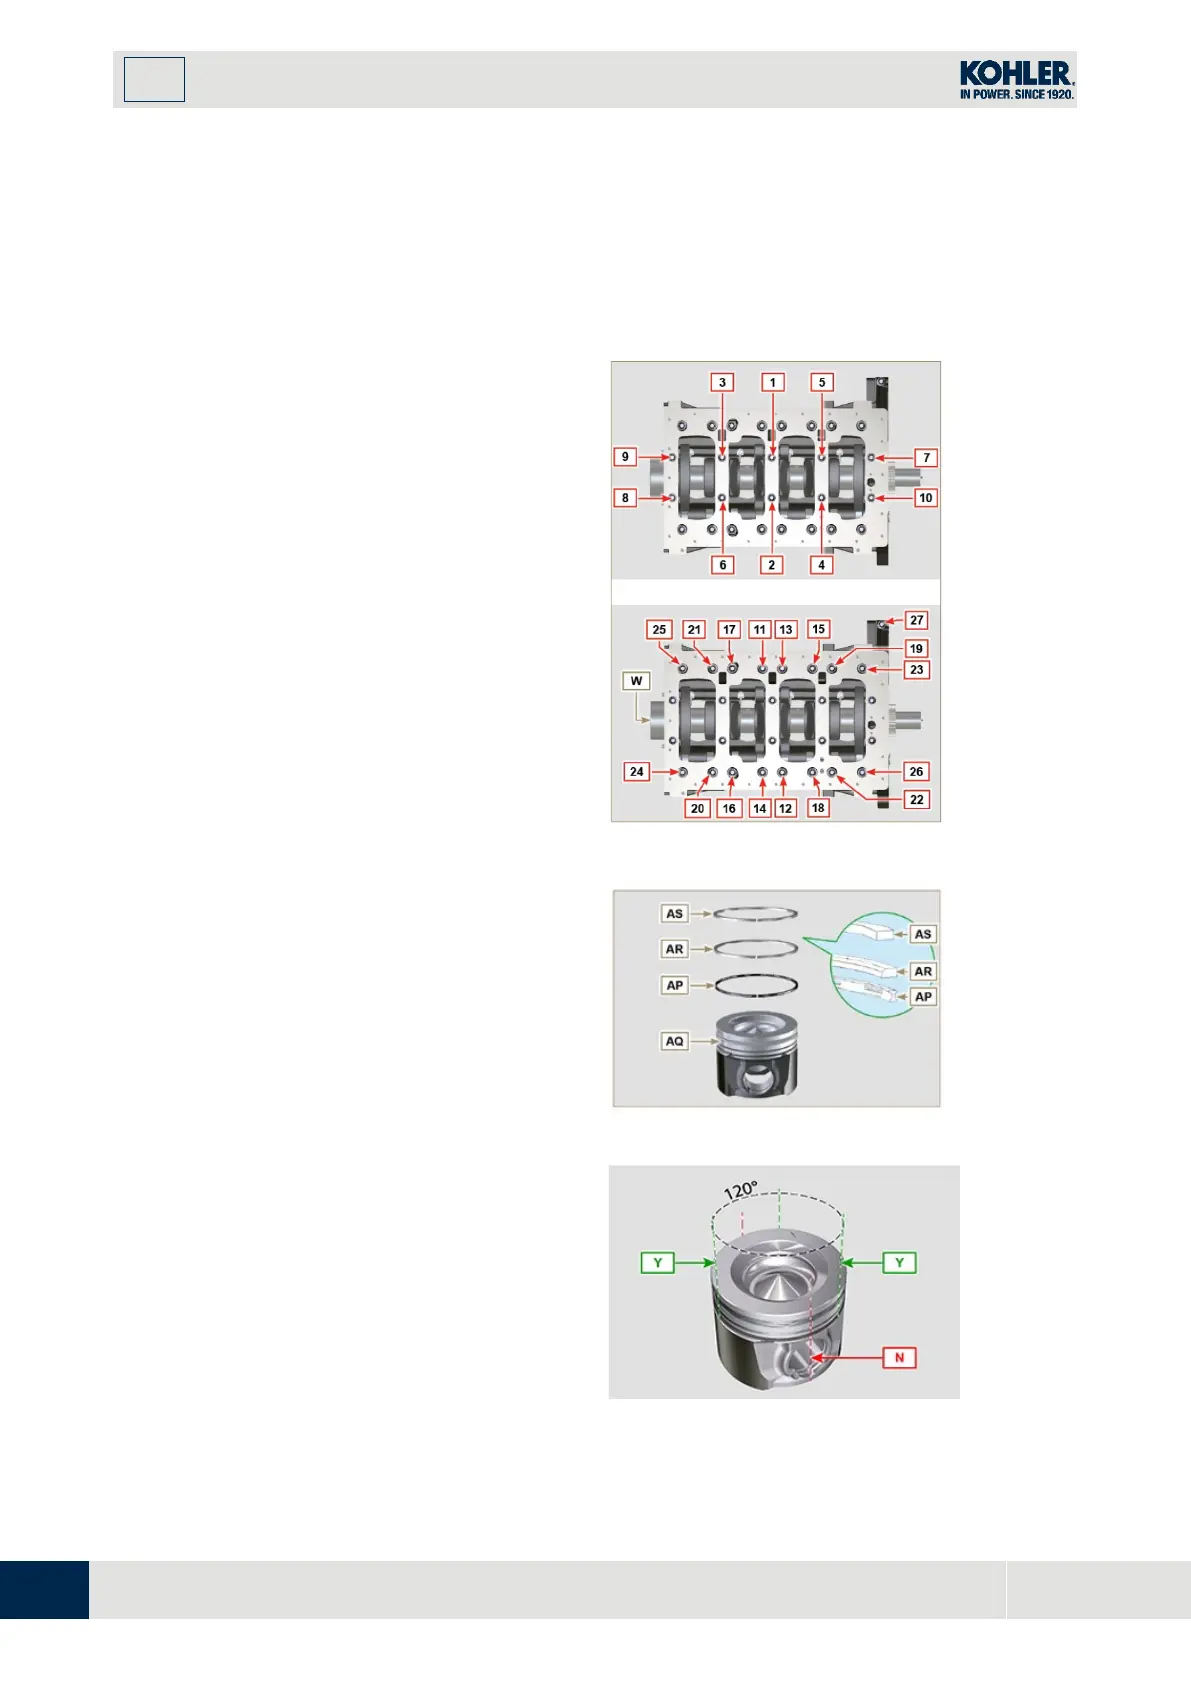
Tightening sequence for 3 cylinders
Tightening Screws Torx M12x1,25 (from
the n° 1 to the n° 10):
CYCLE 1 - with a torque of 40 Nm;
CYCLE 2 - with a torque of 70 Nm;
CYCLE 3 - with a torque of 120 Nm.
Tightening Screws Torx M8 (from the n° 11 to the
n° 27):
CYCLE 4 - with a torque of 20Nm;
CYCLE 5 - with a torque of 35 Nm;
10.
Perform the operations described in Par.
8.4.2.
11.
Check that crankshaft W rotates
smoothly.
Fig 9.10
9.3.7 Piston rings
1.
Perform the operations described in Par.
8.5.3.
2.
Put the scraper ring AP onto the pisto
n
AQ.
3.
Put the 2° seal ring AR on the piston AQ.
4.
Put the 1° seal ring AS onto the pisto
n
AQ.
Perform the operations described in Par.
8.5.4.
6.
Position the segment openings with a
120° angle between them (Y).
NOTE:
do not use the segment opening with the
pin hole (
N
)
7.
Lubricate the piston skirt and piston rings
with oil.
Fig 9.12

 Loading...


