2-9
bizhub PRESS C71cf
2
2.2 Job Printing
Step 1: Prepare Print Data
Prepare print data.
Observe the following precautions when printing data.
Available data size is up to 320 mm (width), 480 mm (length) / 12.60" (width), 18.90" (length). (1195 mm / 47.05" for
Banner)
- Minimum data size is 100 mm (width) e 148 mm (length) / 3.94" (width) × 5.83" (length). When printing levels
smaller than 100 mm (width) e 148 mm (length) / 3.94" (width) × 5.83" (length), allocate several lines or rows of
labels in a page.
- When printing crop marks, put them within the maximum print range mentioned above.
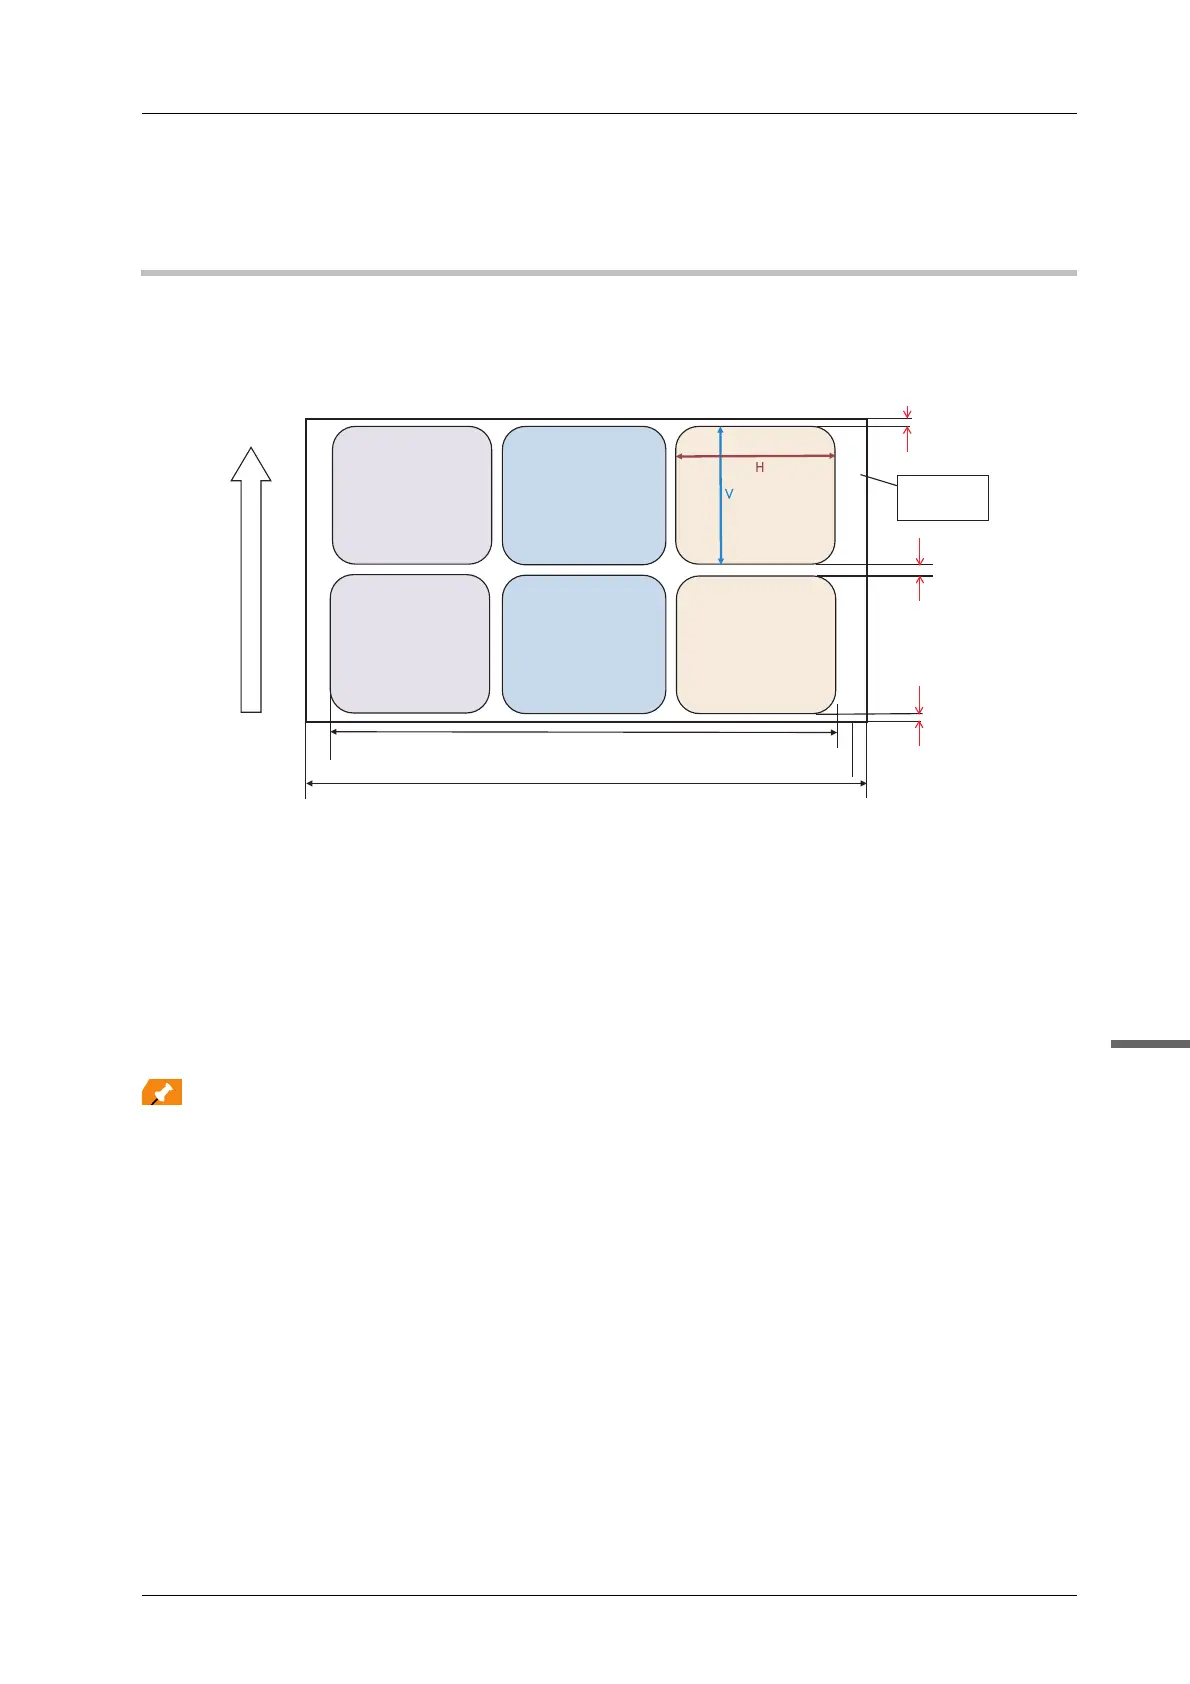
- Allocate labels so that the top (A) and bottom (C) margins are 0 mm / 0" respectively. When allocating several
lines in a page, ensure a 1 mm / 0.04" space (B) between each line.
- When printing several pages, a 1 mm/0.04" space is automatically inserted between each page.
- If you need margins (B) wider than 1 mm / 0.04" between each line of data, adjust the margins so that the total
of the top margin (A), bottom margin (C), and 1 mm / 0.04" page margin (to be inserted automatically) becomes
the value of the margin (B).
- For example: When obtaining a 5 mm / 0.2" margin for margin B, set 2 mm/ 0.08" margins for the top (A) and
bottom (C).
Top margin (A): 2 mm + Bottom margin (C): 2 mm + 1 mm (to be inserted automatically) = Margin between data
(B): 5 mm / Top margin (A): 0.08" + Bottom margin (C): 0.08" + 0.04" (to be inserted automatically) = Margin
between data (B): 0.2"
Feeding direction
Printable range 320 mm/12.99"
Paper width 330 mm/12.99"
C = 0 mm
B = 1 mm
A = 0 mm
Page area