2-11
bizhub PRESS C71cf
2
E Click [Print].
The job is sent, and saved on the HDD.
Step 3: Print Test Pages
Print test pages from the [Hold Job] screen.
The procedure for stopping the printed image near the delivering section and checking the image immediately.
- If you want to combine several jobs to print test pages, select the jobs using the [Call Insert Job] tab in the [Image
Page Edit] screen, and then copy the pages or delete any unnecessary pages in the [Image Page Edit] screen to
edit the pages for test printing. For details, refer to the HTML User's Guide.
- If the accuracy of a print position is not particularly important, you can shorten the distance to reduce
consumption. For details, refer to the HTML User's Guide.
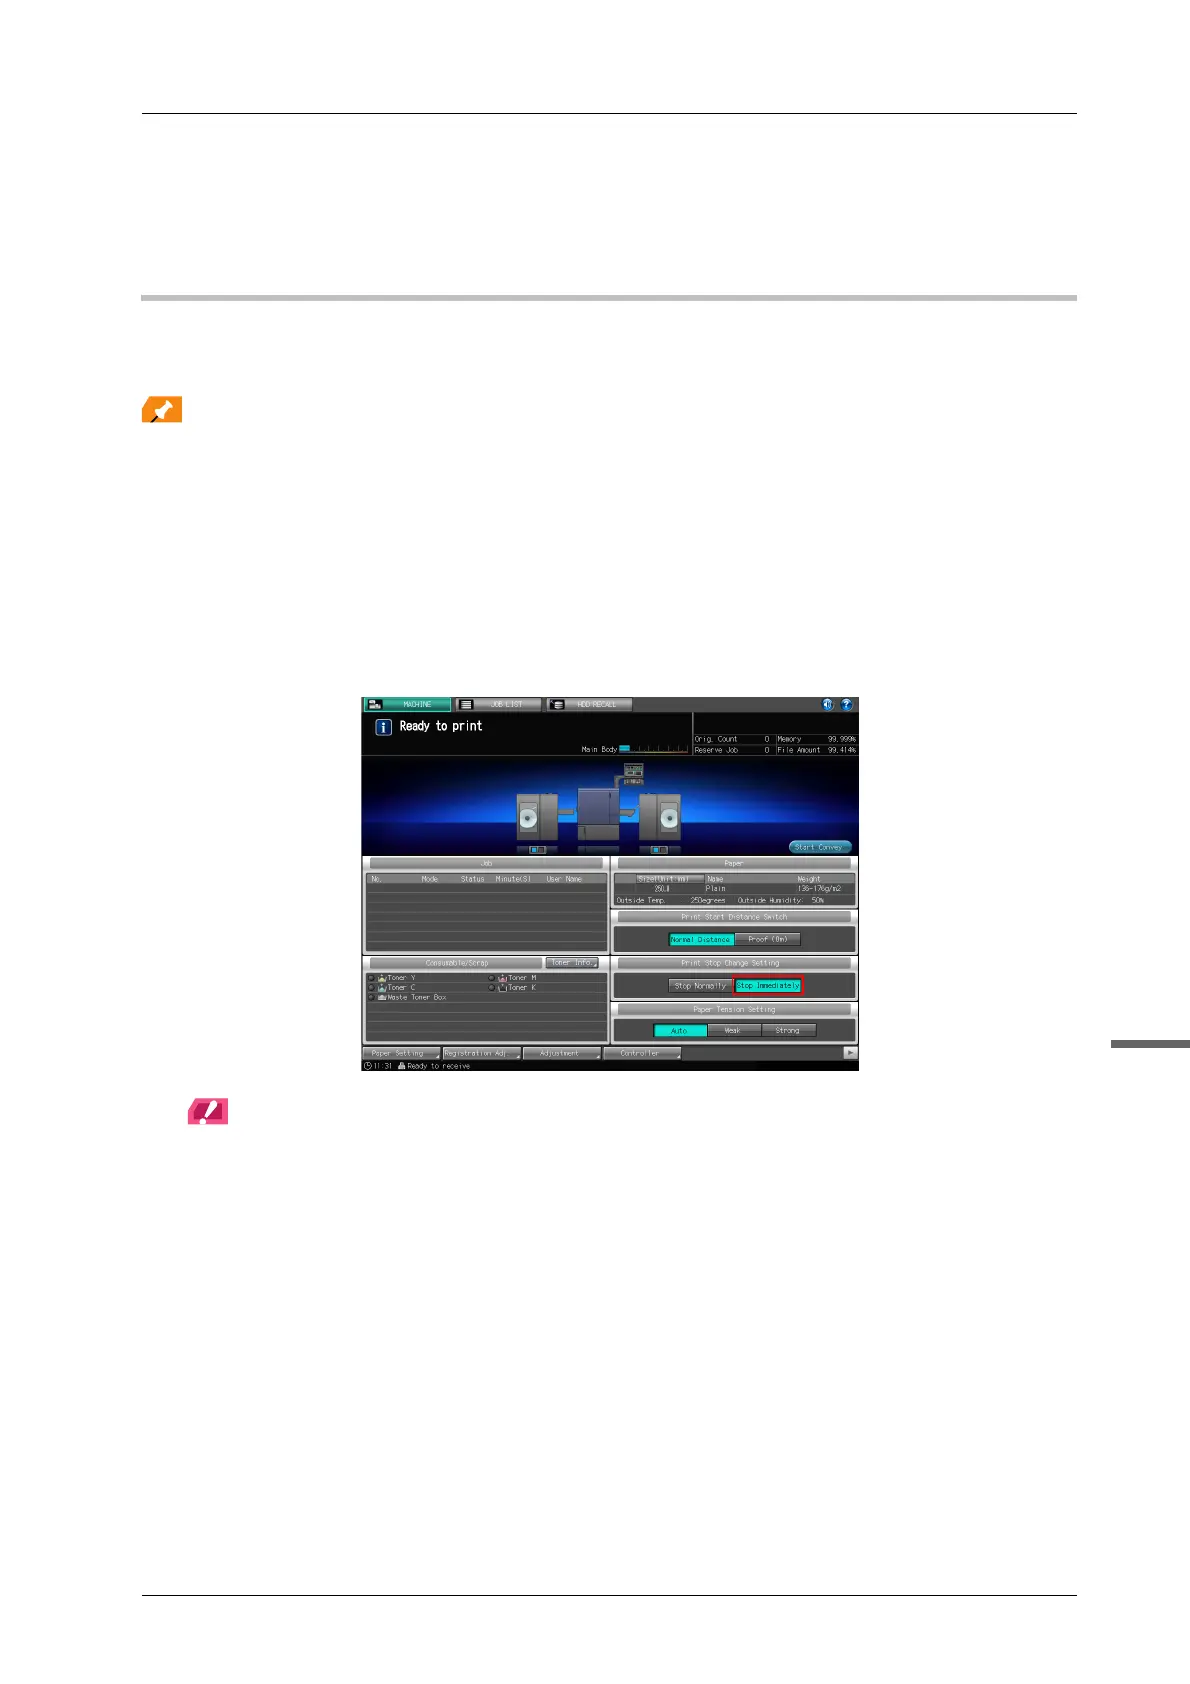
A Press [Stop Immediately] for [Print Stop Change Setting] on the [MACHINE] screen on
the touch panel of the main body.
- If [Stop Immediately] is selected, printed image stops near the delivering section.
- If [Stop Normally] is selected, printed image is wound on Roll Winder RW-201 and stops.
NOTICE
[Print Stop Change Setting] is back to [Stop Normally] when the sub power switch of the main body is turned
OFF.