EasyManuals Logo

kruss DSA100 User Manual

kruss DSA100
115 pages
To Next Page IconTo Next Page
To Previous Page IconTo Previous Page
Page #97 background imageLoading...
Page #97 background image
Appendix page 95
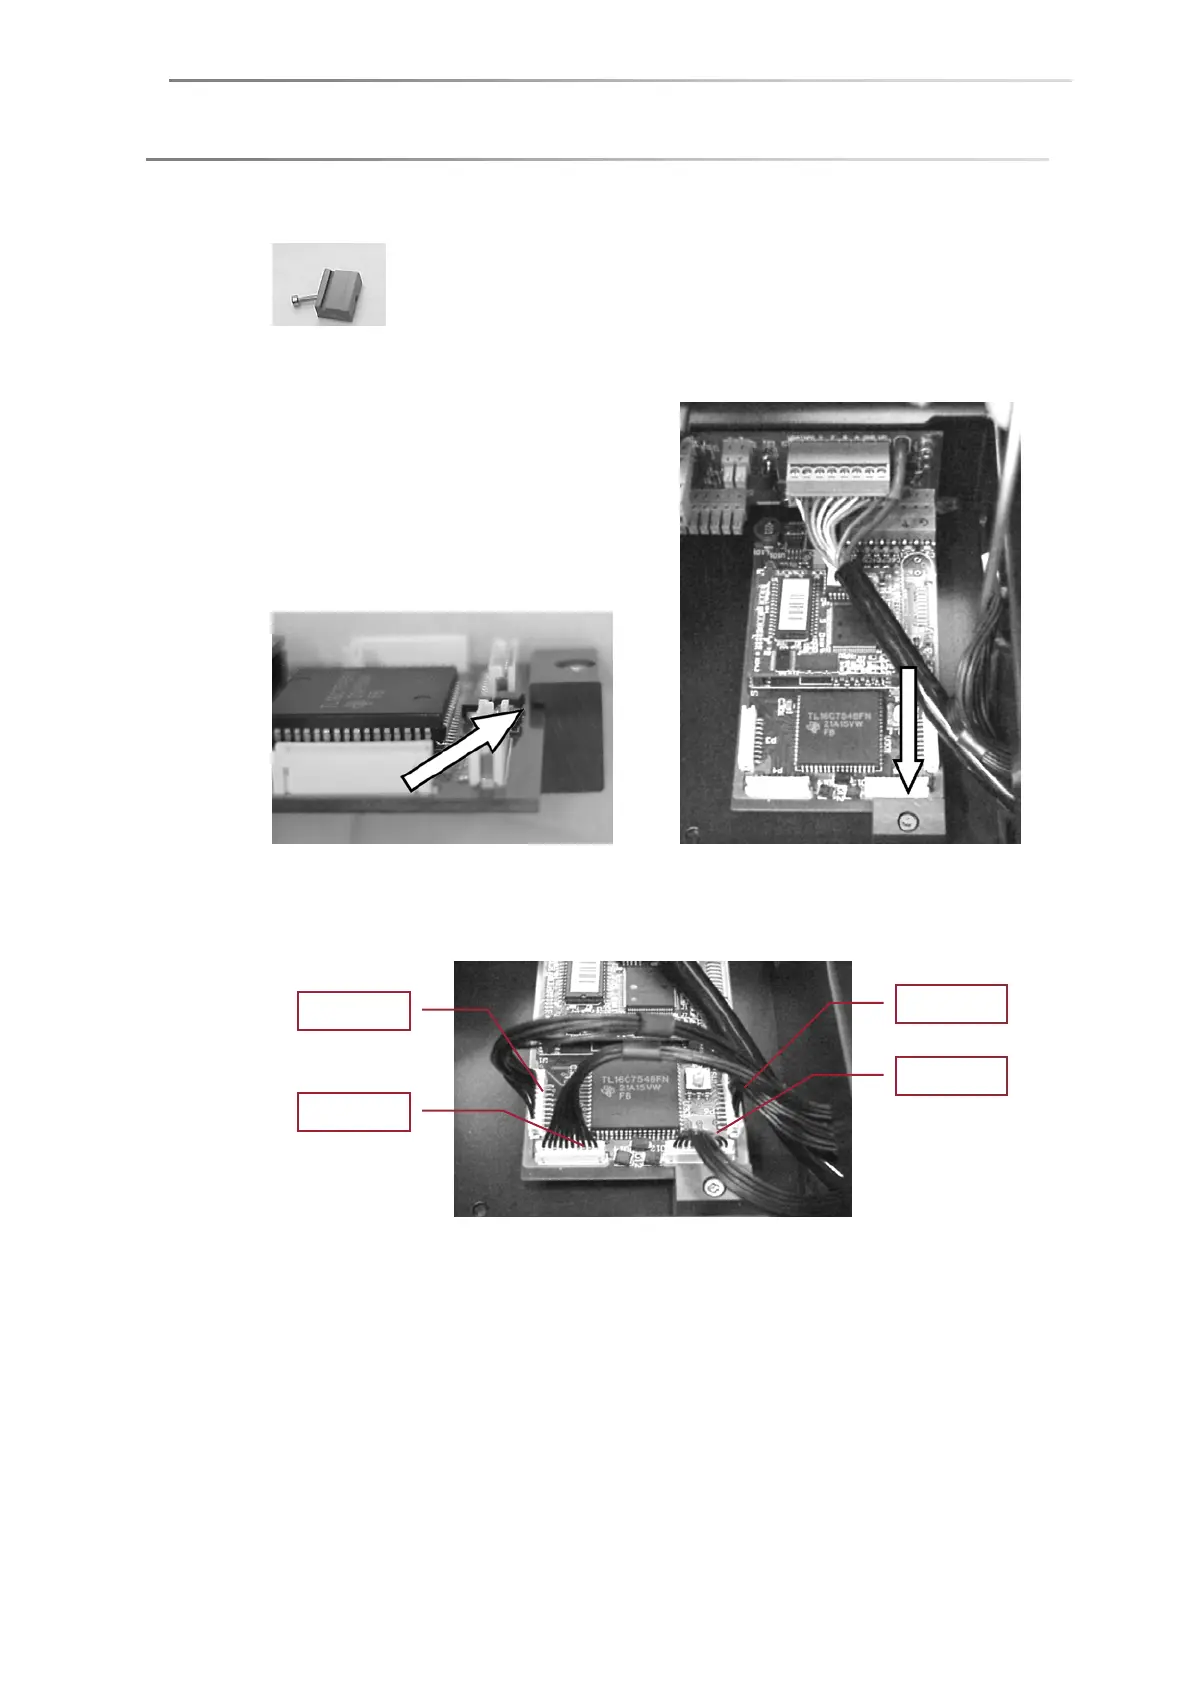
8. Fix the supporting block...
...with the screw to the bottom of the compartment so that the edge of the
board is situated in the gap of the supporting block.
9. Occupy the sockets of the installed board with the four plugs coming from the
connecting plate. The connections for axes 1 to 4 are plugged into the board in
ascending order from right to left.
10. Reverse the steps 2 - 4 to reassemble the cover and to put the instrument into
an operational state.
Axis 1
Axis 2
Axis 3
Axis 4

Table of Contents

Questions and Answers:

Question and Answer IconNeed help?

Do you have a question about the kruss DSA100 and is the answer not in the manual?

kruss DSA100 Specifications

General IconGeneral
Brandkruss
ModelDSA100
CategoryMeasuring Instruments
LanguageEnglish

Related product manuals