EasyManuals Logo

Labconco Logic+ A2 User Manual

Labconco Logic+ A2
201 pages
To Next Page IconTo Next Page
To Previous Page IconTo Previous Page
Page #119 background imageLoading...
Page #119 background image
119
7. Double check all power has been removed from the biosafety cabinet.
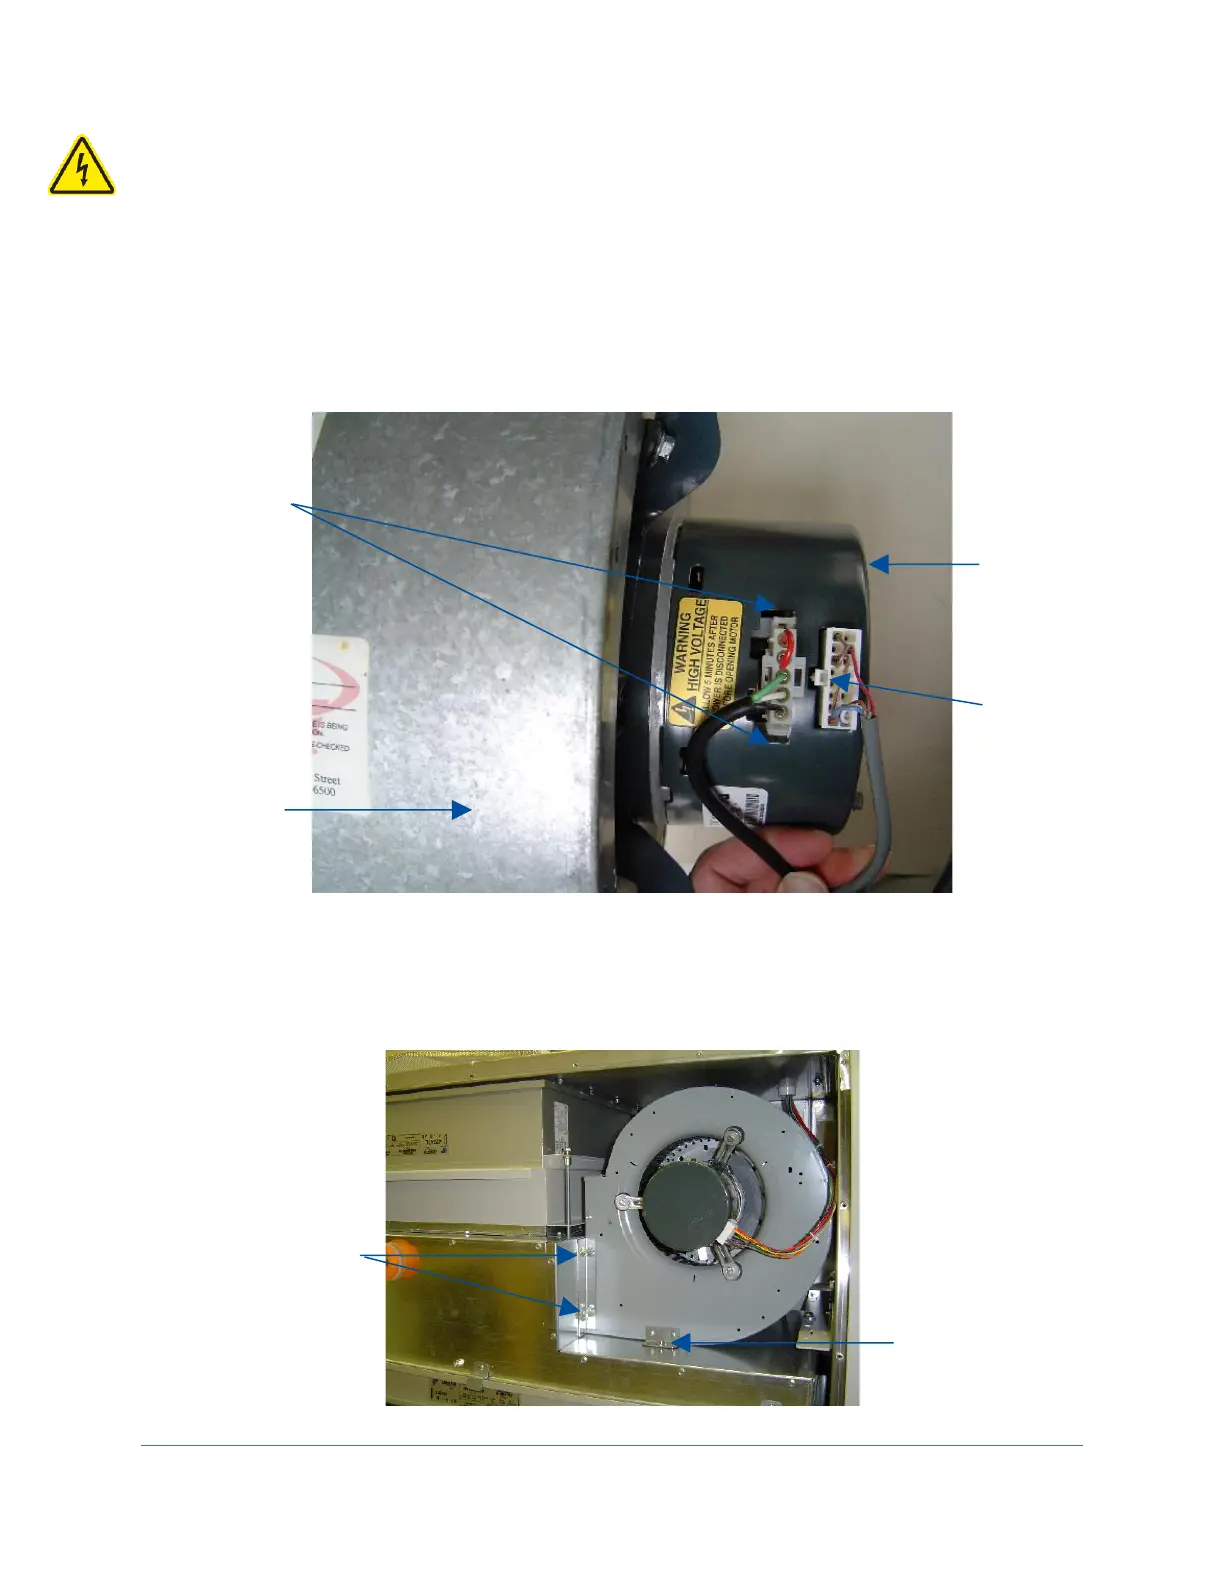
8. Disconnect the two (2) wire harness connections from the motor. The 5-pin
connector, located closest to the blower, is released by depressing the locking
tabs on either side of the connector. The 16-pin data connector is released by
depressing the single locking tab in the center of the connector, on the side of the
connector closest to the blower. See Figure 12-29.
9. Using a 1/2-inch socket or wrench, remove the two upper and one lower
mounting bolts. See Figure 12-30.
Figure 12-29
5-pin
Connector
Locking Tabs
16-pin
Connector
Locking Tab
Motor
Blower
Figure 12-30
Lower
Mounting Bolt
Upper
Mounting Bolts

Table of Contents

Questions and Answers:

Question and Answer IconNeed help?

Do you have a question about the Labconco Logic+ A2 and is the answer not in the manual?

Labconco Logic+ A2 Specifications

General IconGeneral
BrandLabconco
ModelLogic+ A2
CategoryLaboratory Equipment
LanguageEnglish

Related product manuals