131
LED Lamp Socket Cap Replacement
If a lamp socket cap for the LED lamps is damaged and needs to be replaced, follow
these instructions.
1. Unplug the cabinet from all electrical power.
2. Remove the front dress panel as described earlier in Removal of External Dress
Panels.
3. Remove the LED lamps from the socket caps as described in the previous
section Changing the LED the Lamps.
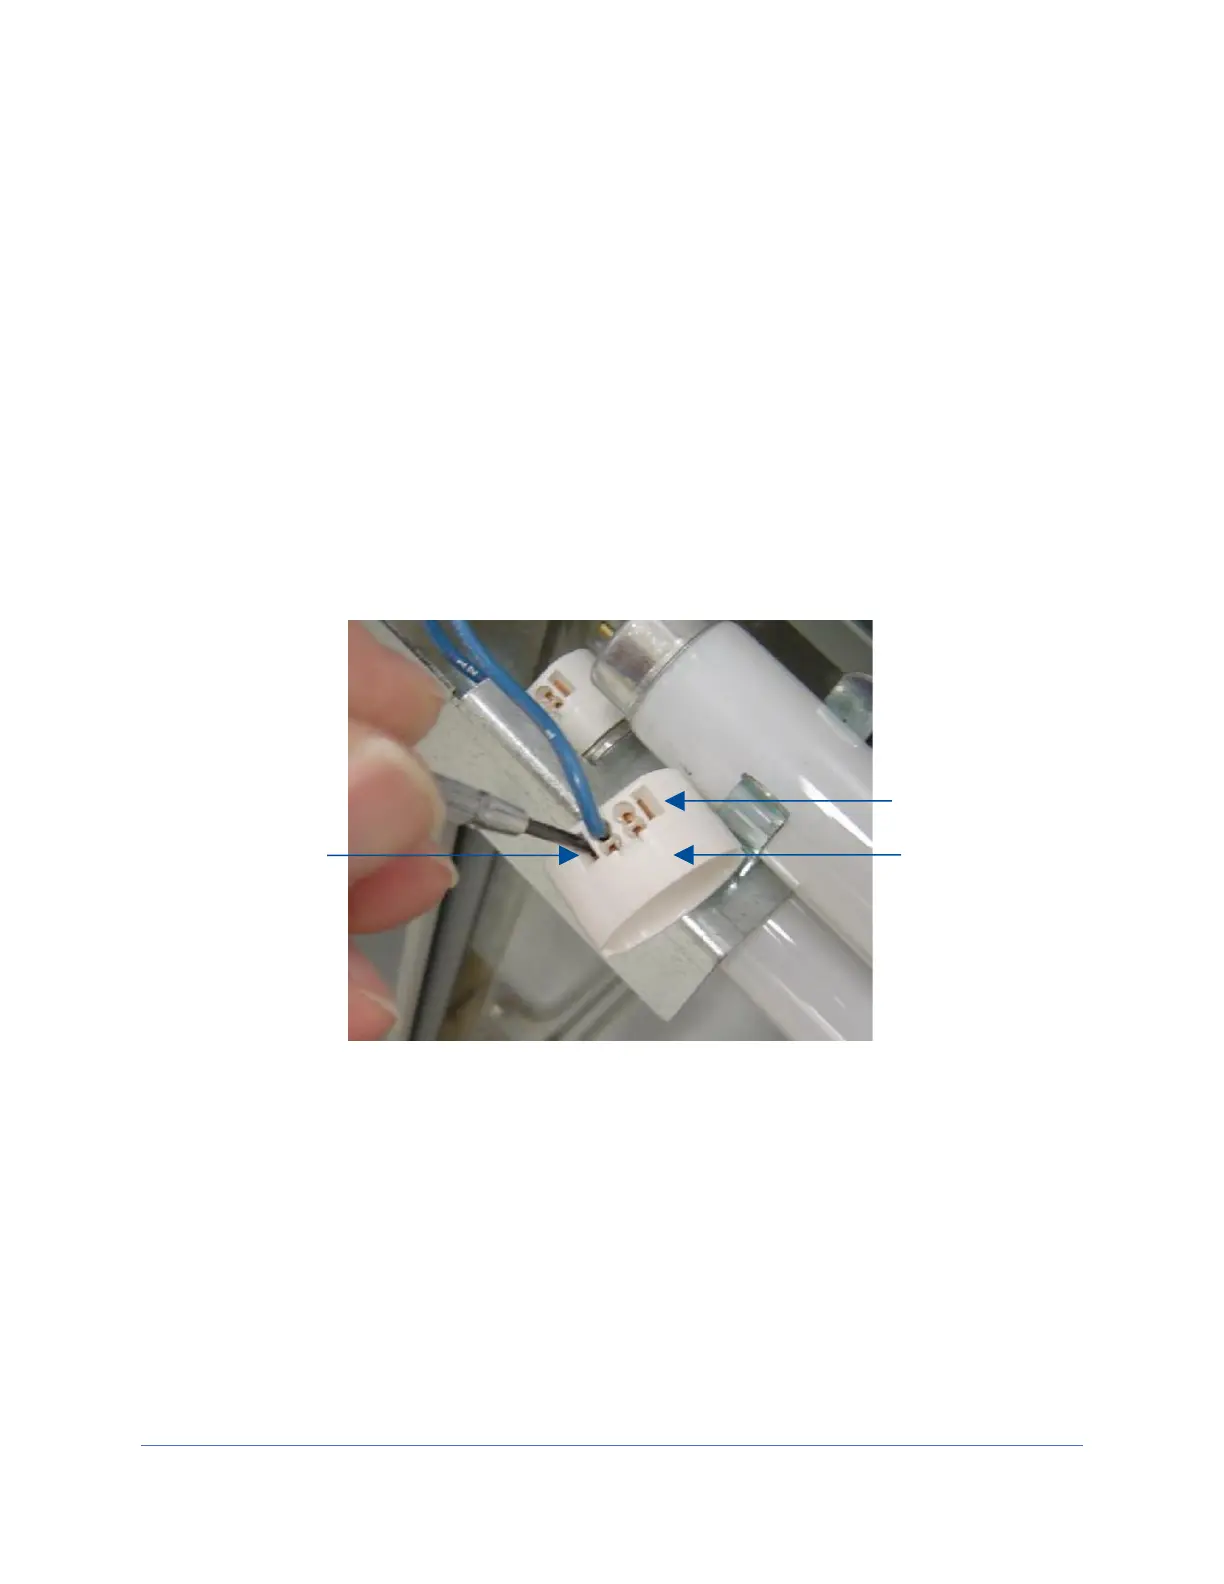
4. To replace a socket cap, insert a small straight bladed screwdriver into the
socket near the lamp wire, as shown in Figure 12-45.
5. Once wires removed from the socket, the socket cap is free to be discarded, and
the new socket reassembled.
Reinstallation notes:
1. Be sure to press each wire into the holes on the new LED socket cap until they
are locked in place. Try pulling each wire back out after inserted, if they will not
come out, they are inserted correctly.