62
Type B2 Supply HEPA Filter Leak Test
During this test the supply HEPA filter will be challenged and scanned to check for
leaks. This section describes how to access and test the supply HEPA filter on a Type
B2 biosafety cabinet. The aerosol generator and photometer should be prepared at this
point as described in the preparation steps listed in the previous section.
1. Raise the glass sash as high as it will go.
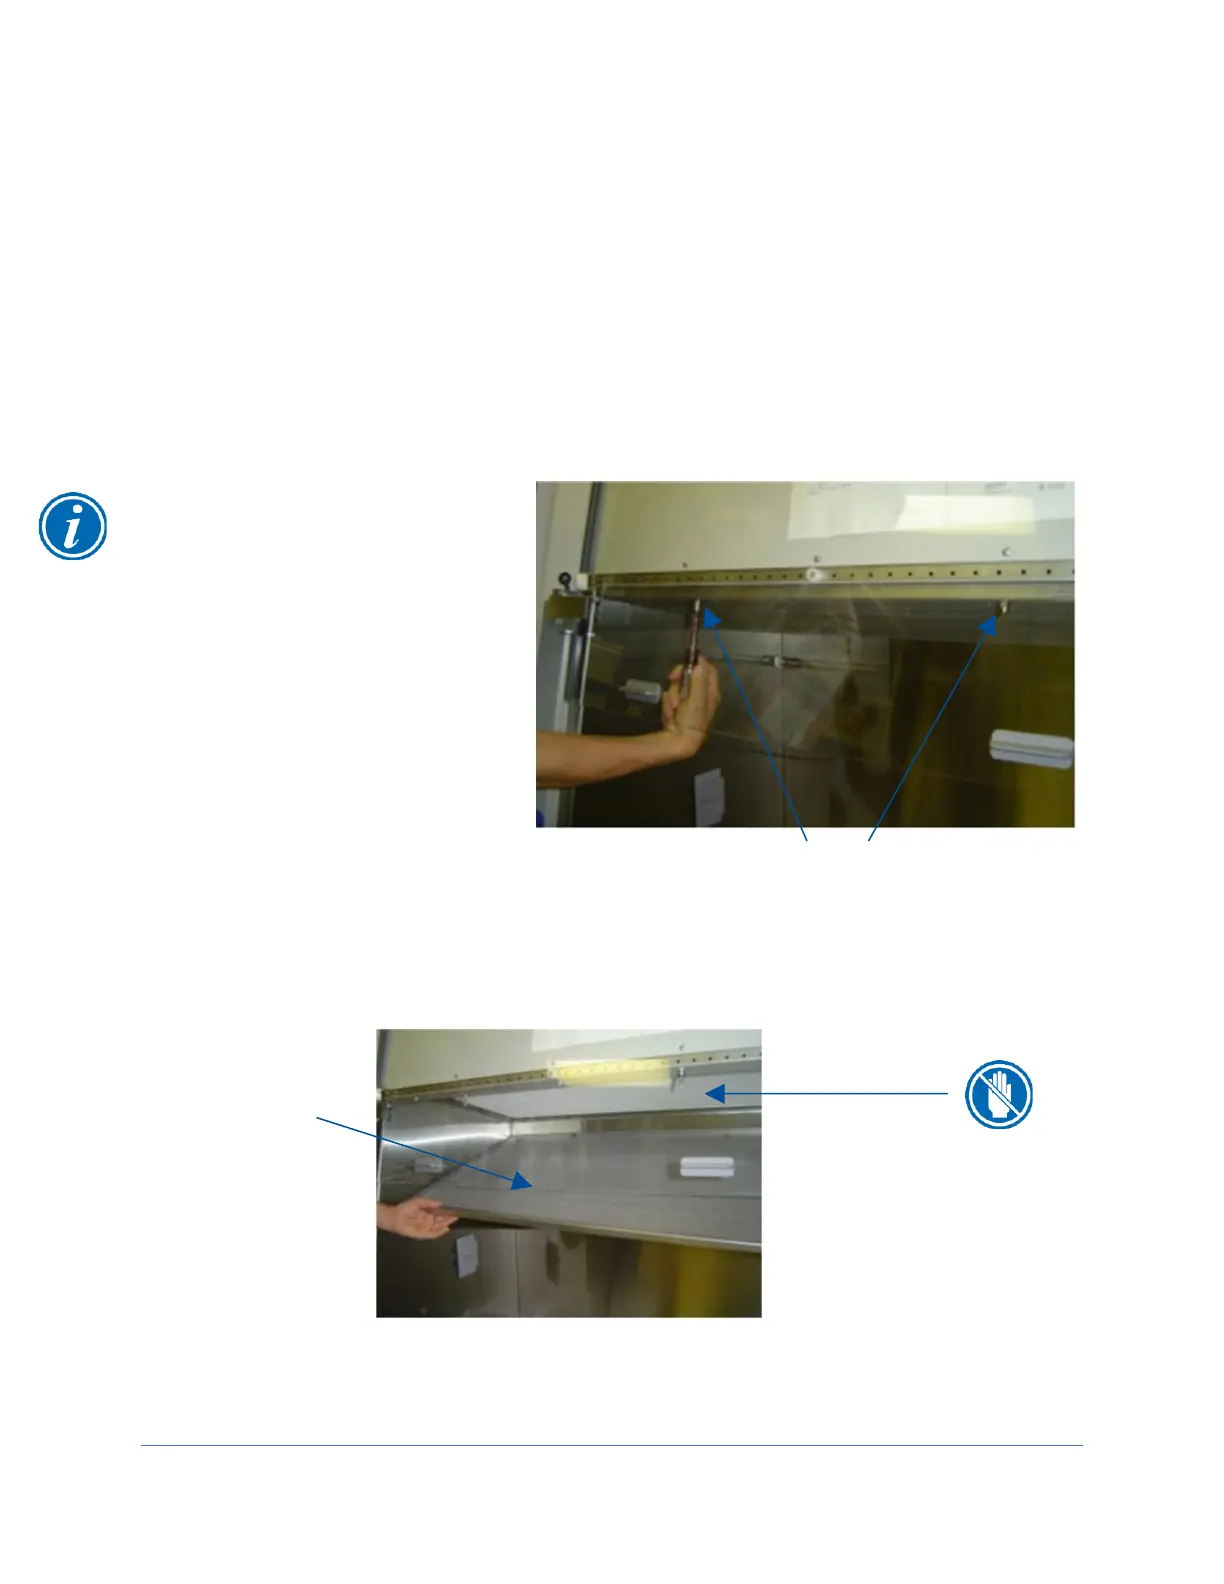
2. Using a 7/16 inch nut driver or socket and ratchet, remove the two acorn nuts
along the front of the diffuser. See Figure 10-11. Note: Dress Panel and LED
lamps removed for clarity.
3. Lower the front edge of the diffuser until it clears the bottom of the sash, then pull
the diffuser straight out of the biosafety cabinet. See Figure 10-12.
4. The supply HEPA filter is now ready to be scanned. Set the photometer sampling
valve to “DOWNSTREAM”. Ensure proper vacuum at the sampling nozzle.
Note: The diffuser acorn nuts
are secured to the studs with a
removable thread locking
compound to prevent them from
vibrating loose during shipment.
There may be some resistance
the first time the nuts are
removed; this is normal. No
additional thread locking
compound need be applied to
these acorn nuts unless the unit
is being prepared for shipment.