128
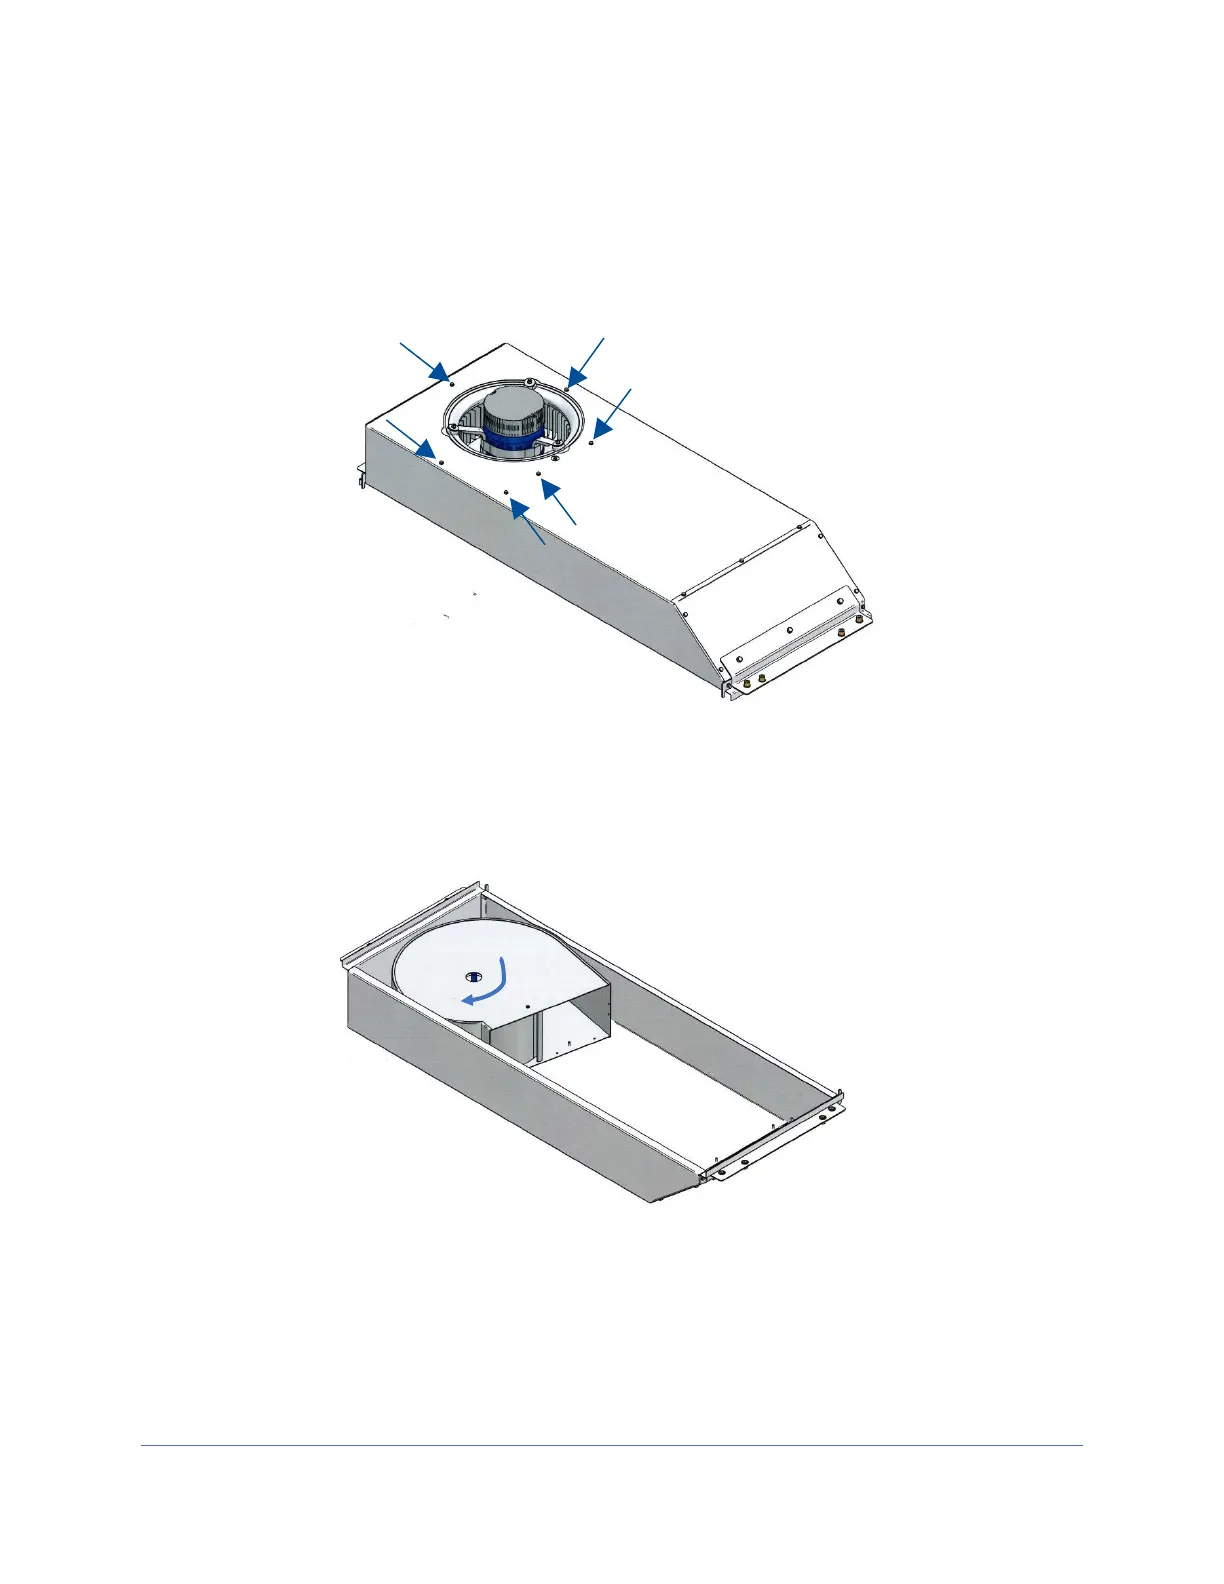
10. The exhaust blower/motor assembly may be removed from the exhaust plenum
at this point by removing the several thread-cutting, hex head screws located on
the motor side of the exhaust plenum. Use a 5/16-inch socket or nut driver to
remove these screws. The blower/motor assembly must be rotated
approximately 45 degrees to orient it correctly for removal.
11. The blower/motor assembly must be rotated approximately 45 degrees to orient it
correctly for removal, as shown in Figure 12-41b.
Reinstallation Notes:
1. When upward pressure begins to be applied onto the exhaust HEPA, only tighten
until the filter is secure and the filter gasket has 50% compression. Do not
overtighten the bolts.