174
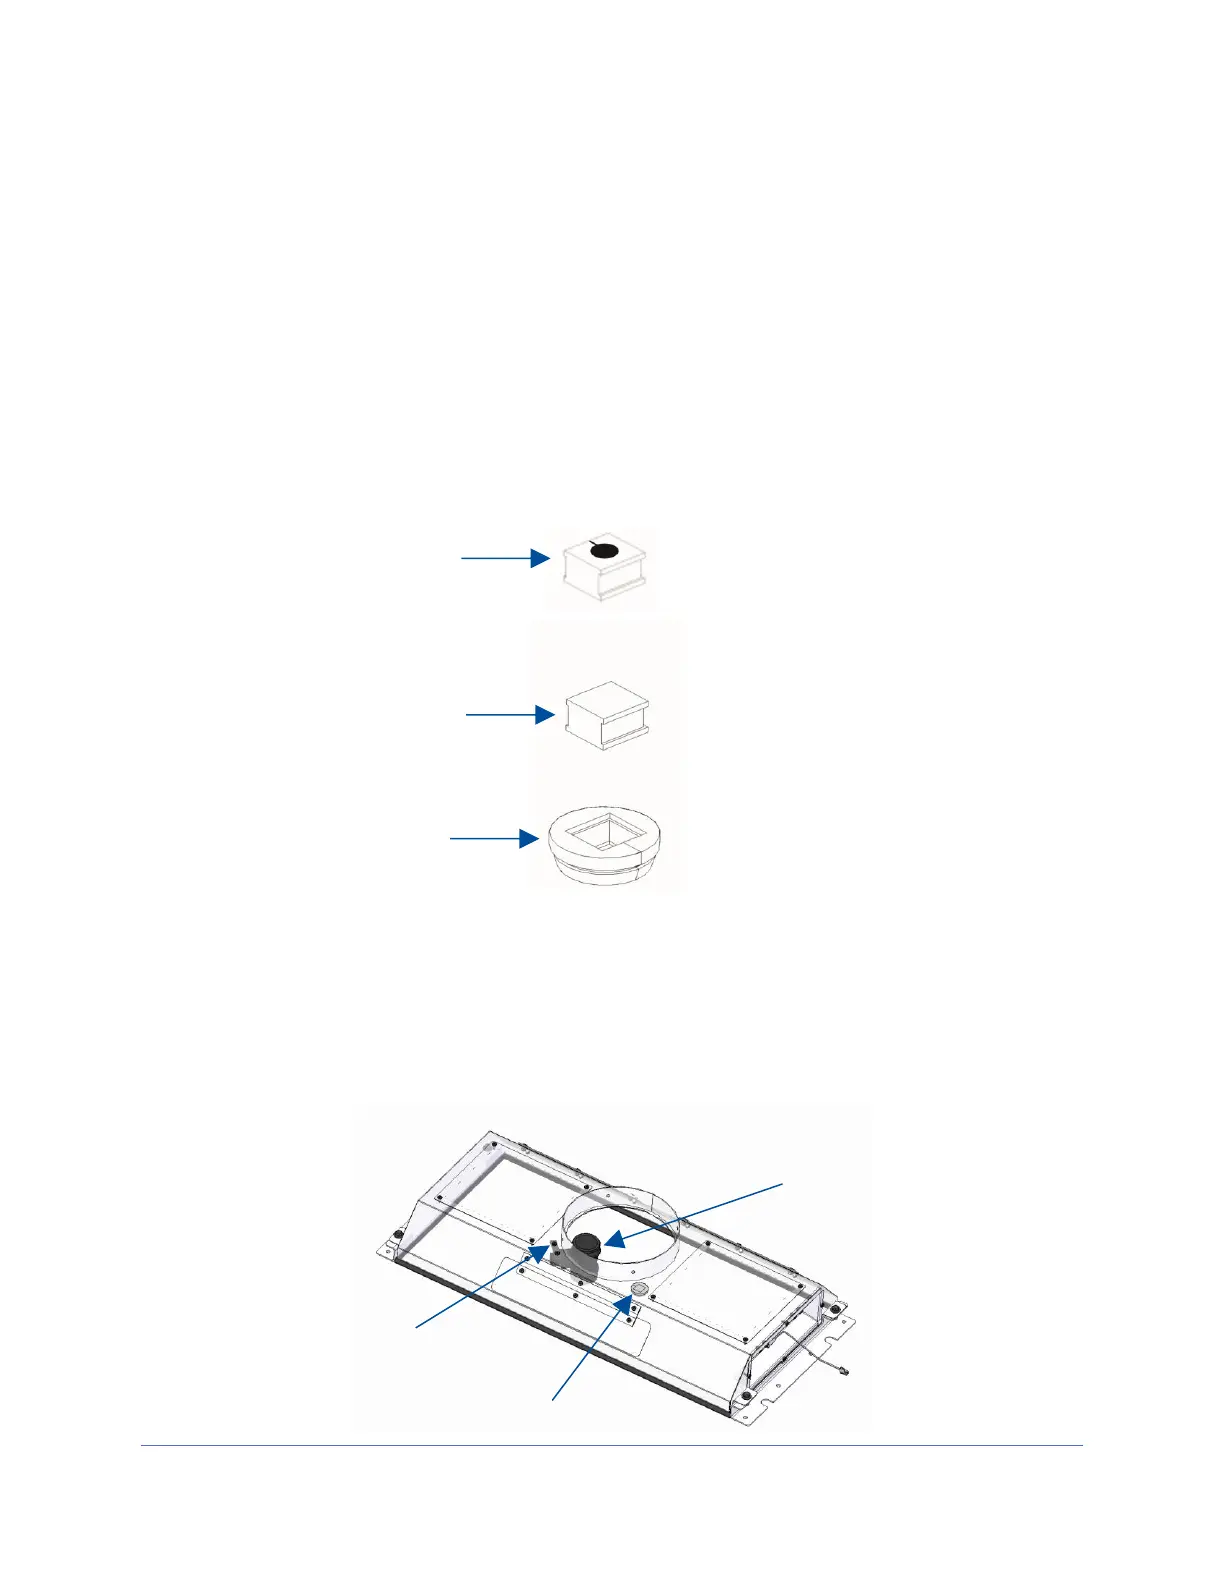
3. New installation only – Gently remove the cable sealing grommet, located on the
top of the canopy (Type A2) or exhaust housing (Type C1). Remove the square
solid plug from inside the sealing grommet. Locate the replacement plug in the
airflow sensor kit. Push the cable from the airflow sensor over the slit in the
replacement plug. Gauge the location of the replacement plug on the cord based
on where the sensor will sit when installed, and the pass through cutout for the
grommet in the sheetmetal. Install the sealing grommet over the replacement
plug, noting the keyed orientation between the grommet and the plug. See
Figure 18-6 to identify the grommet and plugs described. Note – after becoming
familiar with the sealing grommet and replacement plug installation on the cable,
remove the grommet and plug until after Step 4.
4. For new installation, pry out the two hole plugs in the top of the canopy (A2) or
exhaust housing (C1). Working through the duct stub opening, or one of the
service panel openings, place the airflow sensor as shown in Figure 18-7.
Secure the sensor with two attachment screws supplied in the kit.