Maintenance
12-31
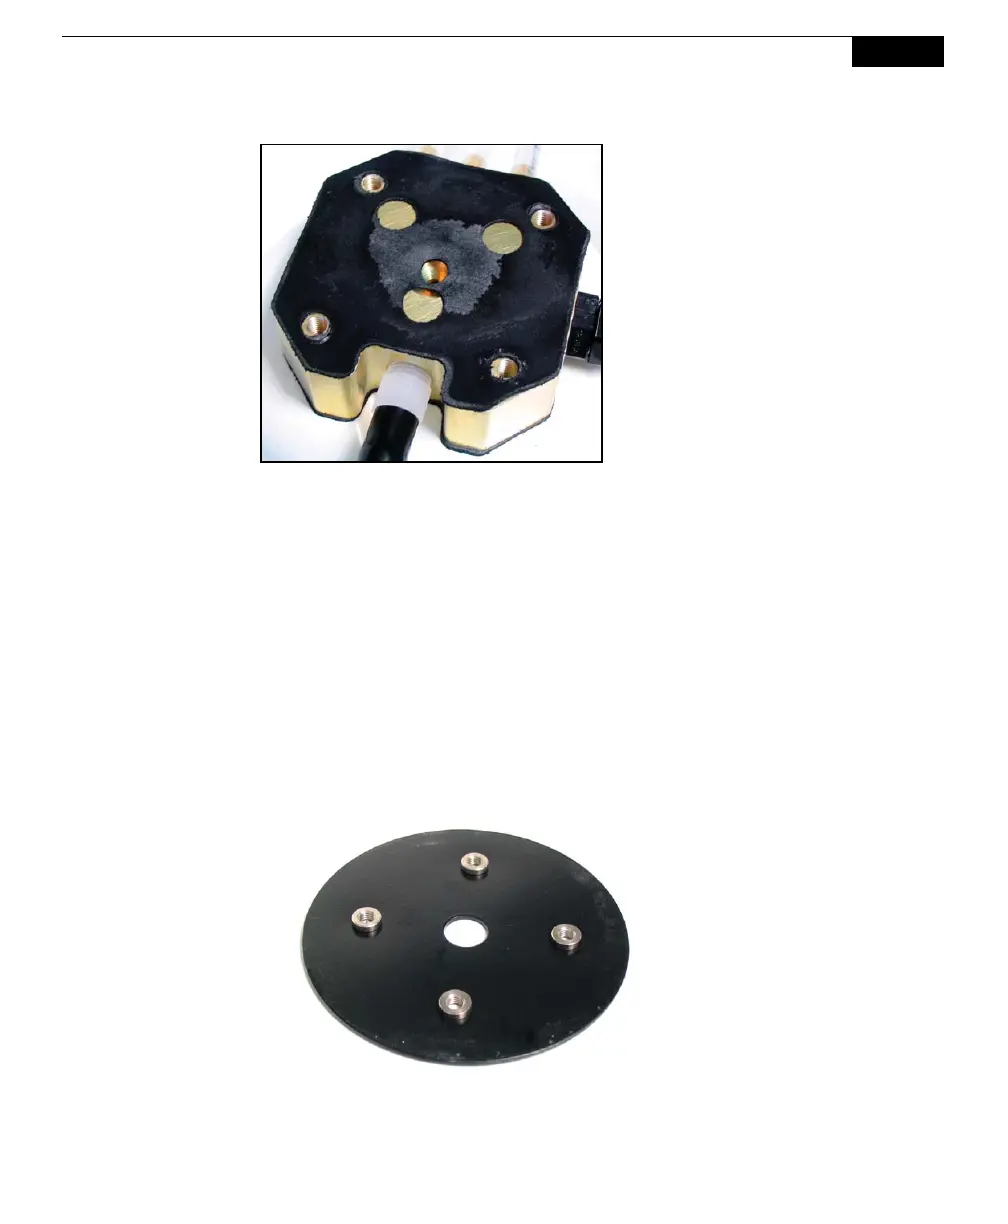
Align the bellows and two attached plates with the holes in the manifold
(above). Note that there is a seam on the bottom edge of the bellows. Before
tightening the screws, align the seam in the bellows with one of the long
edges of the manifold and attach with the four screws removed in Step 9
above. In other words, do not align the seam in the bellows with any of the
corners of the manifold. Make sure that the bellows remains centered with
respect to the two clamping plates.
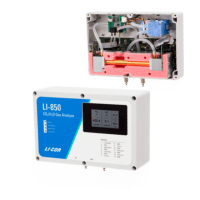
13. Insert the remaining black plate into the top of the bellows as shown in Step
11. Note that the screw inserts should be on the underside of the plate (inserts
shown below). Apply a film of silicone lubricant around the top edge of the
bellows.
The screw inserts are on
the underside of the top
plate, and face
downward, into the
center of the bellows.
14. Align the screw holes in the clamping plate with the tubing and control cables
attached to the manifold, as shown below. Reattach the bellows mounting
plate removed in Step 7.



 To Next Page