Installation Manual Liebert Hipulse E Chapter 2 - Installation Procedure
Single or '1+N' UPS System Installation (Electrical)
(07/04) Page 2-7
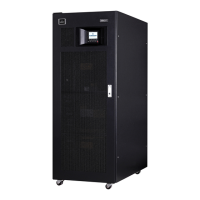
2.1.9 Cabling procedure for 400 kVA UPS with 6 pulse rectifier (or 12 pulse rectifier)
Important
The operations described in this section must be performed by authorised electricians or qualified technical
personnel. If you have any difficulties do not hesitate to contact our Customer Service & Support department at
the address given at the beginning of this manual.
Once the equipment is positioned and prior to fixing the equipment in place, it is necessary to make the electrical and
auxiliary connections between the two cabinets that make up the UPS.
Electrical power connections and auxiliary connections between the two cabinets must be made from the front of the
UPS.
Refer to the drawings provided in Chapter 6 for guidance during connection.
Power connections between the rectifier cabinet and the inverter cabinet
1. Open the inside doors to access the cabinet connection bars.
2. Connect the copper plaits supplied coming out of transformer T1 in the inverter cabinet to the connection bars
located alongside the right-hand rear upright of the static switch cabinet. First connect plait 18 from ‘T1-c’ to
terminal I3 of the static switch unit; next connect plait 17 from ‘T1-b’ to terminal I2, then connect plait 16 from
‘T1-a’ to terminal I1 of the static switch unit, and finally connect plait 25 from ‘T1-N’ to the Neutral bar. Perform
the connection in the order specified.
3. Connect the prepared plaits (+/-) already supplied coming out of the UPS rectifier bridge to the inverter cabinet
connection bar. Be careful to comply with connection polarity.
Note: Make all connections with a torque of 45 Nm for M12 bolts.
Auxiliary connections between the rectifier cabinet and the inverter cabinet
Open the inner door on the left side of the inverter cabinet and make the following auxiliary connections:
4. Connect the ribbon cables already fitted in the inverter cabinet to the respective connectors in the rectifier cabinet.
The ribbon cable W20 must be connected to X47, while the ribbon cable W21 must be connected to X48. Respect
the indications of these connections rigorously.
5. Connect the loose lead cables in the inverter cabinet to their respective connectors in the rectifier cabinet. The
loose lead cables X39 is connected to 12 way connector socket; repeat the same operation for the loose lead cable
X40, connecting to the 4 way connector socket.
Once the equipment has been finally positioned and secured, connect the power cables as described in the following
procedure.
Study the connection diagram as illustrated in Chapter 6.
6. Verify that the UPS equipment is totally isolated from its external power source and all the UPS power isolators
are open. Check that these supplies are electrically isolated, and post any necessary warning signs to prevent
their inadvertent operation.
7. Open the door(s) to the UPS cabinet and remove the lower protective cover to gain access to the connections
bars.
8. Connect the safety earth and any necessary bonding earth cables to the copper earth busbar located on the floor
of the equipment below the power connections.
The safety earth cable must be connected to the earth busbar and bonded to each rack\cabinet in the system.
Note: The earthing and neutral bonding arrangement must be in accordance with local and national codes
practice.