2. Installation MX-FR Series Modular Matrix Frames – User's Manual 11
MX-FR80R and MX-FR65R Frames
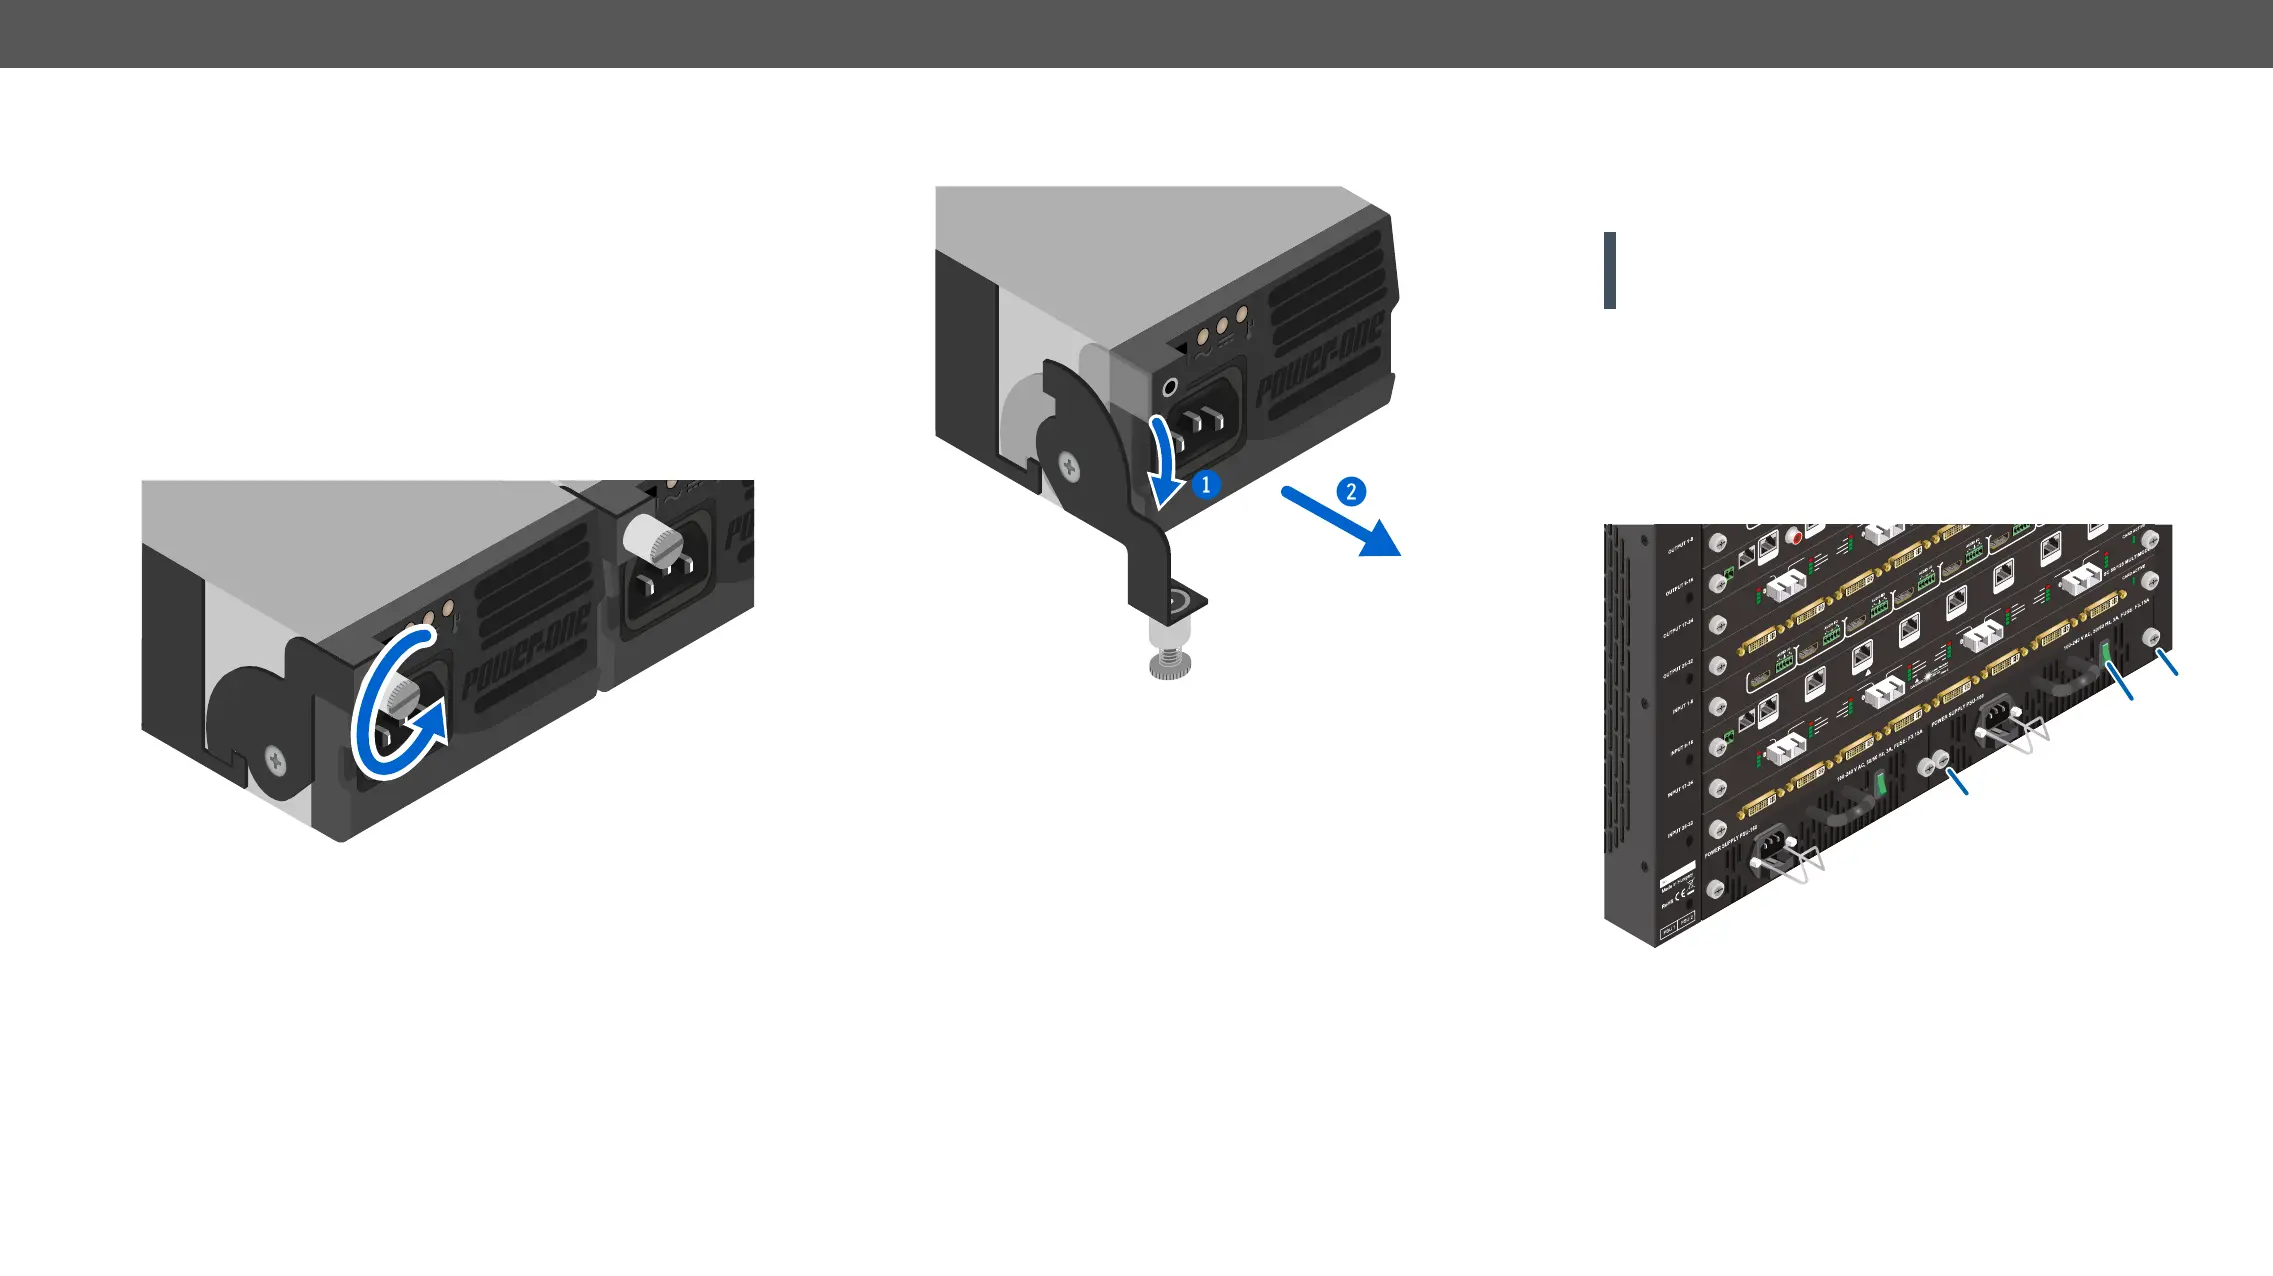
The PSU of these frames is hot-swappable, thus, you do not have to
switch off the matrix to replace or install a PSU.
Three slots are available for the FNP-850-12RG PSUs. The load depend
is to have two PSUs in use continuously. Thus, the third PSU can be
replaced safely:
Step 1. Unplug the power cord from the AC socket, then from the
desired PSU.
Step 2. Loose the xing screw
screwdriver.
Step 3. Pull down the lever (
1
), then pull out (
2
) the PSU unit by
Step 4. To install another PSU: insert the unit in the slot, and push it
until it stops.
Step 5.
Step 6. Plug the power cord to the PSU, then to the AC socket.
MX-FR33R Frame
Two types of PSUs exist for MX-FR33R frames. Both can supply the
frame, but the two units are not interchangeable with each other. See
more details in the Redundant Power Supplies section.
ATTENTION! The MX-PSU-350 type is hot-swappable, thus, you do
not have to turn off the matrix to replace a PSU. Former type of
PSUs do not support this feature.
The MX-PSU-350 PSU of the MX-FR33R frame can be replaced similarly
Step 1. Switch off the desired PSU (
1
) and unplug the power cord
form the AC socket
Step 2.
2
) from the PSU and pull out
the power cord.
Step 3.
3
), then pull out the PSU.
Step 4. Insert the new PSU, push it until it stops.
Step 5.
with PZ1 head.
MX-DVII-HDCP-IB
8 CH ANALOG & DIGITAL INPUT BOARD
IN 1 IN 2 IN 3 IN 4 IN 5 IN 6 IN 7 IN 8
MX-HDMI-OPT-IB-SC
IN 1
IN 2
IN 3
IN 4
IN 5
IN 6
IN 5
IN 6
8CH OPTICAL INPUT BOARD
LASER ACTIVE
HDCP
HDMI
SINGLE FIBER
L.A
HDCP
HDMI
SINGLE
LASER ACTIVE
HDCP
HDMI
SINGLE PRESENT
LASER ACTIVE
HDCP
HDMI
SIGNAL PRESENT
LASER ACTIVE
HDCP
HDMI
SINGLE PRESENT
MX-TPS-IB
12V 3A
DC IN
8 CH TPS INPUT BOARD
12V power on TPS connector. Only use with compatible devices!
TPS IN 1 TPS IN 2 TPS IN 3 TPS IN 4 TPS IN 5 TPS IN 6 TPS IN 7
Ethernet
8CH INPUT BOARD FOR HDMI WITH 3D AND ANALOG AUDIO
MX-HDMI-3D-IB-A
IN 1
IN 2
IN 3
IN 4
IN 5
MX-DVID-OB
8 CH DVI-D OUTPUT BOARD
OUT 1 OUT 2 OUT 3 OUT 4 OUT 5 OUT 6 OUT 7 OUT 8
MX-HDMI-OPT-OB-R-SC
OUT 1
OUT 2
8CH OPTICAL HDMI RECLOCKING INPUT BOARD
LASER ACTIVE
HDCP
HDMI
SINGLE FIBER
LASER ACTIVE
HDCP
HDMI
SINGLE PRESENT
MX-TPS-OB-S
12V 4A
DC IN
8 CH TPS OUTPUT BOARD WITH DIGITAL AUDIO
TPS OUT 1 TPS OUT 2 TPS OUT 3 TPS OUT 4 TPS OUT 5 TPS OUT 6 TPS OUT 7 TPS OUT 8
S/PDIF I/O 1 S/PDIF I/O 2 S/PDIF I/O 3 S/PDIF I/O 4 S/PDIF I/O 5 S/PDIF I/O 6 S/PDIF I/O 7 S/PDIF I/O 8
8CH OUTPUT BOARD FOR HDMI WITH 3D AND ANALOG AUDIO
MX-HDMI-3D-OB-A
2
3
3
1