V. 1.0 | LPKF Laser & Electronics AG
Cleaning/Replacing the working-depth limiter
Cleaning and replacing the working-depth limiter (DL) is shown in the system software
in the form of messages. Furthermore, you can measure the wear of the working-
depth limiter automatically. To do this, use the function Check depth limiter wear in the
menu Machining.
Before performing the steps, ensure that the following spare parts and auxiliaries are
available:
Spare parts and auxiliaries
Brush
Screwdriver Torx 6
1. Put down the tool that is in the collet into the tool magazine.
2. Move the processing head to the position y=0 mm; x=15 mm.
3. Open the cover.
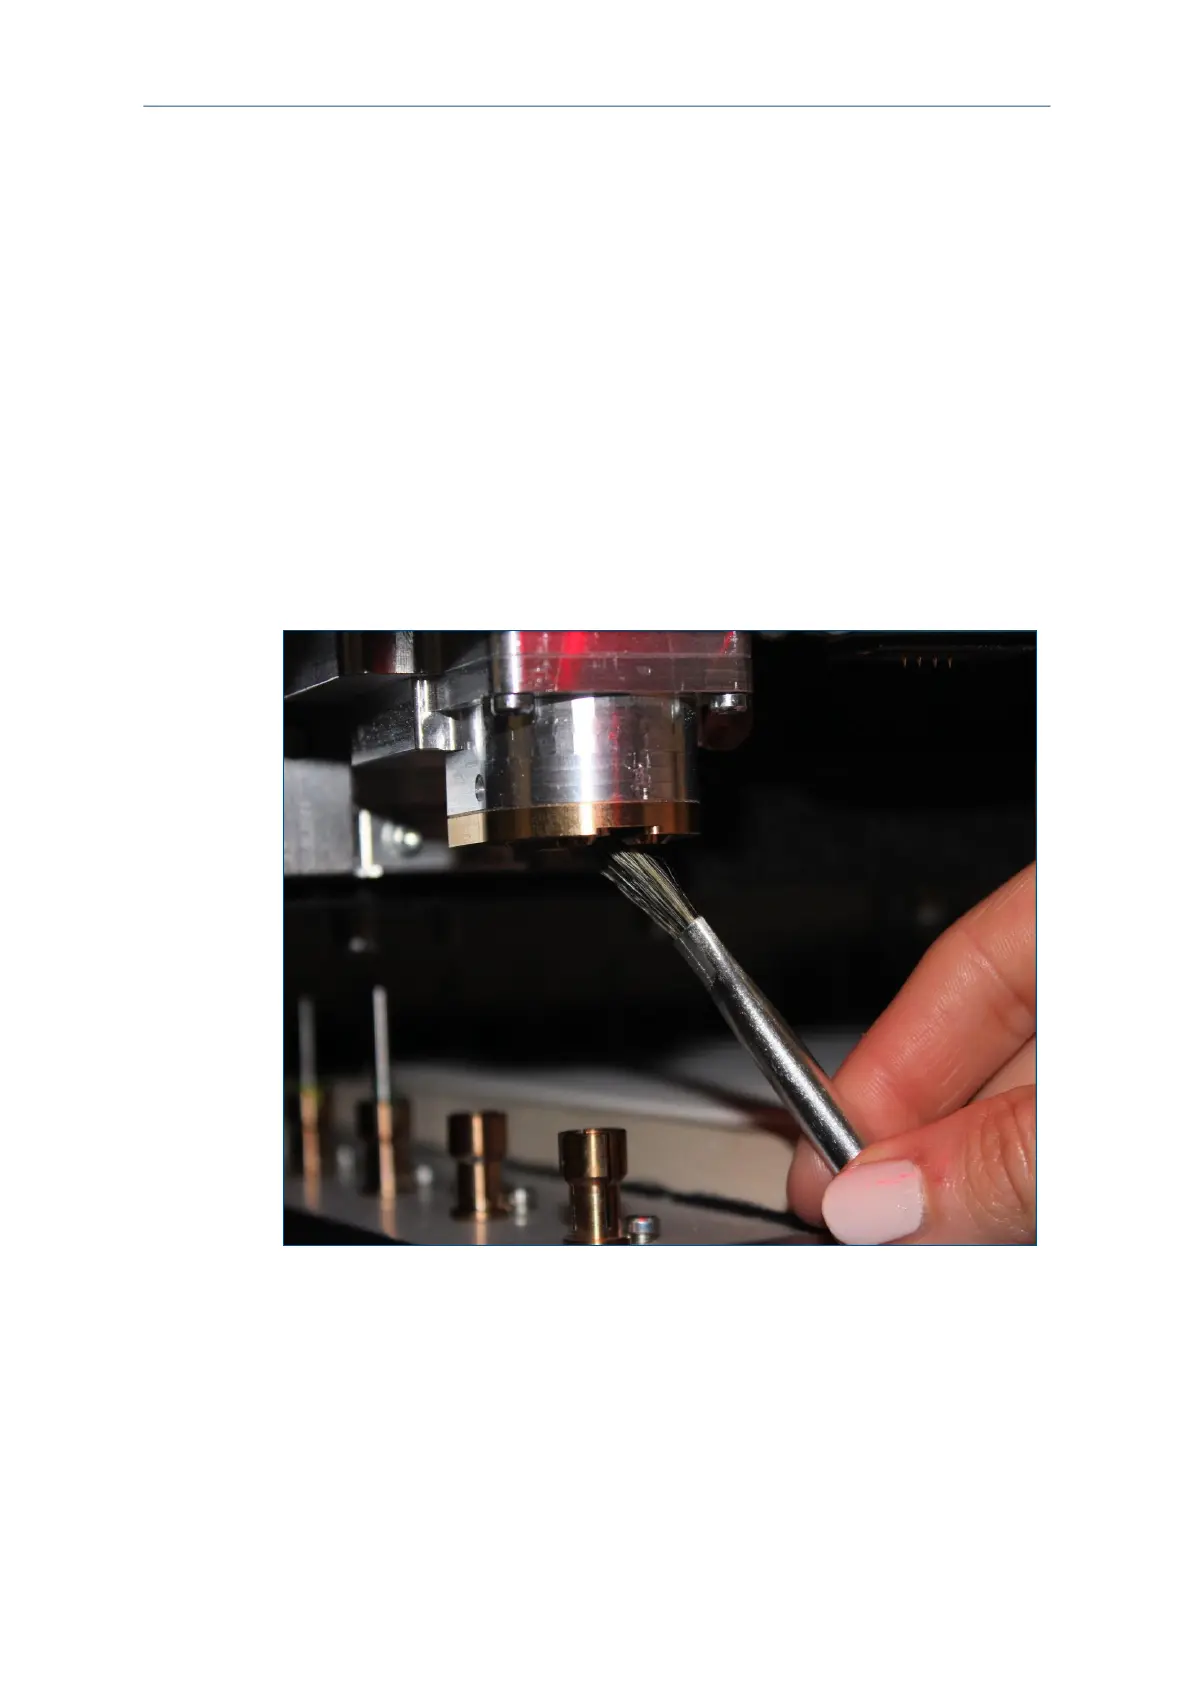
4. Clean the working-depth limiter with a brush or a lint-free cleaning cloth. Remove
all visible chips and dust deposits:
Fig. 133: Cleaning the working-depth limiter with brush
Cleaning is finished.
5. For replacing the working-depth limiter, remove the five screws with the wrench: