10 Appendix
This chapter contains navigation elements of the document.
10.1 List of figures
Fig. 1: Electrical fuse ............................................................................................. 20
Fig. 2: Limit switch for deactivating the axis movement when the cover is
opened ........................................................................................................ 21
Fig. 3: Type label S64/S104 .................................................................................. 28
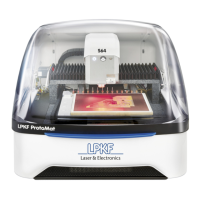
Fig. 4: Front view with closed acoustic hood ......................................................... 29
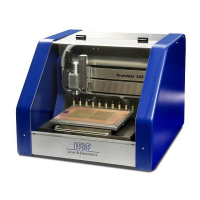
Fig. 5: Front view with opened acoustic hood ....................................................... 30
Fig. 6: Side view right side..................................................................................... 31
Fig. 7: Rear view .................................................................................................... 31
Fig. 8: Side view left side ....................................................................................... 31
Fig. 9: Processing head ......................................................................................... 32
Fig. 10: Dispenser ................................................................................................... 33
Fig. 11: Applying solder paste with the dispenser ................................................... 33
Fig. 12: Camera ....................................................................................................... 34
Fig. 13: Measurement unit for determining the copper layer thickness .................. 34
Fig. 14: Processing table ......................................................................................... 35
Fig. 15: Tool magazine ProtoMat S64 (rear view) ................................................... 36
Fig. 16: Tool magazine ProtoMat S104 (rear view) ................................................. 36
Fig. 17: Cleaning device .......................................................................................... 36
Fig. 18: Extraction system AX079-25 ...................................................................... 38
Fig. 19: Compressor ................................................................................................ 39
Fig. 20: Connections at the rear of the system........................................................ 41
Fig. 21: Displays and control elements ................................................................... 43
Fig. 22: System with lifting device ........................................................................... 50
Fig. 23: Polyester straps removed ........................................................................... 51
Fig. 24: Transport box opened ................................................................................ 52
Fig. 25: Removing the sheet of cardboard .............................................................. 52
Fig. 26: Removing the steel rods ............................................................................. 53
Fig. 27: Steel rods ................................................................................................... 53
Fig. 28: Padding material ......................................................................................... 54
Fig. 29: Removing the padding material on the left side ......................................... 55
Fig. 30: Removing the padding material on the right side ....................................... 55
Fig. 31: System accessible ...................................................................................... 56
Fig. 32: Transport sling pulled out ........................................................................... 56
Fig. 33: Steel rod with foam damper ....................................................................... 57
Fig. 34: System lifted by a group of four .................................................................. 57
Fig. 35: Transport lock ............................................................................................. 59
Fig. 36: Minimum required space ............................................................................ 64
Fig. 37: Workplace of the operating personnel........................................................ 65
Fig. 38: Center of gravity of the system ................................................................... 66
Fig. 39: Connecting the system ............................................................................... 68
Fig. 40: Extraction hose ........................................................................................... 69
Fig. 41: Nozzle for extraction hose .......................................................................... 69
Fig. 42: Mains cable ................................................................................................ 69
Fig. 43: Control cable .............................................................................................. 69
Fig. 44: Extraction hose connected to the system .................................................. 70
Fig. 45: Connecting the extraction hose .................................................................. 70
Fig. 46: Control cable .............................................................................................. 71
Fig. 47: Connecting the control cable ...................................................................... 71
Fig. 48: Connecting the mains cable ....................................................................... 71
Fig. 49: Pneumatic tube ........................................................................................... 72
Fig. 50: Connecting the pneumatic tube to the system ........................................... 72