4-25
REMOVE DRYER FRONT PANEL
Remove the dryer top (See page 4-23).
Disconnect the door switch
(See page 4-23).
Remove the lower service panel
(See page 4-21).
Remove the lint filter housing
(See page 4-21).
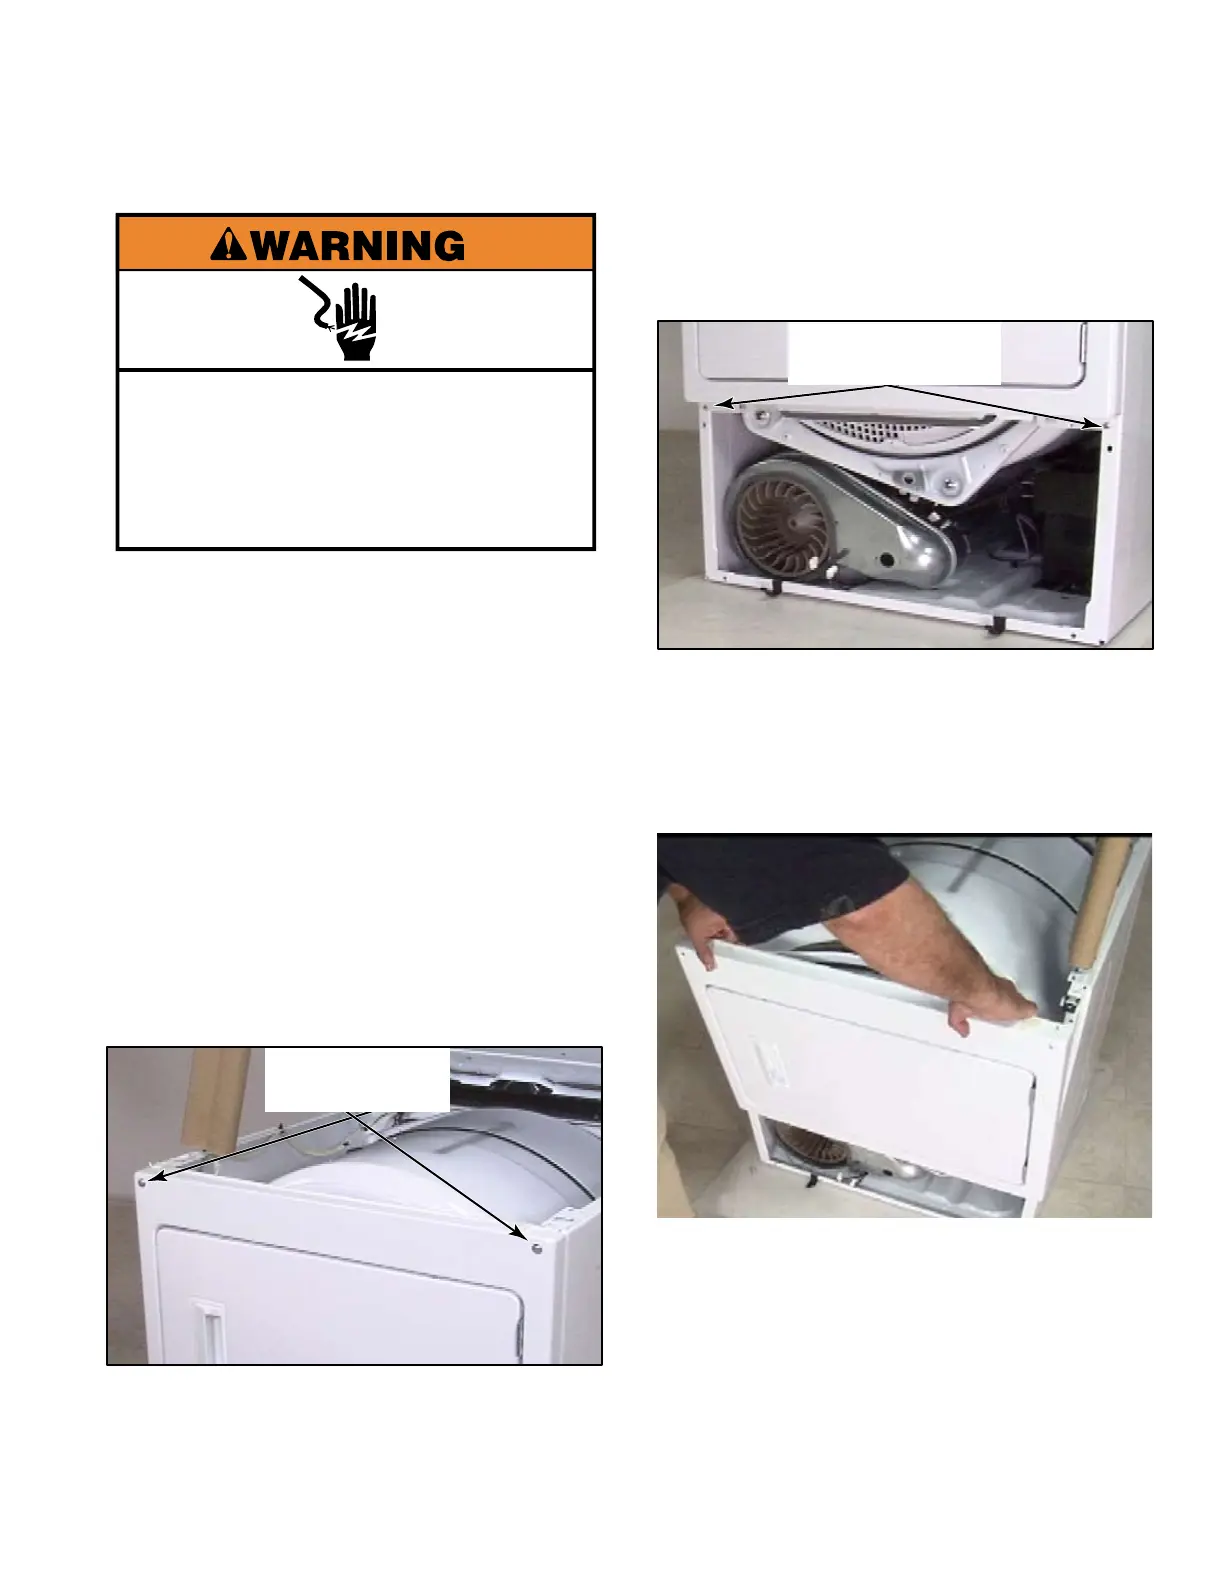
Remove the two T-20 security screws
from the top front corners. Make sure the
washers are on the screws when replacing
them to avoid damaging the finish of the
dryer.
1.
2.
3.
4.
5.
Remove two 1/4” hex head screws at the
bottom right and left ends of the front panel
that were hidden behind the lower service
panel.
Grasp the top and bottom edge of the front
panel. Pull the top of the panel away from
the dryer to release the upper supports.
Apply a little downward force to release the
support rollers from the channel of the drum
and remove the front panel.
The back side of the front has two support
rollers and the outlet grill still attached.
6.
7.
8.
Electrical Shock Hazard
Disconnect power before servicing.
Replace all parts and panels before
operating.
Failure to do so can result in death or
electrical shock.
Two T-20
Security Screws
Two 1/4” Hex
Head Screws