October 2008 "3072ES / 3772ES / 3772ES HD" Service & Parts Manual
Page 1-8
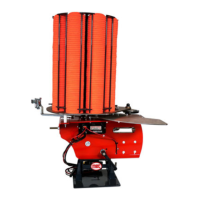
Rear Wheel Motors with Brakes (DT-710)
Disassembly
1. Make a “V” shaped set of alignment marks on the end-cover and housing to aid in the reas-
sembly process.
• Clamp the motor housing in a vise with the shaft facing down.
2. Remove the seven (7) bolts that hold the motor assembly together.
• Carefully remove the end-cover -
be aware that the piston and spring may fall out
.
• Carefully remove the piston from the end-cover and set it aside.
• Remove and discard the O-ring seal and backup seal.
• Remove the spring and set it aside.
3. Lift commutator container and commutator from the motor and set aside.
• Place commutator on a flat, clean surface with the seal facing up.
• Gently tap on the seal with a small screwdriver until the opposite side of the seal lifts from
the groove. Remove the seal and discard.
4. Remove the manifold, rotor set, and divider plate. Remove all seals and discard.
CAUTION: Do not allow rollers to drop from the rotor assembly when removing the
rotor from the motor.
• Remove the drive link from the motor and set aside.
5. Clean all parts in an oil-based solvent and dry using compressed air.
Assembly
1. Apply a light coating of fluid to all new seals prior to installation.
2. Place the housing on a clean, flat surface with the output end facing up.
• Install the dust seal with the lip on the seal facing up.
• Clamp the housing in a vise with the pilot on the housing facing down.
• Install the metal backup shim into the bore.
• Install the backup seal into the housing bore with the lip on the seal facing up.
• Install the shaft seal into the housing bore with the lip on the seal facing up.
• Refer to illustration for seal orientation.
3. Install the bearing shims (not shown in illustration) in housing.
• Install housing bearing.
• Install the shaft being careful not to cut seal lip with the shaft keyway.
4. Locate the thick disk stamping and set it aside.
• Install one (1) disk stamping into the housing. Make sure that lugs or splines engage those
in the housing.
• Install one (1) friction disk engaging splines on the disk with those on the shaft.
• Alternate disk stampings and friction disks until all disks except the thick disk stamping are
installed.
• Install the thick disk stamping on top of the disk assembly.