95
F
ITTING THE COMMUNICATION SERVER
CHAPTER 4 INSTALLATION
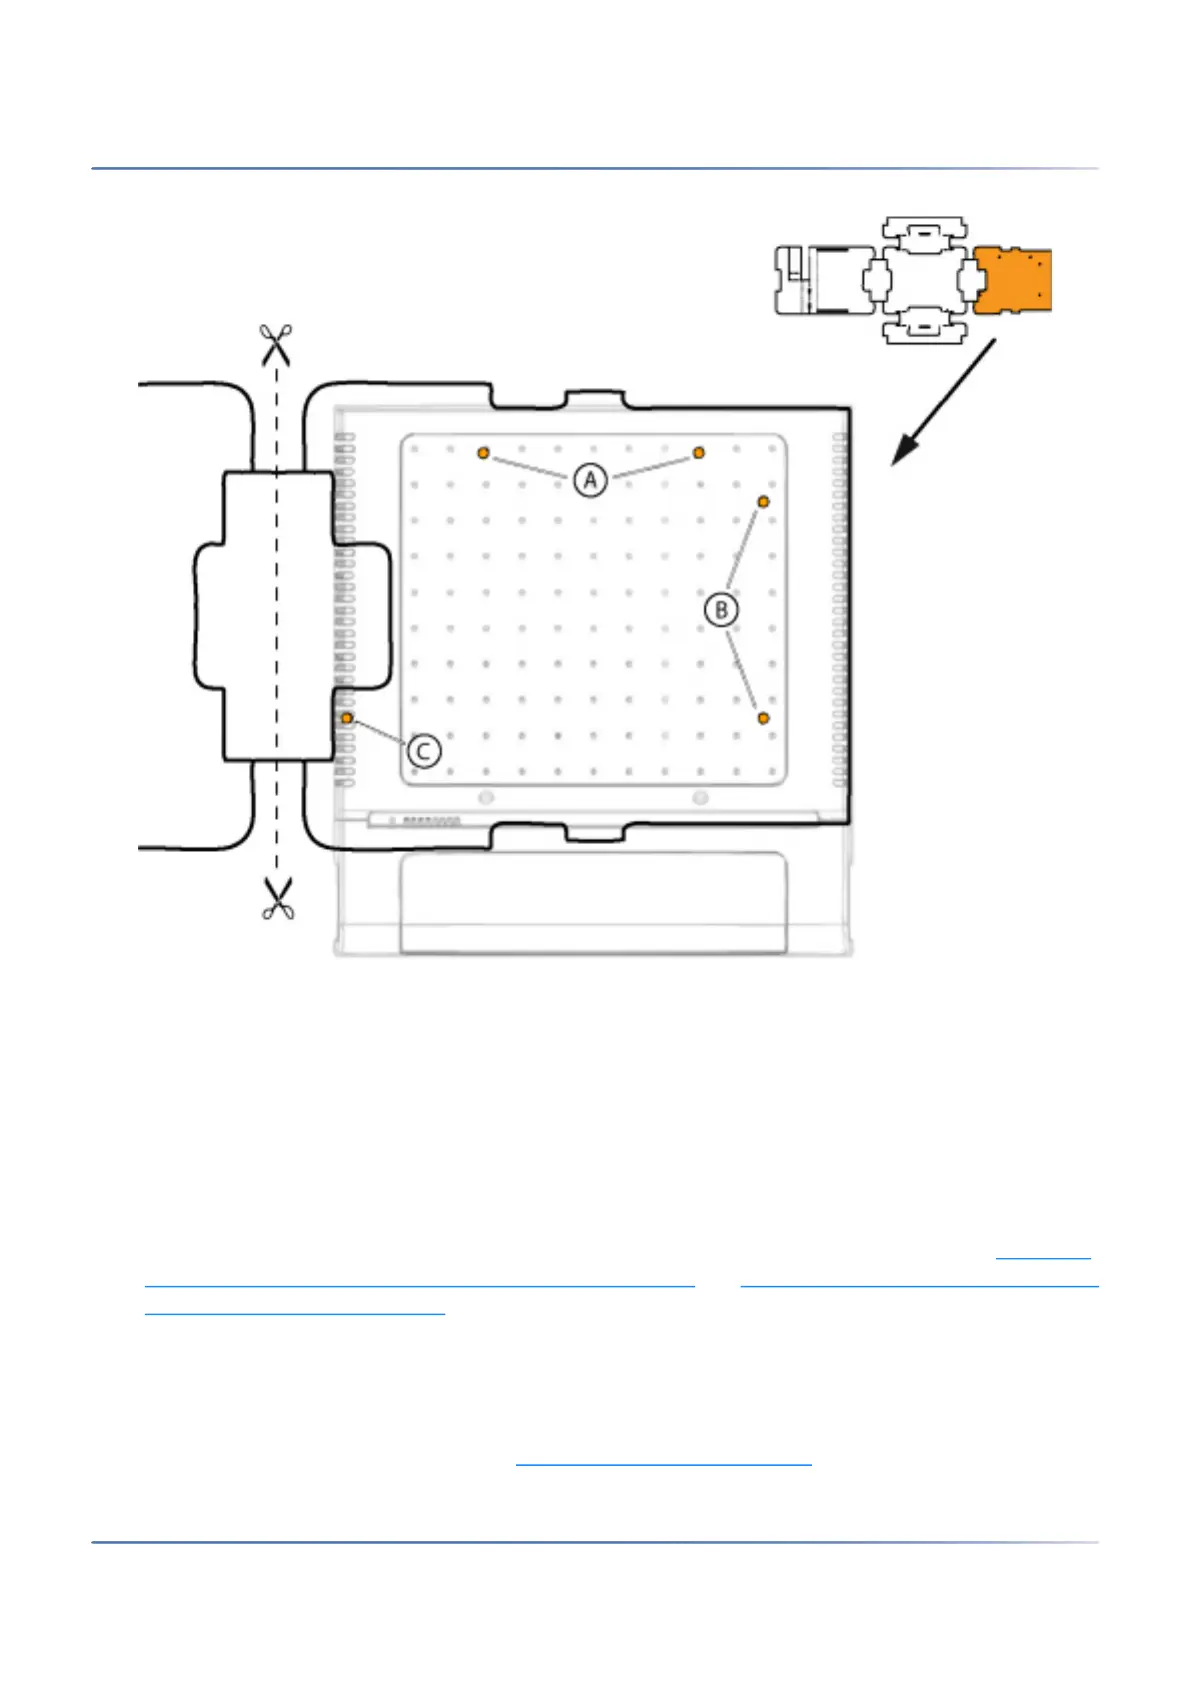
Figure 4.5: Drilling template
Wall-mounting procedure
Materials required:
• Screw set for wall/desktop installation
• 6 mm drill
• Screwdriver
To mount the communication server to the wall, proceed as follows:
1.
Using the drill template or the instructions on the drill plan to mark out the three drill holes. Make
sure you observe the minimum distances to other objects, walls or ceilings as shown in
Minimum
distances for wall mounting (front panel facing to the right) and Minimum distances for wall mounting
(front panel facing downwards).
2. Drill the three dowel holes.
3. Insert the dowel plugs.
4. Screw in the two shorter upper dowel screws (position A or B). Observe the distance between the
screw heads and the wall as shown in Drilling plan for wall mounting
.