NPort 6000 Series Initial IP Address Configuration
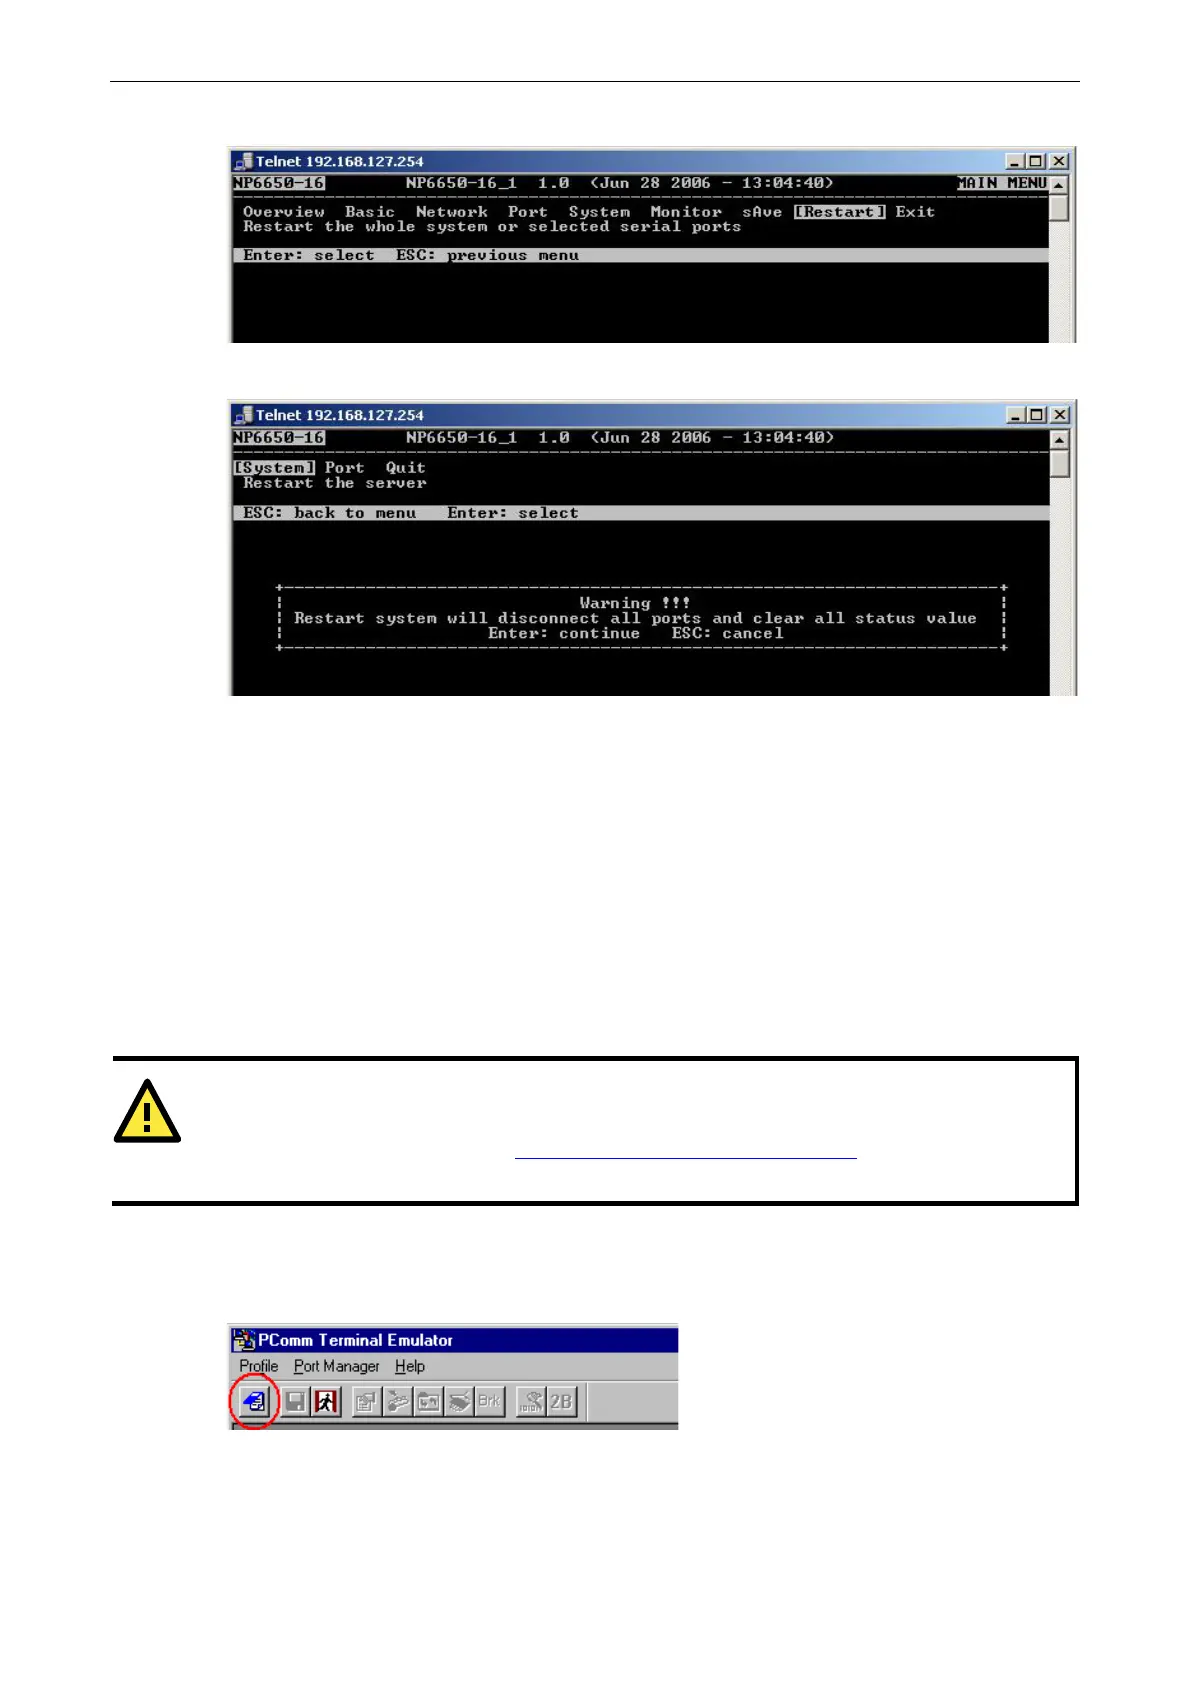
10. Press R or use the arrow keys to select Restart and then press ENTER.
11. Press S or use the arrow keys to select System; then press ENTER to restart the NPort 6000.
Serial Console
The NPort 6000 supports configuration through the serial console, which is the same as the Telnet console but
accessed through the RS-232 console port rather than through the network. Once you have entered the serial
console, the configuration options and instructions are the same as if you were using the Telnet console.
The following instructions and screenshots show how to enter the serial console using PComm Terminal
Emulator, which is available free of charge as part of the PComm Lite suite. You may use a different terminal
emulator utility, although your actual screens and procedures may vary slightly from the following instructions.
1. Turn off the power to the NPort 6000. Use a serial cable to connect the NPort 6000’s serial console port to
your computer’s male RS-232 serial port.
ATTENTION
The NPort 6610/ 6650 has a dedicated serial console port. For the PIN definition, see the RS
-
-2 under the following heading: NPort 6600: RS-232/422/485 (male RJ45)
. For all other NPort 6000
models, po
rt 1 serves as the serial console port.
2. From the Windows desktop, select Start All Programs PComm Lite Terminal Emulator.
3. The PComm Terminal Emulator window should appear. From the Port Manager menu, select Open, or
simply click the Open icon as shown below:
 Loading...