NPort 6000 Series Configuration with the Web Console
Module Settings
If your NPort 6000 series has expanded network modules, please refer to Chapter 6 for more information.
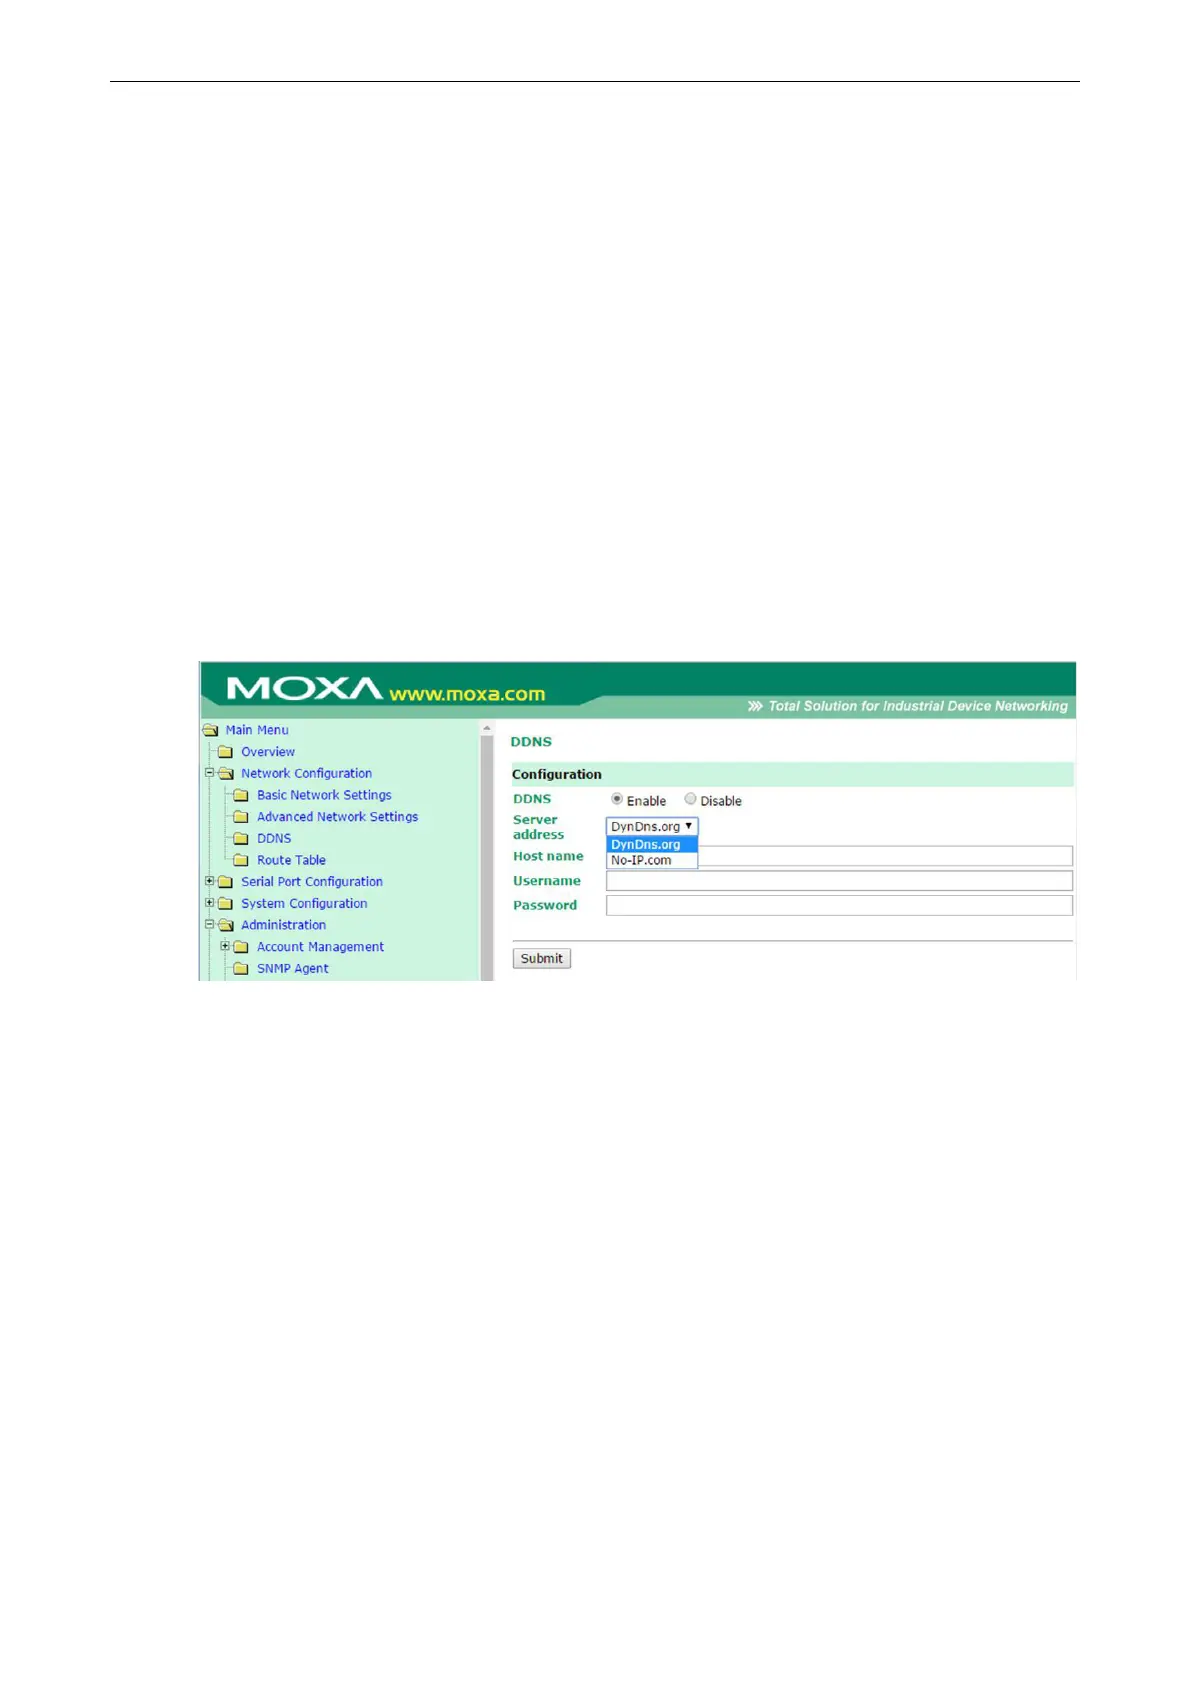
Setting up the DDNS
This section explains how to use the NPort 6000 with DDNS. When the NPort 6000 receives its IP address from
a DHCP (Dynamic Host Configuration Protocol) server, remote servers will be unable to access it using a fixed
IP address. With DDNS (Dynamic Domain Name Server), a remote server can access the NPort 6000 using its
domain name instead of its IP address.
Currently, the NPort 6000 supports DNS service as provided by DynDNS.org and No-IP.com. Taking NO-IP.com
as an example, you can easily register a host name for your own use for free. For detailed information, visit
http://www.noip.com/ or https://www.dyndns.com.
After you finish registering, you can fill in the host name, username, and password based on the service
provider you have chosen.
For example, if you have registered the host name “moxanport6000.noip.me” with NO-IP.com, you choose
“NO-IP.com” for the Server address, input “moxanport6000.noip.me” for host name, input your username and
password on “NP-IP.com”, and then click Submit. After doing so, when a remote server wants to access this
NPort 6000, it can simply use “moxanport6000.noip.me” instead of its IP address.
 Loading...