IN-CABIN MICROFILTER
MTC-121
C
D
E
F
G
H
I
K
L
M
A
B
MTC
Revision: January 2005 2004 Quest
IN-CABIN MICROFILTER PFP:27277
Removal and Installation EJS001T5
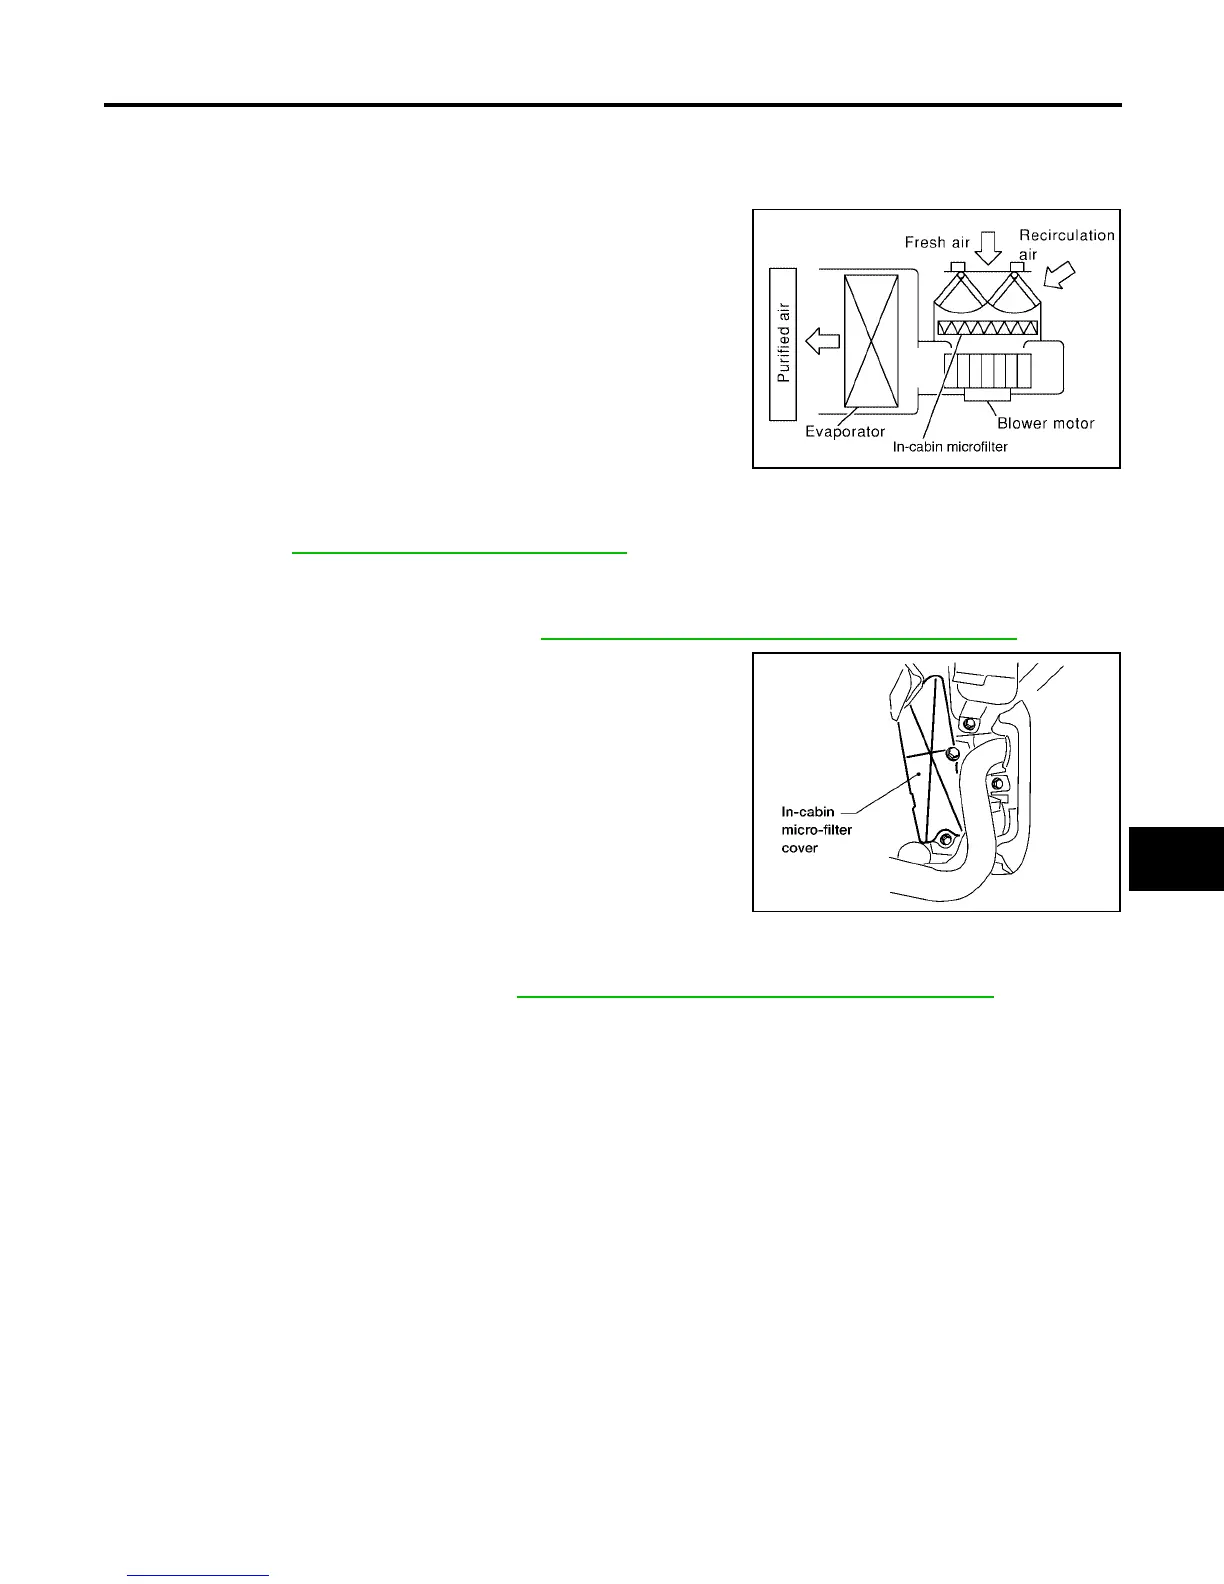
FUNCTION
The air inside the passenger compartment is filtered by the in-cabin
microfilters when the heater or A/C controls are set on either the
recirculation or fresh mode. The two in-cabin microfilters are located
in the front heater and cooling unit assembly. The rear heater and
cooling unit assembly only draws in air from the passenger compart-
ment to recirculate into the passenger compartment, so the rear
heater and cooling unit assembly is not equipped with in-cabin
microfilters.
REPLACEMENT TIMING
Replacement of the two in-cabin microfilters is recommended on a regular interval depending on the driving
conditions. Refer to MA-6, "
PERIODIC MAINTENANCE" . It may also be necessary to replace the two in-cabin
microfilters as part of a component replacement if the in-cabin microfilters are damaged.
REPLACEMENT PROCEDURES
1. Remove the glove box assembly. Refer to IP-13, "Instrument Lower Panel RH and Glove Box" .
2. Remove the three screws and remove the in-cabin microfilter
cover.
3. Remove the in-cabin microfilters from the front heater and cool-
ing unit assembly.
4. Install the in-cabin microfilters, replacing the two in-cabin micro-
filters with new filters, into the front heater and cooling unit
assembly.
CAUTION:
When installing the two new in-cabin microfilters make sure
that the filters are facing in the direction indicated by the
direction arrow for the air flow. The direction arrow is
printed on the side of the in-cabin microfilters.
5. Install the in-cabin microfilter cover.
6. Install the glove box assembly. Refer to IP-13, "
Instrument Lower Panel RH and Glove Box" .
LJIA0012E
LJIA0058E