172 LD-250 Platform User's Guide 20472-000 Rev B
8.10 Replacing Non-Periodic Parts
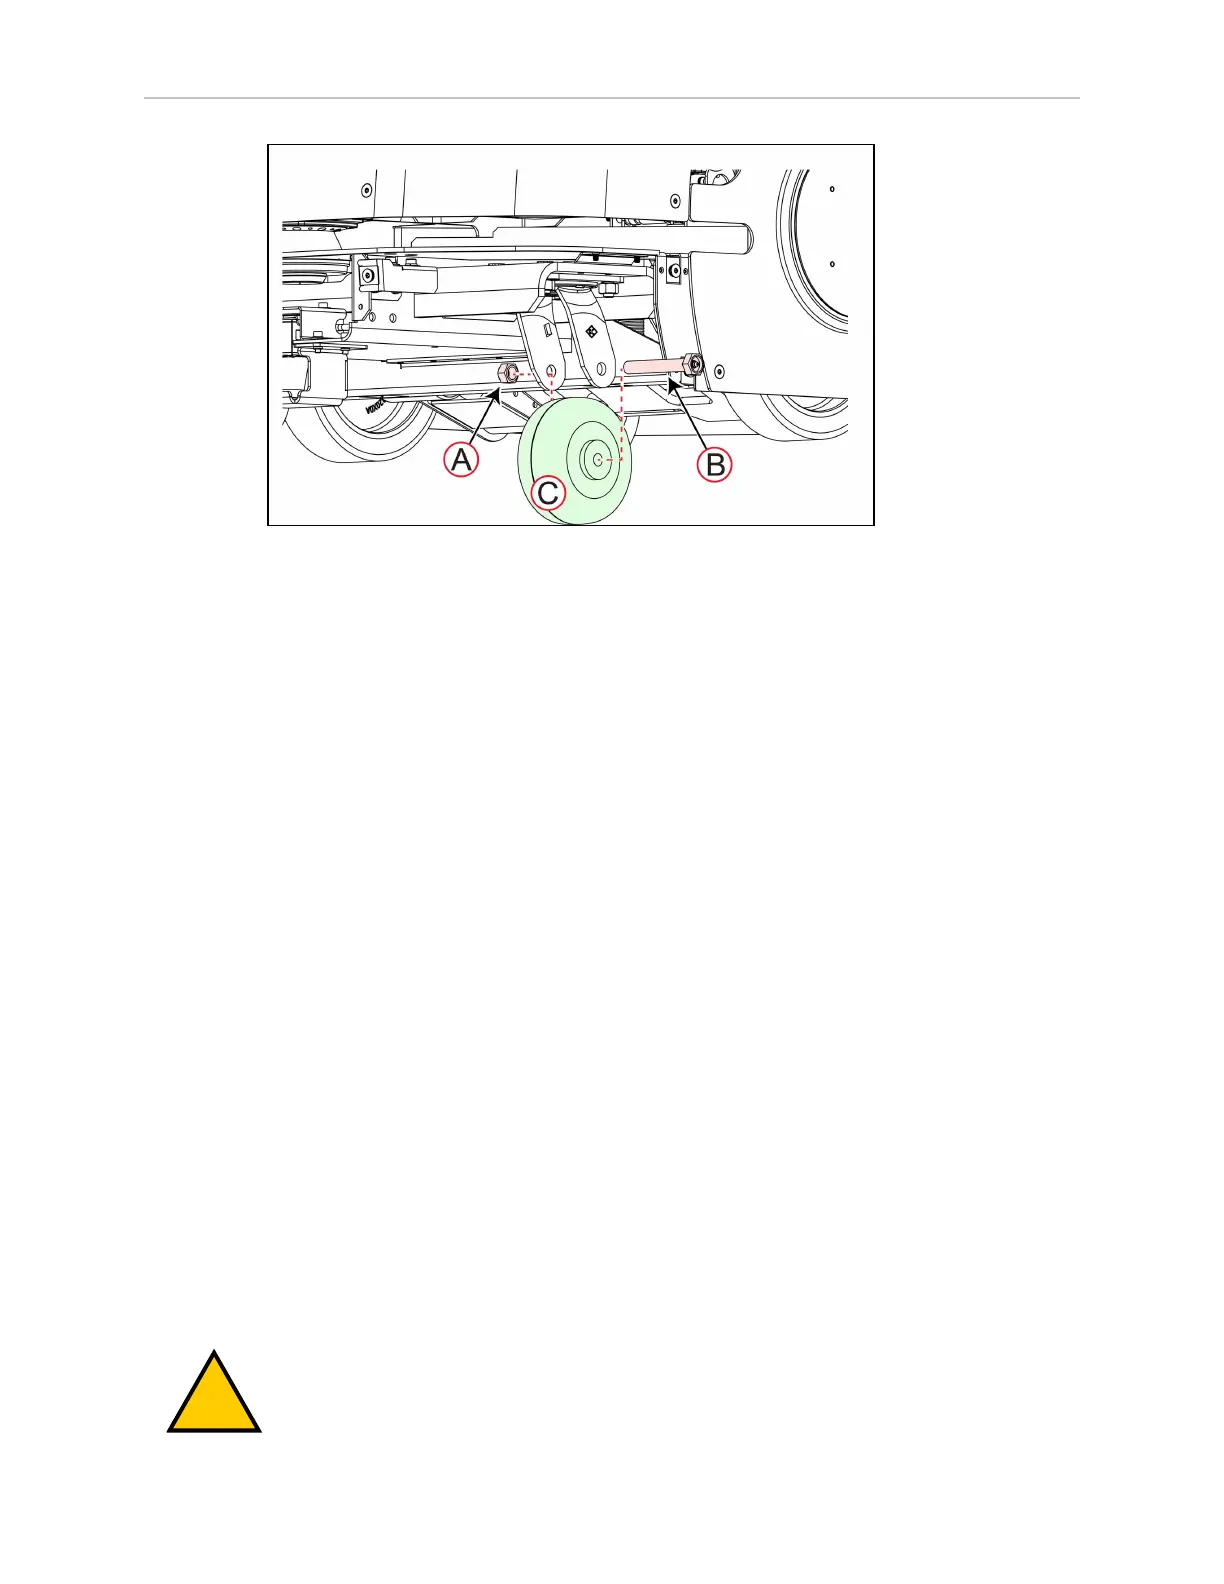
Figure 8-19 Replacing a Caster Wheel
To replace a caster wheel:
1.
Put the LD-250 into a safe working state by pressing an E-Stop button. Safely lift up the
LD-250 so that you can work underneath.
2.
Remove the lower front or rear skin. See: Remove and Replace the Lower Front Skin on page
182 and Remove and Replace the Rear Skins on page 184.
3.
Use two 19 mm wrenches or sockets (one on each side) to unfasten the retaining nut (A)
and axle (B).
4.
Slide out the axle (B) to remove the caster (C).
5.
Place a new caster in the yoke and replace the axle (B).
6.
Replace and tighten the retaining nut (A). Verify that the caster rotates freely.
7.
Replace the lower front or rear skin. See: Remove and Replace the Lower Front Skin on page
182 or Remove and Replace the Rear Skins on page 184.
8.
Safely lower the LD-250 back onto its wheels.
Replacing a Caster Assembly
If the bearing is worn or damaged you must replace the entire caster assembly, not just the
wheel.
All four casters assemblies are identical, and are mounted to the LD-250 in the same way.
NOTE: If you can lift the LD-250 enough to access the nuts and bolts that retain
the caster, you can avoid removing the payload structure and the battery. Remov-
ing the payload structure and battery is necessary only if you tilt the LD-250 onto
its side.
WARNING: MAGNETIC FIELD - MEDICALIMPLANTRISK
Magnetic fields can be hazardous to medical implant wearers. Medical