Chapter 8: Maintenance
Implant wearers stay back 30 cm (12 inches) from the underside of the LD-250,
which is exposed during certain maintenance procedures.
You require:
l
16 MM wrench for M10 locking hex nut.
l
Caster part no 20301-121.
To replace a caster:
1.
Put the LD-250 into a safe working state by pressing an E-Stop button. Safely lift up the
LD-250 so that you can work underneath.
2.
Remove the lower front or rear skin. See: Remove and Replace the Lower Front Skin on page
182 and Remove and Replace the Rear Skins on page 184.
3.
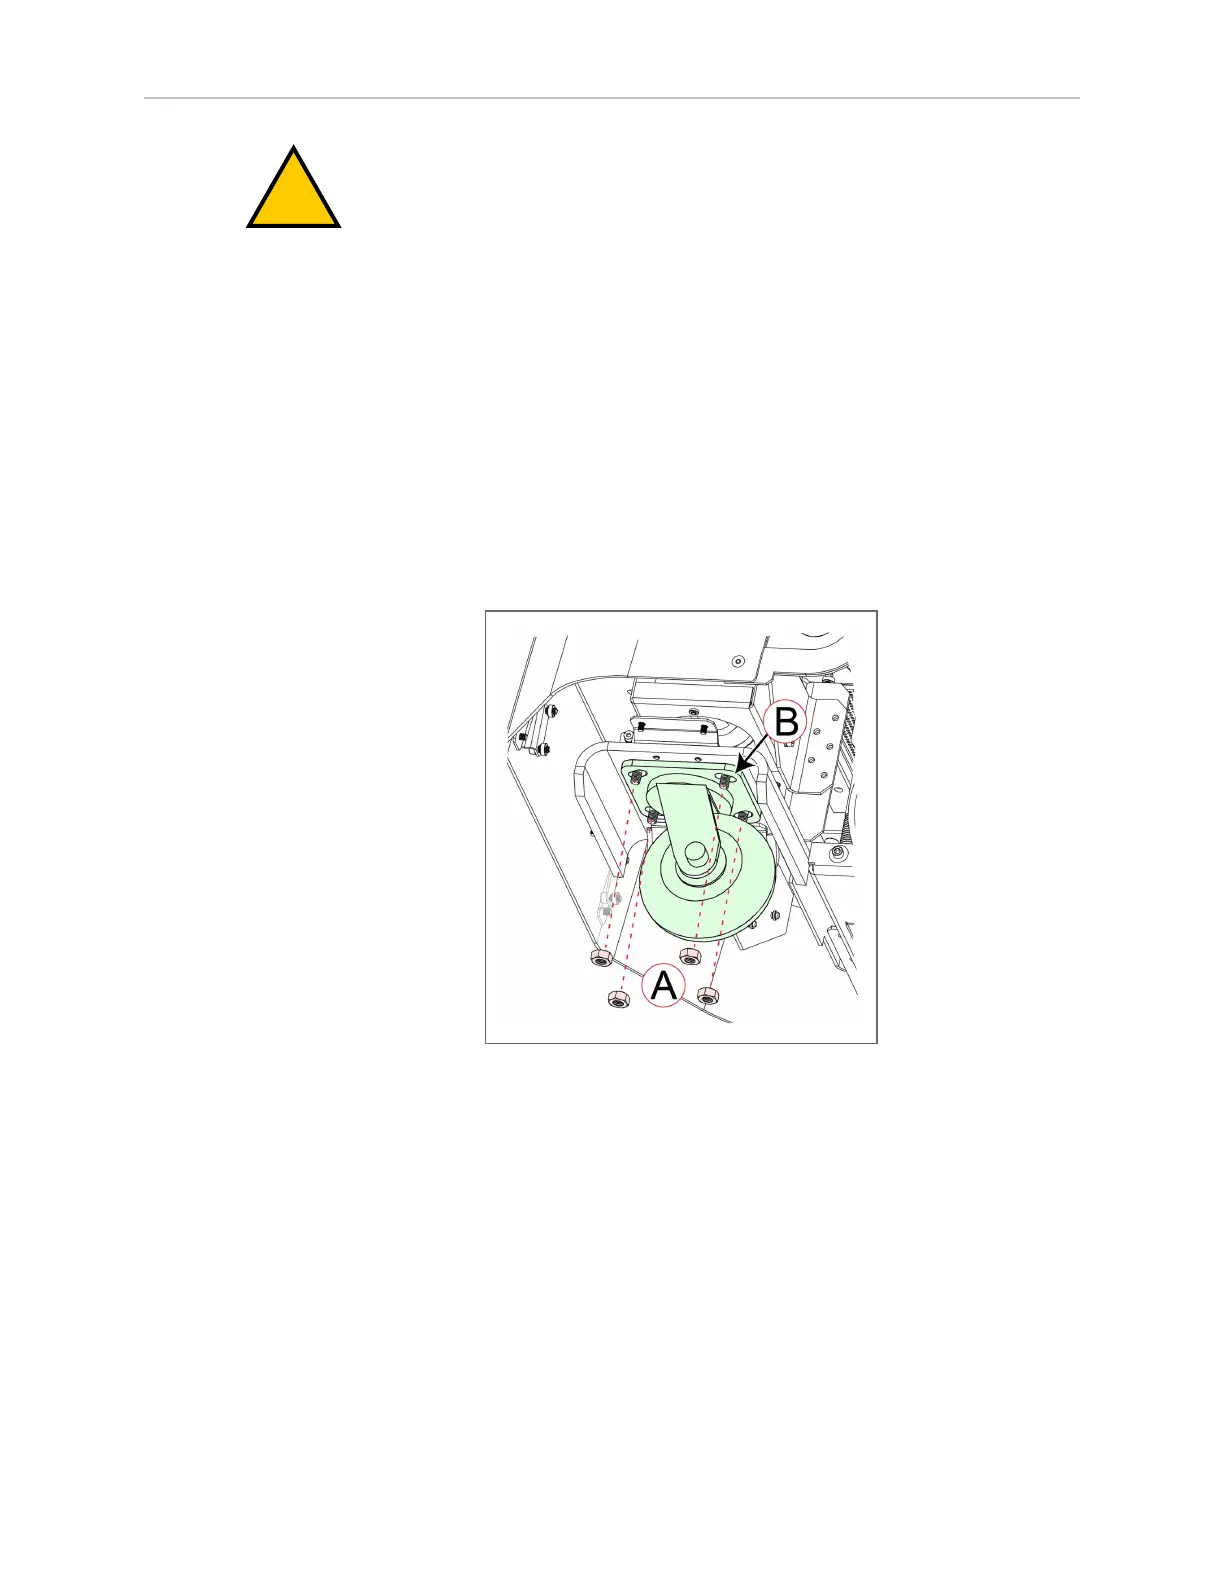
Remove the four M10 hex nuts (A) that fasten the caster to the chassis. (Retain the four
nuts to attach the replacement caster.)
Figure 8-20 Replacing an LD-250 Caster Assembly
4.
Remove the caster and replace it with a new caster.
5.
Fasten the caster loosely with four M10 locking hex nuts. Tighten all four nuts in a
crosswise pattern.
6.
Center the caster on its elongated holes (B) and make sure that it is square with the
chassis.
7.
Replace the lower front or rear skin. See: Remove and Replace the Lower Front Skin on page
182 or Remove and Replace the Rear Skins on page 184.
8.
Safely lower the LD-250 back onto its wheels.
20472-000 Rev B LD-250 Platform User's Guide 173