3.8
9926595 R01 - 2015-2016 RANGER EV Service Manual
© Copyright Polaris Industries Inc.
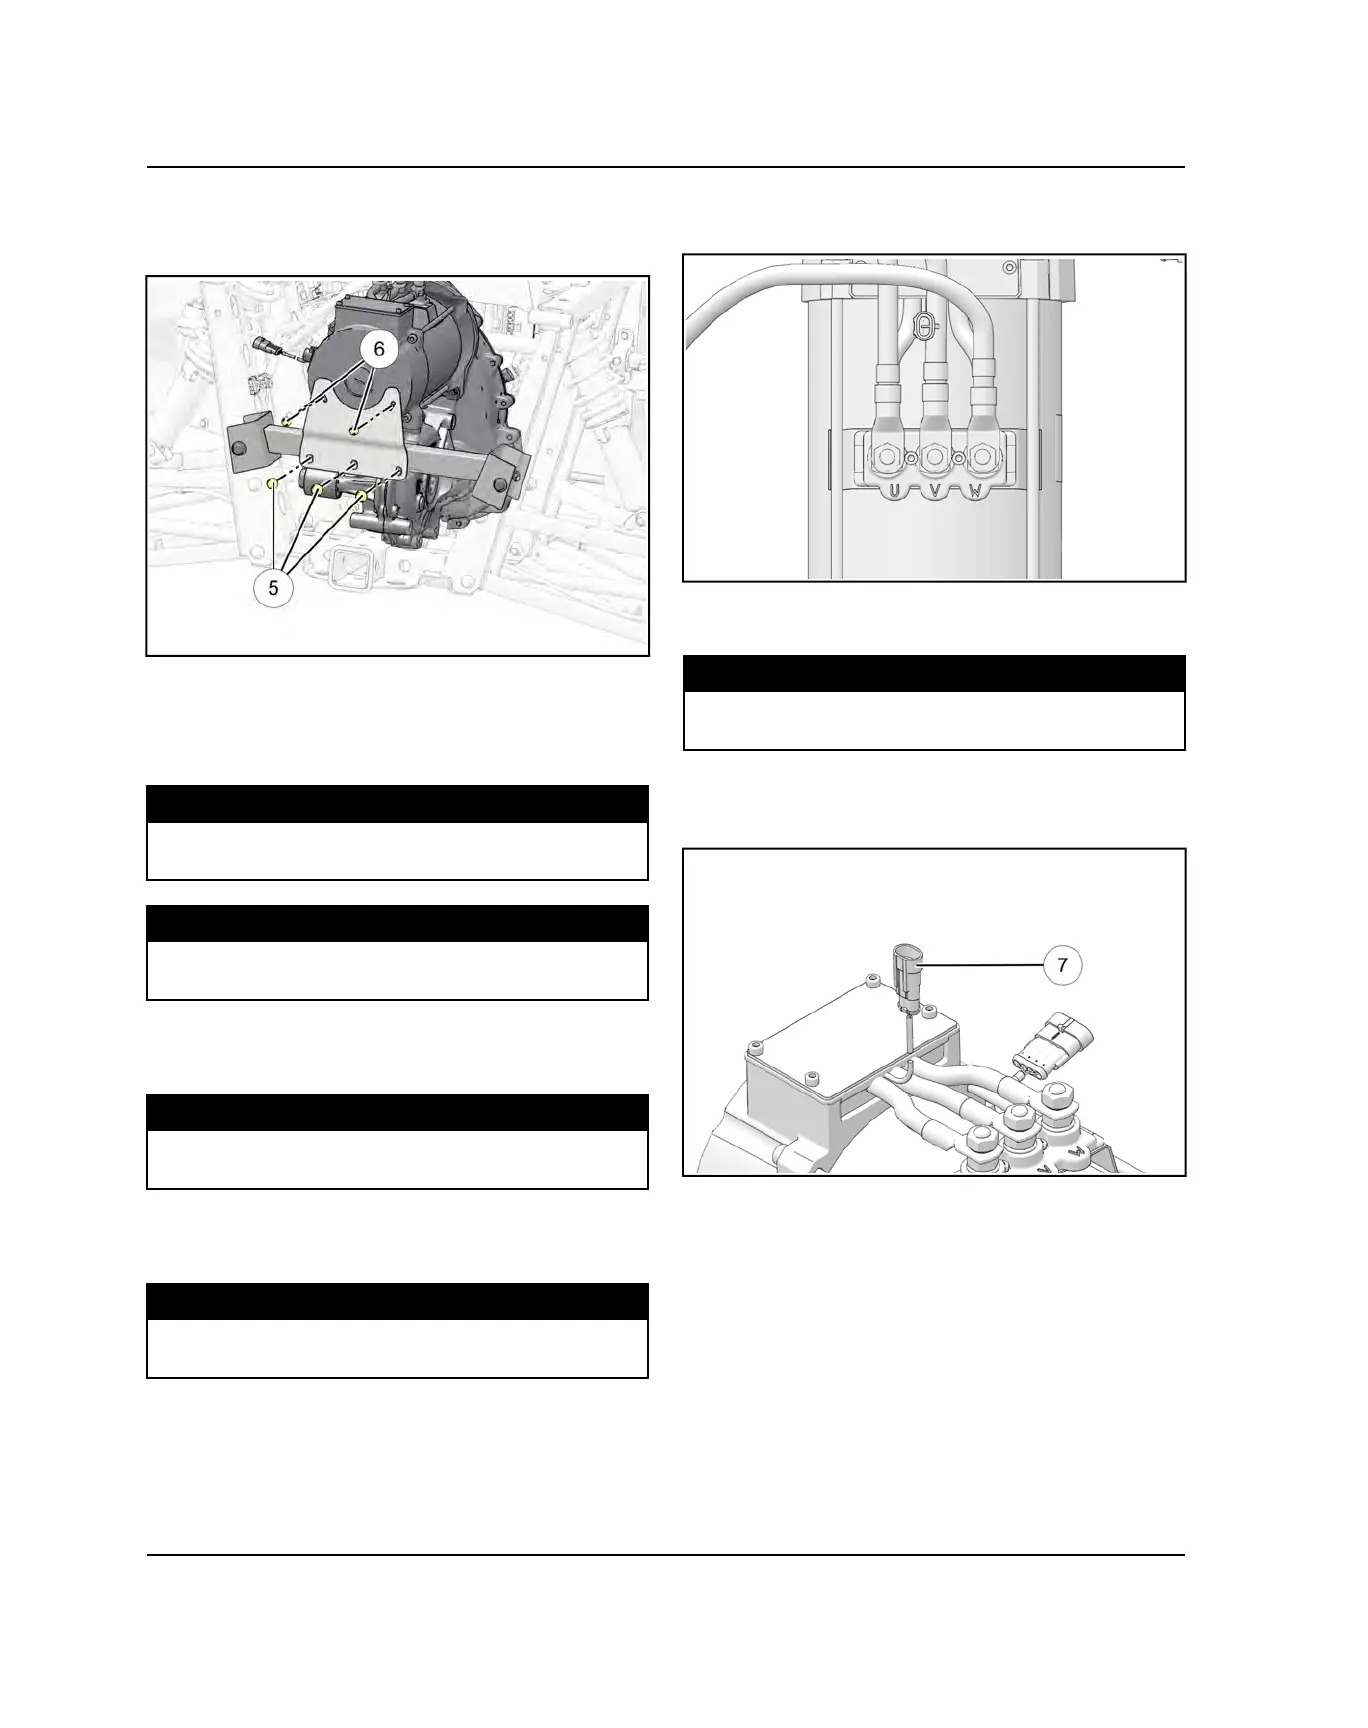
5. Loosely install rear support bracket with upper and
lower fasteners
t
and
y
. Do not tighten support
bracket bolts at this time.
6. Tighten motor mount bolts evenly by hand until motor
is drawn tight against transaxle.
7. Torque lower motor mount bolt to specification first,
then torque the upper motor mount bolts.
TORQUE
Motor Mount Bolt (M8):
17 ft-lb (23 Nm)
TORQUE
Motor Mount Bolts (M6):
8 ft-lb (11 Nm)
8. Tighten three upper (M6) rear support bracket
screws evenly by hand until all are hand tight, then
torque all three bolts to specification.
TORQUE
Rear Support Bracket - Upper Bolts:
8 ft-lb (11 Nm)
9. Tighten three lower (M8) rear support bracket bolts
evenly by hand until all are hand tight. Torque bolts
to specification.
TORQUE
Rear Support Bracket - Lower Bolts:
17 ft-lb (23 Nm)
10. Connect rear-most drive motor cable (marked “U”) to
terminal block and install washer and nut.
11. Connect cable marked “V” and install washer and
nut.
12. Connect cable marked “W” and install washer and
nut.
13. Hold cable centered in terminal cover and torque
each nut to specification.
TORQUE
Motor Cable Nuts:
11 ft-lb (15 Nm)
14. Connect sensor wire harness to drive motor
u
. Be
careful to align connector halves and avoid pin
damage.
15. Check all wiring and fasteners for proper assembly.
16. Re-connect main power connector.
17. Install storage trays, seat, and cargo box.
18. Test drive vehicle.
DRIVE MOTOR DISASSEMBLY
Also refer to Drive Motor Assembly View, page 3.5.
1. Mark casing and drive end housing for reference
during reassembly.
DRIVE MOTOR

 Loading...