Indicator Light System Status
Steady green light Cameras are ready; camera tracking is off
Steady red light Cameras are powering on
Blinking red light Factory restore on the cameras is starting
Blinking blue light Camera tracking is on
Adjust the Room View
You can adjust the room view on the EagleEye Director to get the best perspective for your video calls.
Procedure
1. Do one of the following:
• From the local interface, go to > Settings > Administration > Camera Tracking >
Calibration, and then select Begin Calibration.
• From the system web interface, go to Admin Settings > Audio/Video > Video Inputs, and
then select the Input used by the EagleEye Director.
2. Do one of the following:
• In the local interface, select Skip to move to the Adjust Room View screen.
• In the system web interface, select Adjust Room View.
3. Use the arrow buttons and zoom controls on the remote control or system web interface to show
the room view you want far site participants to see.
4. Select Finish to save the settings and return to the Camera Settings screen.
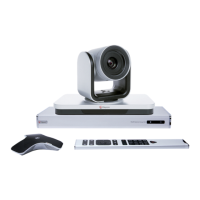
Calibrate the EagleEye Director Cameras
In Voice Tracking mode, you only need to calibrate the right camera. In Direct Cut mode, calibrate the
right camera and then left one. Ensure that only one person speaks while you are calibrating the cameras
and keep the background quiet. If you rearrange or move the EagleEye Director, recalibrate it.
Procedure
1. Do one of the following:
• In the local interface, go to > Settings > Administration > Camera Tracking >
Calibration.
• In the system web interface, go to Admin Settings > Audio/Video > Video Inputs and
select Calibrate Voice Tracking.
2. Follow the directions in the Auto Calibration screen that appears.
When you click Start, auto-calibration begins. When the automatic process ends, you have these
choices:
• Yes, I see a green box around my mouth. Selecting this choice means auto-calibration
was successful and you can move forward with adjusting the room view, if you like.
• No, I see a green box, but it is not around my mouth. Selecting this choice means you
can try auto-calibration again or manually calibrate the camera.
Configuring a Camera or Camera Control System
Polycom, Inc. 186

 Loading...