WARNING
CAUTION
DIP1
(bottom)
DIP2
(top)
Setting
right
(OFF)
right
(OFF)
3-phase, earth monitor-
ing on
le (ON) right
(OFF)
3-phase, earth monitor-
ing o
right
(OFF)
le (ON) single-phase, earth
monitoring on
le (ON) le (ON) single-phase, earth
monitoring o
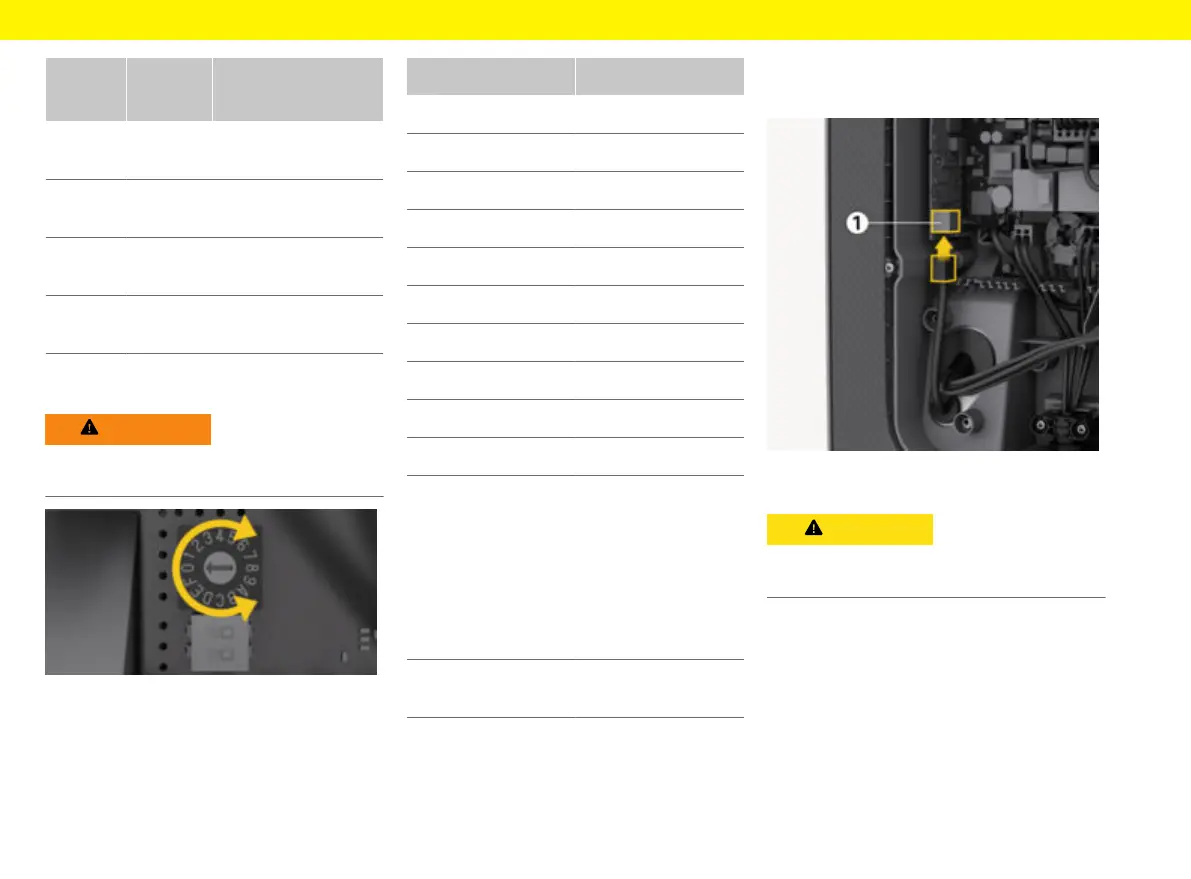
Setting the charging current
Set the charging current conguration with the Wall-
box in a voltage-free state only.
Fig.16: Rotary switch
e
Use a 0.02 in x 0.08 in screwdriver to adjust
the charging current of the Wallbox on the rotary
switch in accordance with the fuse of the build-
ing and with the rated power of the Wallbox.
g
(Fig.16)
Position Value
F 32 A
E 30 A
D 25 A
C 20 A
B 16 A
A 15 A
9 13 A
8 10 A
7 8 A
6 6 A
2 and 3 Reset Wallbox to fac-
tory settings
To be able to charge,
aerwards set the
switch to the recently
determined maximum
possible charging cur-
rent
All other positions Reserved for future ap-
plications
Connecting to the network
Connect Ethernet cable (optional)
1. Mount connector to the Ethernet cable.
2. Insert into the port from below.
Damage to the Wallbox
Leaks can be prevented if the plug is crimped inside
the Wallbox only.
Completing the assembly
Mount the cover
1. Fit and press down cover with integrated foam
seal.
2. Insert and tighten the 5x20 T25 screw at the
lower edge of the cover.
 Loading...